Showing posts with label Ancients. Show all posts

Monday, October 23, 2023

Battle of Kernstown, March 1862

 A group of us here in Newport News, Virginia, convened to fight out the first battle of Stonewall Jackson’s 1862 Valley Campaign. This battle was at Kernstown, Virginia, which occurred in March of 1862 and featured a light snowfall on the field. The rules used were my own homegrown set, entitled Minieballs and PigStickers. 


The historical battle was a meeting engagement between Brigadier General Shields’ Union Division and Major General Thomas Jackson’s Division. Shields, based in Winchester, attempted to draw Jackson north, where the Union forces could overwhelm the Confederates with numbers. Shields’ plan worked and the forces met at Kernstown on March 23rd, 1862. Jackson literally walked into a trap but, ever the firebrand, went on the offense immediately. Colonel Nathan Kimball’s brigade, supported by three batteries, was stationed on Pritchard’s Hill. Colonel Erastus Tyler was marching to Kimball’s right from the Union camp located to the north. Stonewall Jackson immediately ordered Colonel Samuel Fulkerson’s brigade to attack Pritchard’s Hill to allow the rest of the Confederates to maneuver to Sandy Ridge on the Union right flank. 

View from the Confederate side of the table

Brigadier Richard Garnett’s “Stonewall” brigade advanced up Sandy Ridge to a stone wall near the Glass farm. Tyler’s Union brigade arrived to attack this position soon afterwards. Wave after wave of blue-clad troops began to savagely charge the Confederate position. Meanwhile, Fulkerson’s small brigade was easily thrown back from Pritchard’s Hill. Sensing an opportunity, Kimball began to march his brigade to his right to catch Garnett’s brigade in a pincer. 

By this time, the exhausted Confederates were running out of ammunition. Garnett made the fateful decision to withdraw from the stone wall in the heat of battle. Jackson was furious, as this compromised the entire Confederate position. Jackson had no choice but to order a general retreat, but reserved his wrath for Garnett, arresting him to be court-martialed. 

It was Jackson’s first defeat, but he would be ultimately successful in a brilliant campaign over the next few months, tying down over twice his numbers and keeping these Union soldiers from being able to reinforce McClellan’s campaign to the east. As for Garnett, he was eventually exonerated, but the stain of his decision never fully subsided. He fell at Gettysburg leading his next field command. As for the Union, Colonel Kimball was promoted to Brigadier General and had the distinction of being the only Union commander to defeat both Stonewall Jackson and Robert E. Lee (earlier in West Virginia). Final historical casualties were approximately 600 Union and over 700 Confederates. 

In our fight, Fulkerson succeeded in pinning Kimball’s brigade on Pritchard’s Hill and the battle indeed centered on the stone wall on Sandy Ridge. This time, Garnett’s brigade stubbornly held on to the wall as elements of Burk’s brigade pierced the woods in between Kimball and Tyler’s commands. A notable event saw General Shields (who wasn’t on the field historically) leading a charge on the stone wall and catching a Minieball in his forehead for his trouble. Shields’ death caused some morale problems for the Federals at the wall. 

Vicious fighting at the stone wall

In our game, the fight ended as a draw (with a slight Confederate edge). We had a great time and the rules worked smoothly and efficiently. Final casualties in our game were 425 Union losses and 300 Confederates. 

Thanks to our group for participating. I can’t wait until the next ACW fight !

Sunday, May 14, 2023

Weekend Ancients with Mortem et Gloriam

This past weekend, Bradley and I got together to bash some Ancient armies at each other. He brought his Carthaginians and I fielded Gallic Foederate Romans. The system of choice was our favorite, Mortem et Gloriam. We played the Maximus scale of 10,000 point armies. I placed a Large wood in the center of the table, which irritated Bradley to no end. His Carthaginians outscouted me by 70%, so I was on the receiving end of that move. 


The game began with my Foederate infantry moving through the thick woods to engage the enemy. I also pushed my Skirmishers on my left flank up to slow down his advance. I had my Roman-trained Warriors on this flank, and I only intended to fight defensively here.


Bradley countered by pushing his Numidians fast up to my cavalry on his left flank. I immediately charged and began pushing my strong cavalry on this flank. After taking some missile hits, the Carthaginian cavalry and Numidians melted away here. 


The fighting in the woods was vicious, as both sides beat each other up.


The action on the Roman left saw mostly skirmish missile fire, as both sides took grievous casualties. The Romans stood motionless, waiting for the inevitable clash on this flank. Carthaginian cavalry began to move around the enemy, towards the line of Roman steel.  In a flash, both sides’ Archers and Javelin-men ran, leaving the way open to attack the motionless Roman-trained warriors. At this point, the Romans were feeling confident with an 8-2 lead in points. 

At this point though, the tide began to turn. In the woods, Carthaginian infantry charged the Foederate Germans in the flank, beginning to inflict massive casualties. On the Roman right, the victorious cavalry ran into reserve infantry armed with long spears. The results were devastating to the Roman cavalry. The score tightened and then was suddenly tied 8-8. 


On the Roman left, Balearic slingers and Numidian horsemen began to pelt the Roman-trained warriors, who were forced to adopt Testudo. 

Right before the three hour point, the rest of the Foederate infantry collapsed in the center and that was the game. In a stunning comeback, the Carthaginians won 12-10. Bradley played brilliantly and definitely deserved the win. What a game !


Tuesday, May 9, 2023

Picquet: What’s it All About ?

In the world of historical wargaming, the Picquet family of rules seems to be on the fringe of an already niche hobby. Picquet has its raving fans, as well as its detractors who positively hate it. I personally am not an experienced veteran of the system, but I have played in several games, at least enough to formulate an opinion. 


Picquet is a gaming system which is based on the underlying foundation of fog of war. Each side has its own sequence card deck that can be based on leadership or national military philosophy (for example. Imperial Romans and Germanic warriors have very different decks). Each unit and leader is meticulously rolled for in the areas of Firing, Combat, and Morale (in the Classic Picquet system - see below). The game then begins with a roll-off to determine how active one side is and for how long. I won’t go into nitty-gritty details, but turning cards to see what units can do and then actually executing these actions per unit burns up these actions. When the actions are completed, another roll-off determines the next set of actions. At the end of a total number of actions (20 in Classic PK), the turn ends and the card decks reshuffle and a new turn begins. 


Fans of the systems say that the games play like a story and that the fog of war provides true realism when it comes to control of the flow of battle. Detractors state that the cards dictate the game and too little control is left to the players. In addition, the biggest criticism is that one side can continue rolling for actions at the expense of the other side. In theory, the turns should balance out, giving each side equal opportunity to make their moves. In reality, these “swings” can happen. 


The Picquet family is further split into the afore-mentioned “Classic PK” (originated by Bob Jones) and what I’ll call “evolved PK” under the ownership of Brent Oman. “Classic PK” has master rules and separate period rules for more grit and flavor. The period rules like Hallowed Ground (ACW), Archon (Ancients/Medieval), and Les Grognards ( Napoleonic Wars) are just a few examples that cover almost every period in history. Field of Battle (covering the horse and musket period and a WW2 version), Pulse of Battle (covering the Ancients period), and Din of Battle (covering colonial actions) are rules based on the principles of “Classic PK,” but the criticisms of that system have been addressed. No longer does one side go on an extended streak of actions while his opponent sits there idly as his army is destroyed before his eyes. The initial rolls dictate the number of impulses for both sides in an alternating fashion. There is now more decisions to be made with each card that puts the wargamer in the driving seat. The cards provide a context; the original concepts of the cards providing a “storyline” and fog of war remain, but the gamer is now in control of how to use the cards. This “evolved PK” has been refined even further with release of Battle Command. My initial reaction to these rules is that it’s an even more refined and improved version of Field of Battle. I’m excited to play my first game this weekend. 


So, in summary, Picquet has a reputation among wargamers. Some love it, some hate it. But I really think there’s a brilliance lurking in the system that many rules do not contain. I think Classic PK is more suited to 1-2 players of like-mindedness; it is especially entertaining as a solitaire platform. I do think that the series of rules under the leadership of Brent Oman are improved versions of the classic system. I highly recommend the Field of Battle family of rules for solitaire or group games. I do think the many detractors of the “Classic PK” series would be mildly surprised at the improvements. Give them a try and join me in traveling down this path. 


Friday, May 5, 2023

Comparison: Mortem et Gloriam vs Warrior


Warrior vs Mortem et Gloriam


Today is a comparison/discussion of 2 Ancients rules. Both rules systems are highly regarded by their fan bases. Warrior is a rewritten version of the classic WRG 7th edition, while Mortem et Gloriam is relatively new on the scene. Both systems utilize a number of “elements” (stands) to build a unit; typically a Warrior unit is composed of 2-12 elements, while a “unit group” in Mortem et Gloriam is dictated by the army lists and typically ranges from 4-9.


1. Table appearance (do the unit sizes and organization look like a battle?) Both systems are similar in appearance and have similar unit sizes, so this will be a Draw.


2. Command and Control (Is C/C challenging and realistic?) I have to give Mortem et Gloriam the edge here. The color-coded chips (or cards) are critical to the game. It is innovative and adds a very challenging feel. Warrior does have a command and control system but it’s almost secondary with respect to mechanics in the game.  


3. Flow of the turn (Is it clunky or smoothly elegant?) Warrior is an IGO-UGO system that is split into Tactical Moves, Firing, Grand-Tactical moves, Charges, etc. Mortem et Gloriam is an alternating system that keeps both players engaged throughout the turn. Although both systems work, I have to give Mortem et Gloriam the edge here. 


4. Mechanics (Are the mechanics easy to pick up? Do the mechanics have enough detail? Do the mechanics slow the battle down?) Both systems have a lot of detail when it comes to mechanics. The mechanics on how to move, when to do morale checks, etc are clear and straight-forward. This has to be a Draw. 


5. Historic results (Do the results seem realistic? Are there wild swings of outcomes?) Mortem et Gloriam is more luck-based and abstract, while Warrior is very statistics-based. I have to give Warrior the edge here. 


6. Historic tactics (Do historic tactics work? Does the system reward the use of historic tactics?) Who knows, as none of us were around to witness the ancient world. We can only glean specific tactics from books and research. I will say that Warrior rewards a shooting army more than Mortem et Gloriam. The use of Skirmishers are also a bit more powerful in Warrior as well. Mortem et Gloriam is a bit more abstract when it comes to specific tactics as a unit is actually defined as a “unit group” in MeG. I think Warrior has a slight edge here. 


7. Morale (Does morale feel right on the unit or brigade/divisional level?) Routs can happen in a flash in Warrior, while it usually takes multiple turns to grind a unit down in Mortem et Gloriam. The number of routed units does affect a specific command in Warrior, whereas they don’t in Mortem et Gloriam. But on the other hand, there is a definite Breakpoint for the overall army in MeG. Both systems utilize morale checks on surrounding units due to witnessing routs. I think both systems excel in this area. A definite Draw. 


8. Playability (Do the rules provide for a fun game, or is it mired in too much detail, etc) Mortem et Gloriam has the edge here. It is a smoother game than Warrior. The statistics and data are on simpler charts and are ingrained in the colored die system. In Warrior, the charts are more complex and the math can be cumbersome. It takes much more time to master Warrior than MeG due to the mathematical calculations needed to play the game. 


9. Ease of setup (what does pre-scenario work look like? Is figure basing too specific? Do the rules require very specific basing?) Both rules use pre-planned army lists based on a points system. Warrior is a bit more fiddly when it comes to base sizes for loose order and close order troops. I think MeG is a bit more flexible in this area, so a slight nod to Mortem et Gloriam here. 


10. End of battle (Do the rules give results that can be useful if conducting a campaign? Are Victory objectives taken account? Is Victory defined by the rules?) Its a Draw in this area. Both systems use very specific scoring methods to determine Victory or Defeat outcomes. They are both primarily tournament games. Neither system has a detailed mechanic for permanent casualties for use in a campaign, but house rules can be easily applied in this area. 


So, in summary, it’s a close result. Mortem et Gloriam wins in 4 categories, while Warrior wins in 2 categories. The other 4 parameters result in Draws. I think if you want a smoother, yet still challenging game, you have to go with Mortem et Gloriam. If you are more old school when it comes to charts and modifiers, than Warrior is the more attractive system. It does take much more investment to master the Warrior system, but there are still enough subtleties in MeG to make it a challenging and realistic system as well.

Thursday, May 4, 2023

Ancients: Romans vs Carthaginians

 It’s been a while since I have updated the blog, but it’s time to get going again. Over the last year, our group has adopted the Mortem et Gloriam rules for most of our Ancients wargaming. The emphasis on command and control, the efficient color-coded tables and dice, and quick resolution make this rules set an ideal choice for club nights or tournaments. 

This past Tuesday evening, our resident painter Bradley brought his beautiful Carthaginian army and pitted it against Dave’s Republican Romans. What a great matchup ! The Romans ultimately prevailed, but the Carthaginians gave them a run for their money. 

We are looking forward to regular matches using Mortem et Gloriam in the future. Stay tuned !


Sunday, March 11, 2018

Barbarians versus Romans, 451 A.D.

Continued study of the Late Roman Empire inspired me to begin my Catalaunian Fields project. As a small preliminary battle in this campaign, I put together a small army of Romans and a slightly larger barbarian army consisting of Huns and Goths, I attempted a stream crossing in the face of an ambush.  I also wanted to test out the capability of the Hun light cavalry against a purely Roman force. The rules of choice were Hail Caesar.

Strategic Background:  As Roman control of the outlying provinces of the empire began to fracture, these areas were ripe for Attilla the Hun to invade. After years of campaigning against the Eastern empire, the Hunnic leader had practically ignored the lands of the Western empire. The reasons for the invasion of Gaul ( modern-day France) were varied. One possible reason is that Attilla misinterpreted a wedding invitation from Justa Grata Honoria, the sister of Roman emperor Valentinian III, and invaded to claim his share of the Roman empire as a wedding gift. The reality of this was that Honoria was betrothed to someone she despised and meant to ask the Hunnic leader for help.....that went horribly wrong, didn't it? Another more plausible reason for Attilla's invasion was to split the Gothic tribes and the Franks and to take advantage of the disunity to gather more lands into the Hunnic empire. Either way, Attilla and his Huns, along with various other tribal allies, began to devastate villages and towns throughout eastern Gaul.

Enter Aetius, who Valentinian tasked to lead a force and defeat the barbarians once and for all. The climactic battle that ensued was in the area of Chalons and named the Battle of the Catalaunian Fields. Later in the year, I plan to simulate this large action, so more details on this particular battle later.

For this scenario, I planned a smaller action that featured a barbarian attack on a Roman force that was crossing a stream in order to join the main army under Aetius.


Late Imperial Roman infantry


The Hunnic hordes


The Scenario:  Leading a force of two infantry forces (as per the rules) and one cavalry force, the Roman commander is attempting to cross a stream in the face of a sudden attack by a combined army of Goths and Huns. The scenario begins with the Roman cavalry already across the stream, with the barbarians advancing from the heights above the plain of battle. The barbarians are assumed to have the initiative, so therefore they will roll for movement first throughout the game. The scenario is scheduled for 10 turns, as the start time of the battle is late afternoon. The positions of the armies are detailed below. 

Initial deployment of the combatants

Orders of Battle:

Roman

Roman General:    Rating 9  (obviously an up and coming leader)

1st Division -  Commander, Rating 8
2  Comitanses Medium Infantry   (Pilum, Drilled)
2 Limitanses   Medium Infantry   (Pilum, Levy)
1 Skirmishers  (bow)

2nd Division - Commander, Rating 8
2 Comitanses Medium Infantry  (Pilum, Drilled)
1 Limitanses  Medium Infantry  (Pilum, Levy)
1 Skirmishers  (bow)
1  Light Artillery  Battery (Scorpion)  (Drilled)

3rd Division - Commander, Rating 8
2 Heavy Cavalry
2  Sagitarii (Horse Archers)

Barbarian

Hun Warlord:   Rating 8

1st Division - Commander, Rating 8
3 Goth Heavy Cavalry

2nd Division - Commander, Rating 8
3 Goth Warbands
1 Goth Skirmishers (javelins)

3rd Division - Commander, Rating 8
4  Hun Light Cavalry (bows, Feigned Flight, Parthian Shot, Marauders)

4th Division - Commander, Rating 8
4 Hun Light Cavalry (bows, Feigned Flight, Parthian Shot, Marauders)

** All units were standard-sized, with the exception of Sagitarii, Hun Light Cavalry, and Skirmisher units.

The Battle: With the Roman infantry behind the stream, and only the cavalry deployed on the plains beyond, the barbarian force attempted to move aggressively forward to catch the Romans in the rough terrain. 


Roman infantry behind the stream faces approaching barbarian warbands


Roman cavalry across the stream sights hordes of Hun cavalry


The Roman right flank


As the Goth cavalry and infantry advance aggressively towards the Roman infantry, the Romans attempt to get across the stream as fast as possible.  The Huns moved forward, but not as aggressively as their Goth allies. Seeing that the right flank was in very real danger of collapsing to the Hunnic hordes, the Roman cavalry rushed forward to engage the enemy.  Instead of sitting back and assuming a defensive position, the Roman commander quickly assumed the attack. 


Roman infantry rush across the stream to engage the warbands


Roman cavalry also attempt to take the initiative against the Huns


Although the Romans decided that the best defense was a good offense, the barbarians had the same idea. The Goth cavalry on the Roman left flank moved rapidly to engage the infantry.  A barbarian heavy cavalry unit launched a charge on this flank against one of the leading Comitanses units. Although the first round was a slight barbarian victory, the two sides were locked in combat during the following turn.  The next turn would go badly for the Roman infantry, which broke in the face of the Goth cavalry.  

On the right flank, a Roman sagitarii unit also charged an open order Hun unit and quickly broke in the ensuing combat. After a couple of turns, the Romans lost 2 units as the barbarians continued to advance.  Add to this the fact that the Hun cavalry had already encircled the Roman right flank with at least one unit. In the center, the two opposing sides of infantry were still approaching each other; swords and shields were not yet crossed. 


Goth cavalry charges into Roman infantry; the Romans would break shortly thereafter


After a Roman horse archer unit breaks, the Hun cavalry begins to envelope the Roman right flank


A wide view of the Roman right


The opposing infantry in the center continue to ominously approach each other


After the successful charge of the Goth cavalry, the barbarian horsemen actually retired slightly to stay out of Roman missile fire range.  The strategy here was to bait the Roman infantry to move out of the disrupted terrain across the stream to enable further charges by the cavalry. 

On the Roman right flank, the Roman heavy cavalry were successful in forcing back the lighter Hun cavalry, with the unintended result of opening up more room on the flank for the Huns to envelope.  The action quickly turned into complete chaos as the Huns saw their advantage and began to overlap the Roman units.  The Hun missile fire was taking its toll, as well as the ability to evade the Roman cavalry charges. This is one of the interesting matchups that I wanted to test out:  lighter Hun cavalry versus heavy Roman cavalry. 


Chaos on the Roman right


More Hun versus Roman cavalry action


The center finally saw the Goth warbands charge against the Roman wall of infantry.  In the initial clash, the Romans formed close order to minimize the shock effect of the Goth charges.  The Goths did prevail though, but the Romans held their ground, albeit disordered with heavy casualties. 


Goths charge Roman infantry in the center


We were half-way through the scenario, and it looked like the barbarians were winning. The Goth cavalry had the Romans pinned on the left flank. The center saw the Goth warbands slowly pushing the Roman infantry back (although it was very slow going in this sector). On the right, the Hun cavalry was surrounding isolated Roman cavalry units and even threatening the Roman infantry in the center.  

But owing to Roman discipline (and not just a little stubbornness on the part of the Roman commander), the Romans bent but did not break.  The Romans slowly advanced on their left flank, wisely using supports in case of a cavalry charge, attempting to inflict casualties on the Goth horsemen via missile fire. The center turned into a bloodbath, with heavy casualties on both sides. The Roman infantry was pushed back a bit, but never broke.  Although the right flank was up in the air, the Roman heavy cavalry finally managed to charge the formed Hun cavalry in front of it, breaking a couple of units, and forcing one of the Hun commands to retreat from the field. The other Hun cavalry division had effectively broken through on the Roman flank and rear.  One Hun unit forced a Roman infantry unit in the center (after managing to break one Goth warband) to form Testudo, a formation virtually invincible against the Hun arrows.

As the Roman infantry on the left flank cautiously advanced against the Goth cavalry, the Goths (not wanting to stick around to absorb javelin casualties) charged.  Incredibly, the lowly Roman limitanses unit in its path formed close order and repelled the Goths ! The other lead Goth cavalry unit decided to get into the action as well and charged in on another Roman unit, forcing it to retire, but advancing to stay locked in combat. 


The Goths launch a charge but were repulsed by close order Roman infantry


The Romans bend but refuse to be broken


One Goth warband has had enough and runs for the hills


The Romans, although enveloped, stay in the fight on the right flank


With but a turn left before nightfall, the Roman left stabilized as the Goth cavalry stepped back disordered, unable to break the disciplined Roman infantry.  In the center, the combat continued, with neither side gaining an advantage.  On the right flank, the Roman cavalry, after eliminating the formed Hun cavalry in front of them, about faced and threw back a charge by more Hun cavalry, totally defeating the barbarian horse archers. 


The high point of the Goth cavalry charge. It would be thrown back.


Hun horse archers attack a Roman unit in testudo formation with no effect


A wide view of the Roman left and center


Bloody combat in the center


As the game ended, it was obvious that the barbarian force was not going to force the Romans off of the field. In fact, there were more barbarian units that were shaken than Romans.  Both sides took heavy casualties, but the barbarians withdrew to the hills and left the Romans to lick their wounds and set up a fortified camp in the plain. It was a tremendous game with two very well-matched forces. Hail Caesar, as a rules set, did a great job of simulating the scenario. The results were very believable and there were no dice rolls that seemed implausible.   I actually played the scenario with the Picquet rules system first, before trying Hail Caesar out for the blog post. Both rules demonstrated a minor Roman victory. 

One of the main situations that I wanted to test Hail Caesar with was the capability of Hunnic light cavalry against Roman cavalry.  The Huns had more units that primarily operated in open order, but the Roman heavy cavalry was unbeatable in direct combat.  The ability of the Huns to maneuver freely around the flanks and rear of the Romans caused many casualties and consternation.  The result was what I expected and the rules simulated this well. 

Another ancients game in the books.  On to Napoleonics and, later in the year, the battle of the Catalaunian Field. 


Monday, January 23, 2017

A Review and Summary of Impetus

I am admittedly a novice when it comes to Ancient and Medieval wargaming. An obsessive Napoleonic gamer for many years, I have only recently (about a year) crept into this black hole of the gaming world. Starting off with the Hail Caesar rules and being happy with them as an introductory set, I have tried a couple of other rules here and there. Impetus is the latest rules system that I have gravitated to.......and I have found myself playing it almost exclusively now.


Impetus originated in Italy and is published by Dadi and Piombo.   I started, as most gamers have done, by downloading the free rules Basic Impetus and trying them out before jumping into the more complex and comprehensive Impetus rules.  It wasn't long before I purchased the full rules and the Extra Impetus issues filled with army lists (all pdf downloads). Although Basic Impetus is a nice game for quick and dirty battles with a minimum of figures, Impetus contains rules for command and control, discipline tests, and army lists for much larger armies. As a plug, Basic Impetus 2 was just released and is highly recommended for anyone interested in the rules. As for this review, it will be focused on the full Impetus rules.


An Extra Impetus publication featuring a myriad of army lists for specific periods


Scale

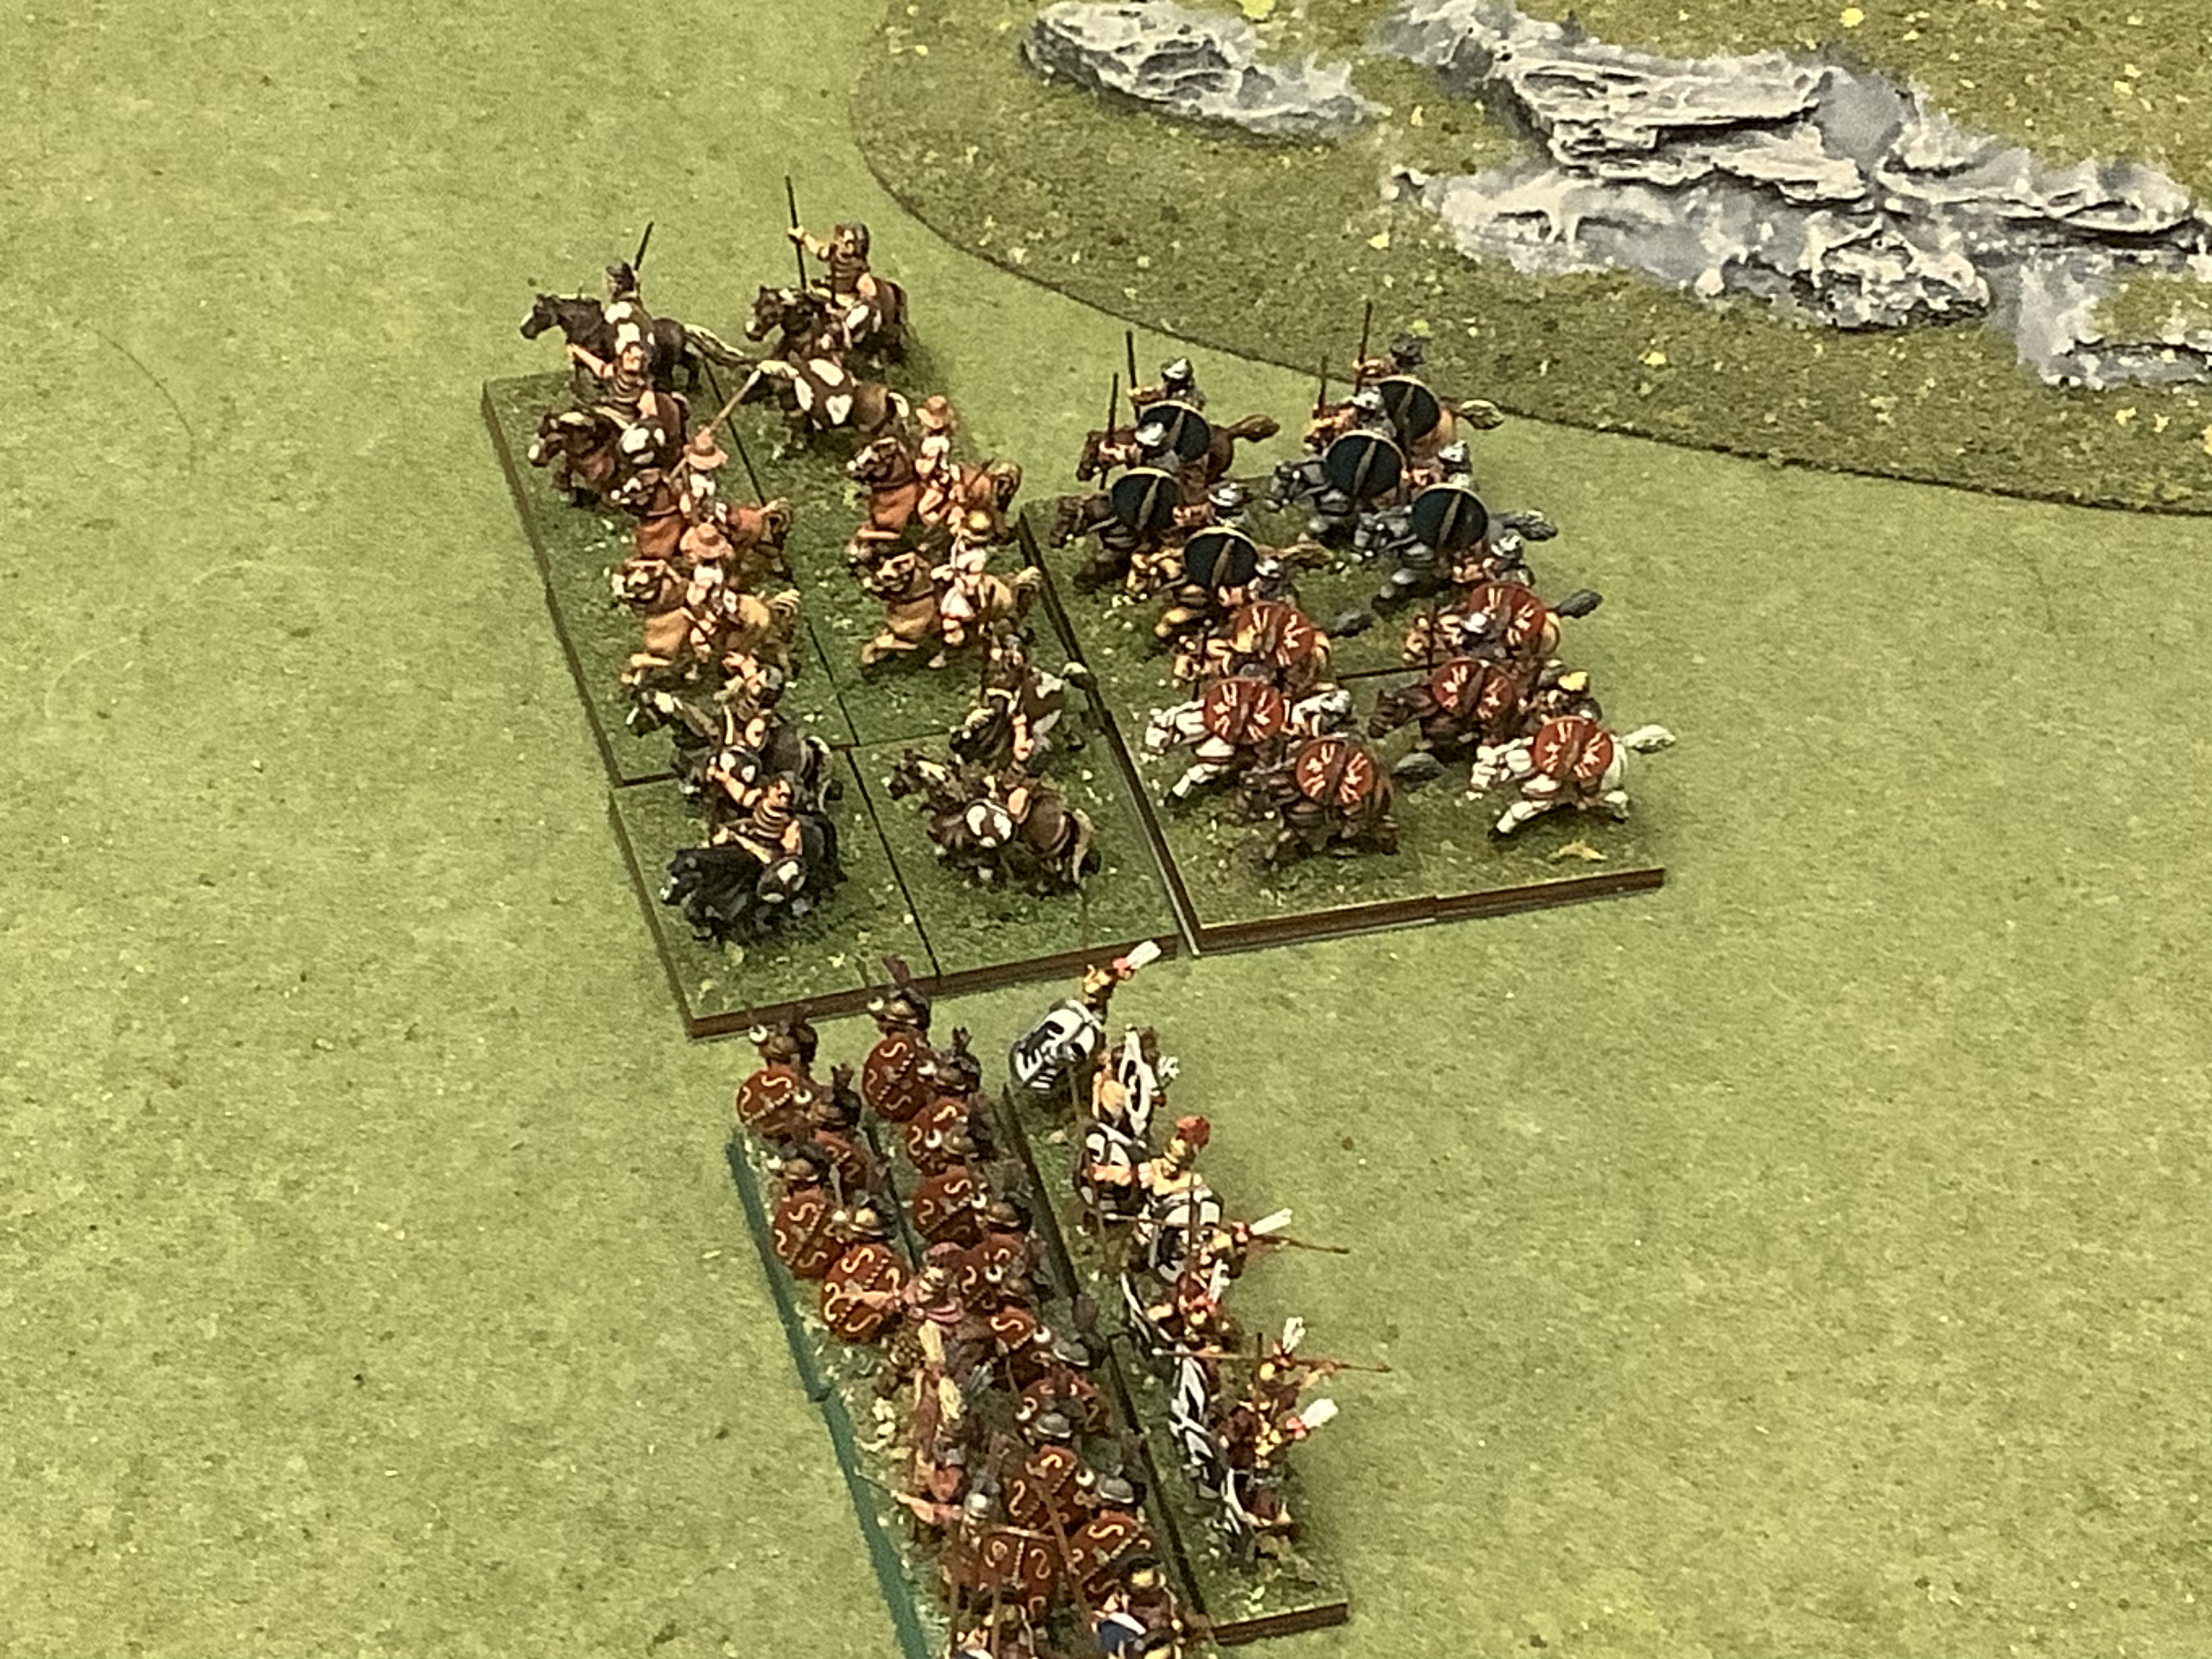
Each unit represents hundreds of men. Specifically heavy infantry is made up of 600-1200 troops, light Infantry and most cavalry units are made up of 400-800 men, while skirmishers / light cavalry units symbolize 200-300 men. Basing for all figure scales are included in the rules. Since I have units at 15mm scale, each unit has a frontage of 8 cm and adjustable depth based on the type of unit.  As an example, an Anglo-Saxon unit of fyrd (heavy infantry) consists of 12 figures on 2 bases equaling 8cm of frontage and 2.5 cm of depth.


A typical unit of infantry


Units have point values and Impetus armies typically consist of 100, 300, or 500 points (for competition purposes -- I am primarily a scenario gamer).

Ground scale is based on a standard distance called "U," which equals 6-7 meters in real-life distance. For example, "U" for 25mm equals 2 cm on the table, while "U" equals 1 cm for 15mm scale figures.

Each turn simulates approximately 15-20 minutes of time.

Unit ratings

A unit is classified by type (for example heavy infantry, missile troops, light cavalry) and contains several statistics:  movement allowance, VBU (Basic Unit Value) which is a composite rating of typical unit strength and combat/fire capability, and an Impetus rating (dice added to the VBU when charging). Discipline Rating and Demoralization Value (VD -- units that have routed compare their VD to the army total VD to determine victory or defeat) are also present.


For example, the heavy infantry unit above may have the following statistics:

Move = 5U, VBU= 4, Impetus=4, Discipline=C, VD=3, Point value=12, Impetuous


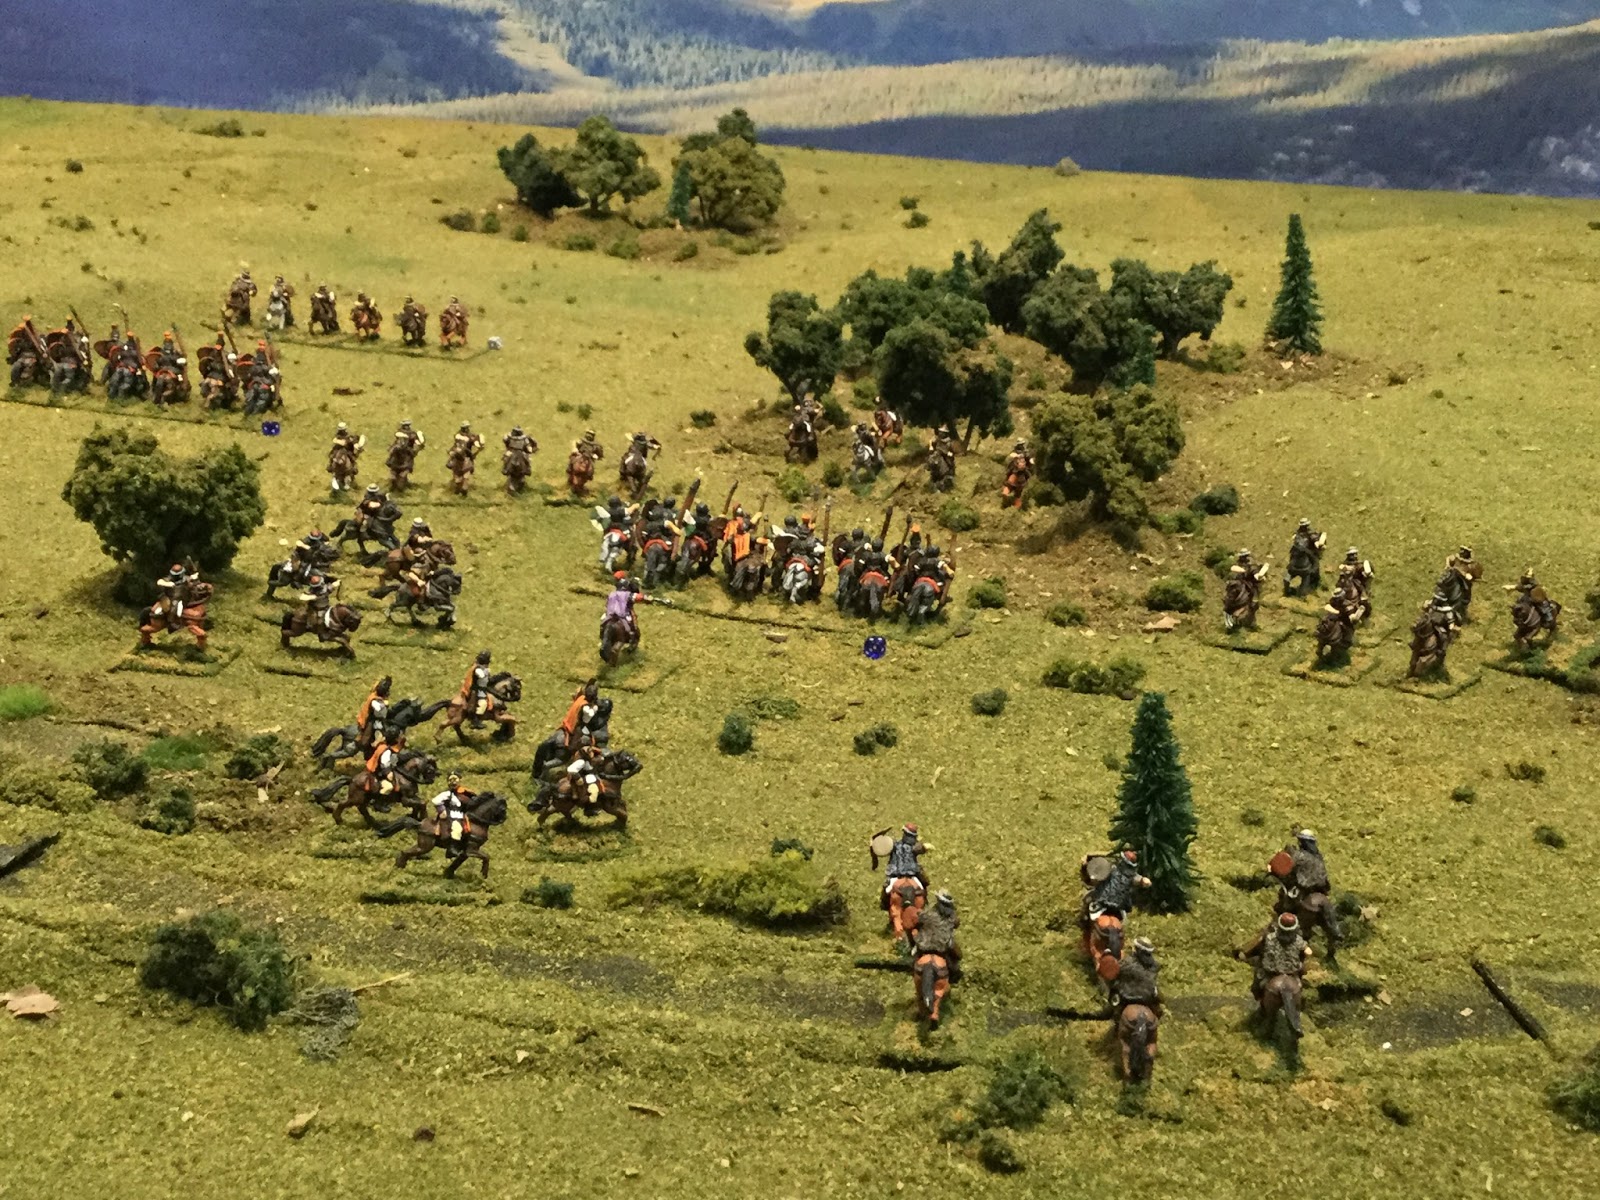
In another example, the Light cavalry unit above has the following statistics:

Move=12U, VBU=3, Impetus=1, Discipline=B, VD=3, Point value=21, Short bow B


Turn Sequence

1. The first step is to decide Initiative, which is very different than most rules. An Impetus army consists of 1-4 commands consisting of multiple units each. To decide Initiative, each player designates one of their commands, adds any leadership bonus, and rolls 2d6. The command with the higher score moves.

2. The command with the initiative activates one unit at a time, either rallying off disorder, placed on opportunity (unit can react to the enemy), moved, fired, or charged into melee.

3. After all units complete their actions, the opposing commanders designate 2 more commands and roll for initiative again.

4. When all commands have been activated (on both sides), the turn is over and the next turn begins.


Command and Control

One of the biggest differences between Basic Impetus and Impetus, command and control is one of the primary aspects of the full rules system. Each army list contains a Command Structure (CS) rating of good, average, or poor. This command structure has a specific range in "U," which is the range that dictates a commander's bonus for rallying from disorder or a negative modifier (if outside this range) for discipline tests.

Each commander has a rating from Charismatic to Cowardly that also dictates how many rallying attempts can be conducted as well as the dice bonus for Initiative rolls.


Moving and Discipline Tests

Moving units, as opposed to rules like Hail Caesar, is pretty restricted. An oblique move or movement to the rear will result in disorder unless the troops are considered light. Multiple moves require a passed discipline test or disorder results. Broken or Difficult ground severely restricts movement as well.

The bottom line is that lighter infantry or cavalry are more flexible in movement, while more disciplined troops and a higher command structure are easier to move around the battlefield. This sounds pretty realistic to me. There is an additional rating for typically barbarian troops, called "Impetuous." Impetuous troops must advance within 30U of the enemy.....imagine hundreds of hairy Germans just itching to charge into those implacable Roman legionaries.

Disorder must be avoided as much as possible. Disorder affects movement, firing, combat-- pretty much everything in the game.

Although "free and easy" movement in other rules systems are fun and quicker to play, I have to say that the restrictive movement in Impetus adds flavor and a strategic subtlety to the game, but is not so complex that it is overwhelming.  As an admirer of realism in miniatures rules, I prefer this approach.


Impetus is especially popular as a tournament game


Opportunity

Placing a unit on opportunity allows the unit to react to the enemy in future phases. The unit on opportunity may fire, opportunity charge, or countercharge. Units within 5"U" of an enemy unit may also react without being placed on opportunity. This is a great way for the non-activated side to remain engaged and turn the game away from a strictly IGO-UGO system.

I need to spend a bit more time with the opportunity rules -- I find that this is one of the more complex concepts within the system.

Firing

Firing also makes up a major part of the system. Typically, lighter troops or skirmishers conduct firing (with the exception of a few heavy infantry units, most notably the Roman pila). Firing can cause disorder or actual casualties.

Firing is range and weapon dependent. Bonus dice are added to the VBU and rolled for hits. As in combat, 6's and double 5's result in hits. The number of hits are then rolled against the critical number (VBU rating plus or minus other modifiers) to determine actual casualties.

Firing can be damaging but is typically not as decisive as combat.

Charging and Combat

Units that charge receive a charge distance bonus (1d6 for cavalry, 1d6/2 for infantry). Only units with an Impetus rating of at least 1 may charge (most skirmishers for example have a rating of 0 and therefore cannot charge).

Charged units may attempt to countercharge or, if skirmishers or light cavalry, may evade. Charging units add their VBU and their Impetus rating to determine the number of combat dice to throw. Again, like firing, 6's and double 5's equal hits, and actual casualties are determined in the same way of rolling hits against the modified VBU.

A defeated unit must retreat (rolled dice) a certain distance. If the defeated unit's VBU reaches 0, then it is considered routed and removed from the battlefield.

Period-flavor rules

To add to the realism of the system, there are several special rules for specific armies. For example, the Roman practice of throwing pila either before charging or receiving a charge is covered. Another example is the Shieldwall rule for the Dark Ages. A unit forming a shield wall is restricted in its movement, but if receiving a charge cancels out the Impetus rating dice of the enemy.

Other rules like forming large units, scythed chariots, long spears, and pikes are contained in the rules. This adds considerable period flavor to the system.


Final thoughts

After only about a half-dozen games, I have found Impetus to be a very smooth playing game, but one loaded with subtlety and tactical challenge. After searching through various forum entries and other reviews, the prevailing wisdom is that it takes about 50 games to fully appreciate the "elegance" of the system. I don't know about that, but I can tell you that the more I play it, the more I'm hooked on it.

As for the jewels of the system, I think the command and control and discipline rules are the strengths of Impetus. VBU and the Impetus ratings truly demonstrate differences between different types of troops in an easy to understand format.

I have seen criticism of the system's portrayal of missile fire, which on the surface seems extremely detailed, versus that of combat, which seems simplified. I typically don't have an issue with this, as there is a great variety of missile weapons and artillery that were very range-dependent. When it comes to close combat, a sword kills as easily as a spear. I'm ok with this.

The addition of special rules (detailed above) provide the necessary historic flavor to a period that spans such a great period of years.

Although Hail Caesar, for example, looks great on the table, Impetus requires a smaller number of figures to field an army. It is therefore less expensive to field full armies for any game.

So, in summary, I feel that Impetus is a challenging, yet not overly complex, game that should satisfy any serious gamer. It firmly resides in the spectrum between DBA and rules like Hail Caesar. I'm hooked.....and I'm looking forward to posting more AAR's for Impetus games in the future.