Saturday, October 12, 2019

Vimeiro, 1808 Using Carnage and Glory 2

Recently, our group of Carnage and Glory enthusiasts gathered in Newport News, Virginia to fight out Wellesley's first victory on the Iberian Peninsula, Vimeiro (August 21st, 1808). Vimeiro holds a special fascination for me personally, not only as the future Duke of Wellington's first victory, but because of all the potential "what-ifs" of the campaign.

We used the Carnage and Glory 2 computer-moderated Napoleonic system and, as usual, it perfectly simulated our tabletop action. Actually, the final result almost mirrored the historical result, even with a couple of  twists that I threw into the scenario.


British infantry advancing on the field of Vimeiro


Historical Background: In order to enforce Napoleon Bonaparte's Continental system and an embargo of British products and goods, the French Emperor decided to focus on Portugal, a staunch British ally and a nation who routinely ignored the embargo. When threatened with invasion, the Portuguese government did submit to a majority of Bonaparte's demands, but Napoleon ordered the invasion anyway. The Emperor commanded General de Division Jean-Andoche Junot to march over 30,000 troops across Spain into Portugal. Along the way, engineering officers conveniently sketched out every contour and defensive structure in Spain; Napoleon's plans for Spain were also already in motion. 

The march to Portugal was an arduous one through barren country. With only 1,500 half-starved men, Lisbon fell without a shot. While Junot occupied Lisbon and raised the tricolor on December 13th, 1807, he did it without a fight from the Portuguese army, but had to deal with multiple uprisings. Then he settled in to serve as occupying governor and awaited the stragglers of his army to arrive in Lisbon. 

During the occupation, the French had to continuously put down more revolts from the fiery Portuguese. Junot also disbanded the Portuguese army, except for a select few units that were marched to Germany as the "Portuguese Legion." There were also a few remaining Portuguese army units to the north that eventually joined the British. 

On August 1st, 1808, the British under Arthur Wellesley came to the aid of the Portuguese and landed an expeditionary force at Mondego Bay. After taking nearly 8 days to disembark the troops, Wellesley's force marched inland and were met by French General de Division Delaborde at Rolica. Delaborde performed a textbook withdrawal and delayed the British advance. The British declared a victory, but it would be difficult to imagine a more orderly withdrawal under fire by the French. 

On August 15th, Junot set out from Lisbon to meet the British, knowing that a victory against Portugal's revered ally would keep the city quiet. Here is an interesting twist to our scenario. Historically, Junot left 7,000 men in and around the area of Lisbon as a garrison. This action doomed Junot's advance against the British from the start, as his 13,000 troops could never hope to win a battle against 18-20,000 British and Portuguese soldiers. Part of the problem was that the Russian Admiral Simiavin, with a Russian naval squadron offshore, refused to allow up to 5,000 Russian sailors and marines to take up garrison duty in Lisbon so that the French could use all available troops to march against Wellesley. The reason for this was purely political; although the Russians were technically allies of the French after the Treaty of Tilsit in 1807, Admiral Simiavin refused to take any action against the Portuguese themselves because they were not technically at war with Russia. 

In our scenario, it is assumed that the Russians do comply with garrison duty, which allows Junot to march out with at least parity in numbers when compared to the British. 

The Battle: On August 21st, the French advanced to attack the British, who were deployed in a defensive position in the rough terrain surrounding the villages of Vimeiro and Ventosa. Historically, the outnumbered French attacked aggressively, but with brigades thrown in piecemeal. The French battle plan was unimaginative, focused on frontal attacks (especially around Vimeiro), and was destined to failure. The French were outnumbered and split their force in multiple directions. The British under Wellesley defeated each brigade in turn and used their numerical superiority to counterattack the French. Although most of the terrain was not suitable for cavalry, the British 20th Light Dragoons managed to maul some retreating French infantry before being countered by French Dragoons and withdrawing to safety.


French Dragoons tangle with British Light Dragoons


Junot's force suffered 2,000 casualties as compared to just 700 British and Portuguese losses. It was an overwhelming British victory. But fate stepped in as the battle concluded; waiting offshore on a British warship, General Sir Hew Dalrymple (who was senior in rank) stepped ashore and promptly relieved Wellesley before a proper pursuit could be ordered. 

Instead of smashing the defeated French, Dalrymple and his contingent offered very generous terms to Junot, allowing him and his army to be escorted back to France, even with their arms. These terms brought outrage in London and there was a serious investigation. For Wellesley's part, he argued fruitlessly against these terms, but was superseded by Dalrymple. Thus, the Convention of Cintra was finalized. Portugal was in British hands. 

Our Battle:  The British were allowed to deploy first up to a line from Vimeiro across to Ventosa. The French, primarily due to a superiority in scouting (due to the 2,000 cavalry that Junot was able to gather), then deployed according to preplanned positions facing the British. 


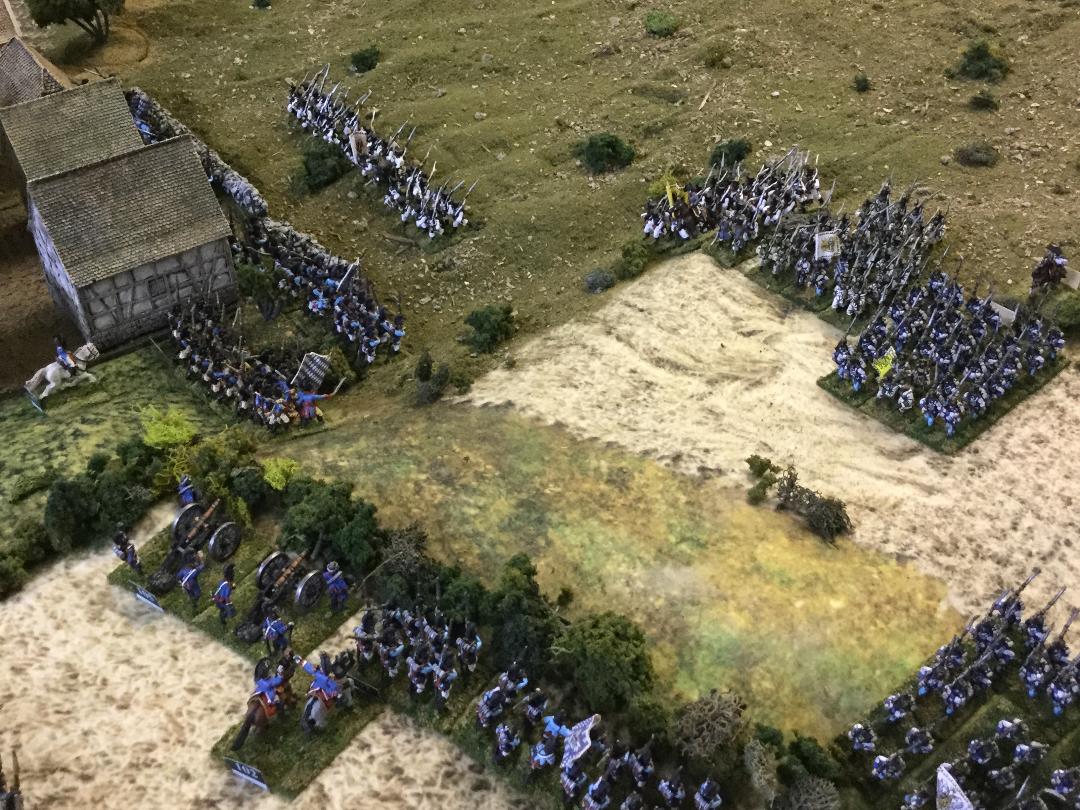
 The battlefield, on a 12' x 5' table


The British held 2 brigades in reserve at the rear of the table.  Crawford's and Trant's brigades were marching in on the far northwest corner road. Based on the French deployment, Wellesley had to dictate destinations and objectives for these brigades from the outset. Most of the British force was deployed in and around Vimeiro, taking advantage of the rough terrain that the French had to attack through. Acland's brigade was deployed to the rear right flank, as there was a chance that the French could deploy on the southern table edge.  Ventosa was held by 4 British battalions and a battery. The small contingent of British and Portuguese cavalry supported the center between Vimeiro and Ventosa (along with a couple of British units and a battery). 


View from the French left flank facing Vimeiro


The French plan centered on Vimeiro as the primary objective (worth 10 victory points), while a rapid advance was to be made by Delaborde's division against Ventosa in the hope of pulling most of the British reserves to this sector. St. Clair's grenadier brigade was held in reserve off-table in the hope of eventually storming and taking Vimeiro. The cavalry brigades under Marjoram supported both Loison and Delaborde's flanks in the center, as that was the only decent cavalry ground on the battlefield.


View from the French center and part of Delaborde's division on the right


The battle commenced with a general advance by Loison's division on the units supporting Vimeiro. Delaborde's troops aimed for an empty gap in the British line on the ridge between Vimeiro and Ventosa. To slow down Delaborde's advance, the British 20th Light Dragoons attempted to charge Delaborde's infantry, but was countered by French Dragoons supporting this infantry. The British cavalry was defeated and headed towards the rear. 


A strong British position at Ventosa


Meanwhile, Crawford's British brigade appeared on the northwest corner road and aimed for the gap between Vimeiro and Ventosa. Trant's Portuguese brigade began to march to the left of Ventosa . The battle continued for several turns, with both sides taking casualties. In particular, the skirmishers of the 95th and 60th Rifles caused alarming casualties on both the French infantry and the French combined battery that was attempting to shell Vimeiro. French morale amongst the guns began to drop. Fatigue was setting in on both sides. 


British and Portuguese commanders pondering their next move


The Portuguese had deployed in lines on the left of Ventosa. Meanwhile, Acland's brigade had been activated to advance onto the French left flank, threatening the main push onto Vimeiro. Delaborde had arrived at the top of the ridge between Vimeiro and Ventosa, which the British would have to now attack to support their center. But seeing an easy target of Portuguese conscripts on the far British left flank, Delaborde began to advance to attack these troops and Ventosa. Here's where the turning point of the battle took place. The Portuguese recruits not only held their ground, but launched powerful vollies of lead into the French attempting to climb the steep hill. Couple this with heavy casualties on Delaborde's men in front of and to the right of Ventosa, and the French were wavering in this sector. 

Loison's troops were also faltering in the heavy terrain around Vimeiro. Fresh British troops began to arrive as Wellesley skillfully deployed his reserves in just the right spots. The irritating Rifles were eventually forced out of their positions by French infantry and cavalry, but the effect they had on the general advance was devastating. 


 British troops holding Vimeiro


Another view of the French advance against Vimeiro


British guns and infantry defending the right flank around Ventosa


As the battle shifted towards the British, orders were sent to St. Clair's grenadier brigade for a last-ditch attack on Vimeiro. As the couriers galloped, the battle raged on. Delaborde's troops in front of Ventosa were now in retreat, although the British and Portuguese had also taken heavy casualties and were not able to follow up.  The battle for Vimeiro raged on, now with the French left flank beginning to retire in front of Acland's brigade.

With drums beating, the grenadiers of St. Clair's brigade advanced onto the tabletop. With great elan, the grenadiers threw themselves onto Vimeiro…….only to be halted by deadly British fire. Redeploying into line, the grenadiers' advance was stopped, and the French commanders knew the battle was lost. 


The attack of the French grenadiers was halted


Stunned with the results, the French had to grudgingly retreat. The British had held, punished the French attack, and held onto the geographic objectives. After walking wounded were reassessed the following day, the computer concluded that there were 3,119 French casualties to just 663 British and Portuguese. It was a Major British Victory !

The Carnage and Glory 2 system was magnificent, as usual. The keys to the battle were the outstanding deployment of British reserves, while the true heroes of the fight included the 95th and 60th Rifles as well as Trant's Portuguese brigade. These conscripts held firm and surprisingly threw the French veterans back. 

A great time was had by all.  The players made great decisions and although the French plan was slightly different from Junot's plan in 1808, the historical results were eerily similar. 

Monday, August 12, 2019

Altdorf, 1809 with Carnage and Glory 2

I recently purchased the excellent scenario book Eagles Over Bavaria 1809 by Michael Hopper and the first battle caught my eye. I've always thought a good wargame would feature the initial Austrian advance over the Isar River into Bavaria. The Bavarians are some of my favorite troops, with their sky-blue uniforms and Germanic helmets.

So I endeavored to put on the fight at Altdorf on April 16th, 1809, which historically was merely a probing skirmish and an artillery duel until the Bavarians fell back to link up with Wrede's infantry division.

So, some us in the Old Dominion Military Society gathered in Newport News, Virginia to fight it out using the Carnage and Glory 2 computer-moderated rules.  The system, as usual, worked flawlessly and generated a spellbinding and interesting wargame.


The Austrian advance onto the Bavarian left flank and center


The Scenario:  The plan for the Austrian invasion of Bavaria in April of 1809 necessitated the crossing of the Isar River at Landshut.  Initially, the Austrian advance-guard attempted to negotiate a peaceful crossing, but the loyal Bavarians would have nothing of it.  So, as the Austrians waited for reinforcements to arrive, the Bavarian commander Deroy learned of a crossing by the Austrians to the Southwest, effectively flanking his current position. 

Immediately, DeRoy's Bavarians conducted a very professional withdrawal and re-deployed in the vicinity of a small village, Altdorf, a few miles to the west of Landshut. Altdorf lies on the edge of a marsh to the east and in a valley, with hilly terrain on each flank. Historically, Radetzky's advanced-guard pursued and probed the Bavarians, but did not commit to a full-scale attack. The skirmish primarily ended up as an artillery duel, with both sides sides losing under 200 casualties each.  The Bavarians continued to withdraw until past the town of Pfettrach and through Wrede's division, stopping at Pfeffenhausen to rest.

Our scenario assumes that the Austrians pushed harder into Altdorf in order to advance as far as possible to split the allied forces. Historically and unbeknownst to Charles at the time, the French and Bavarians were in a high state of confusion, with Marshal Berthier bungling orders and initial deployments. The allied state would be in consternation until Napoleon finally arrived from Paris to take full command. Our scenario assumes that Archduke Charles receives better intel on the allied state than he did in reality.

The battle begins at 4:30 pm and the Bavarians are under orders to hold Altdorf as long as possible. The Austrians, meanwhile, were to attack the Bavarian flanks and ultimately smash through Altdorf as quickly as possible.

The fields east of Altdorf were marshy and unsuitable for artillery movement, so any guns had to move on the north road which traversed through the Bavarian left flank. From Altdorf and to the west, the terrain was made up of fields and the occasional hedgerow. Small wooded areas dotted the position on the Bavarian left.

Due to the marshy ground, Lindenau's infantry brigades left their batteries in Landshut. These brigades would advance toward Altdorf itself and the Bavarian right flank. Radetzky's command would assault the Bavarian left flank.

A helicopter view of the battlefield, with the Bavarians dug in around Altdorf and the Austrians advancing into the marshes from the right side of the table.


The Bavarians dug in on the right of Altdorf


Austrian Uhlans advance as part of Radetzky's advanced guard


The Austrian advance is determined and intimidating


The Wargame: The Austrians marched smartly onto the table, with Radetzky's advanced guard moving towards the heights that made up the Bavarian left flank. Immediately, on turn 1, the Bavarian cavalry commander decided to throw caution to the wind and charged the Austrian Uhlans in the center of the table. Not expecting this sudden charge, the Uhlans were caught at the halt and only weakly managed to get a defensive volley off before the Bavarian Dragoons sent them packing. Continuing their charge, one Dragoon unit crashed into an Austrian infantry battalion and immediately routed them, causing much bloodshed. The other Dragoon unit contacted another Austrian infantry battalion, but one which managed to form battalionmasse. The Dragoons made contact but were smartly repulsed with high casualties. The effect on the entire Austrian center was devastating, bringing the advance to a crawl.

Meanwhile, Radetzky's Grenz troops continued to advance into the wooded area that protected the Bavarian left flank, causing steady casualties on the Bavarian units guarding this area. The horse battery attached to Radezky's command deployed to the left of the wood and began to rake the Bavarians with cannister.

The Austrians under Hesse-Homburg and Mayer continued to advance against the Bavarian right and in front of Altdorf. Stopping to exchange fire with the Bavarians behind a hedgerow, the Austrians charged and strongly forced the Bavarians out of their position. While taking heavy casualties themselves, the Austrians pursued eagerly, effectively collapsing this flank.


The huge Austrian battalions charge the Bavarian right flank


With the right flank collapsed, the Austrians continue to pursue


At this point, even with the brilliant Bavarian Dragoon charge, the game was looking like an Austrian victory.  Then....disaster strikes.  An Austrian charge against a fresh Bavarian infantry battalion deployed next to Altdorf resulted in a bloody repulse, and then a strong countercharge by the Bavarians, routing the Austrians away.  Also, fresh Bavarian cavalry had arrived from the west and deployed through Altdorf to face the fatigued Austrians. The resulting charges were devastating to the Austrians. Two infantry battalions immediately routed, and Austrian Hussars were thrown back  in a valiant attempt to stem the tide. The entire Austrian center was wiped out !


Bavarian cavalry charge the last remaining Austrian horse. The Hussars, after a tough fight, were forced to retire. 


Austrian infantry in front of Altdorf were viciously counterattacked by Bavarian infantry and cavalry


In all, the devastating cavalry attacks caused over 1,300 prisoners to be taken. The young Austrian soldiers were shell-shocked at the turn of events. Although the Bavarian left flank was bending, and the Bavarian right flank was crushed, The Bavarians held onto Altdorf and caused so many casualties on the Austrians, that they couldn't rally. At just a little before 6 pm, the Archduke Louis commanded Lindenau to retreat back to Landshut. Final casualties calculated the next day, including prisoners, saw the Bavarians suffer approximately 500 permanent casualties and the Austrians about 2,000. 

In a hotly-contested game, the Bavarians ended up the winners, but the real winners were all of the gamers who experienced the fluidity and ease of the Carnage and Glory system.  Everyone had a great time, and were sincerely interested in more computer-moderated games.  The day's fight was a major success !


Monday, July 8, 2019

Carnage And Glory Napoleonics at ODMS

On Sunday, July 7th, a group of us convened for a learning game of Carnage and Glory 2 in Newport News, Virginia. The scenario was relatively small and basic and was set in the early stages of the 1812 campaign. We had one veteran C&G player and two members who were merely interested to see what the buzz was all about. 

For those who don't know, Carnage And Glory 2 is a set of computer-moderated rules written by Nigel Marsh.  I've been playing since 1992, so it was a pleasure to demonstrate a game for the members of the Old Dominion Military Society (ODMS).

The Scenario:  In order to cover the retreat of Raevsky's Russian corps in the face of French Marshal Davout's rapid advance in the area of Saltanovka, a small rearguard consisting of Paskevitch's 26th Division (with attached cavalry) was placed in the vicinity of one of the many anonymous Russian villages.  Davout's advanced guard, consisting of General de Division Morand's infantry division, along with Bourdessoulle's light cavalry brigade advanced on the position and deployed for battle at approximatey 2:30 pm on July 7th, 1812.


View of the terrain from the French left flank


View from the front of the French position


The Russian position was formidable, with a strong village and several wooded areas to anchor on. Morand's division did outnumber the Russian infantry, as well as having full regiment of C+ rated Legere infantry.  The Russians, in turn, had twice as many guns as the French, but no Jagers for decent woods-fighting capability. The cavalry was relatively equal on both sides, although the French did have a slight advantage in quality against multiple Cossack units. 

The action began with the Cossacks and French Chasseurs occupying the central woods in skirmish formation, effectively denying the use of woods to each other.  Action in these woods consisted of multiple insults and rude gestures aplenty. French Chasseurs did advance around the wooded area on the Russian right flank to threaten a horse battery on the heights. Rapid redeployment of Russian Hussars and Cossacks stabilized this area. 


Opposing light cavalry units in skirmish order verbally insulting each other in the woods. 


As the French advanced in the center, French batteries began to pound an isolated Russian battalion in the vicinity of the village. Ominously, a unit of Russian Hussars approached and launched a long-range charge against the flank of the French horse guns. Unfortunately, the movement of the Russians began at such a distance that the French guns were able to prolong and face the charge. Add to the resultant defensive fire some supporting fire from another French battery, and the Russians suffered 175 casualties and melted away. The charge did cause a minor bit of chaos in the French ranks, but many Russian Hussars were on the ground as the smoke cleared. 


View of the French advance. The Russian Hussars can be seen readying their charge in the left side of the picture. 

Some cavalry action on the Russian right actually saw two Cossack units throw back French Chasseurs. This was a surprise that allowed the Russians to gain the advantage in this sector. In the center and French right flank, infantry advanced steadily against the Russian infantry. One French Ligne unit threw themselves into the village itself but was met with murderous volley fire from the defending Russians. Courageously, the French infantry held on and continued to contest the village. With the crossroads in French hands, and the village contested, Morand's command had a territorial advantage.  Another charge against the flank of the isolated Russian unit in front of the village, which was already worn down by skirmishing and artillery fire, resulted in a rout ! After a couple of turns, the game was called and the French ended with a minor victory. 


 Action on the French right flank


 Advancing French troops


French infantry gain a foothold in the village


Overall, it was a fast-moving and well-played game. Everyone seemed to enjoy the scenario as well as the Carnage and Glory system.  Hopefully, we will see this outstanding rules system grow within our club !  Thanks to the players who attended and made it a great game !

After stragglers and walking wounded returned to the ranks after the battle, the French total casualties were only 139, while the Russians suffered 411. The Russians were forced to withdraw from the village and the French regrouped to continue their march against the rear of Raevsky's Corps.