Sunday, March 27, 2016

SAGA AAR: On the way to the next village....

On the way to the next village......


The Scenario

The year is 871 A.D. and Alfred the Great was beginning to fight back against the invading Norsemen.

Olaf Glumrok and his war band of hardy Vikings are on the move to the next "to be plundered" village in Wessex when they find the path blocked by an imposing shield wall of Anglo-Saxons.

The Anglo-Saxons are a hastily-built mix of tough warriors and levy archers. Their commander, Wolfred the Ready, has resolved to block the advance of these Vikings who have been plundering their way deeper and deeper into Wessex. It was time to throw the marauders out and send them flying !

Wolfred's force is composed of 6 points in the SAGA system. There are 2 large, combined units of warriors (16 figures each; 2 points each), one levy archer unit made up of 12 figures, and one small hearthguard unit made up of 4 figures. Wolfred and his retinue are mounted. In order to block the Norsemen, the archers are deployed in the center and supported to the rear by the hearthguard unit. The 2 large units of warriors are placed on each flank of the archers. Wolfred's strategy is to hold his position firmly and force the Vikings to charge onto his shield walls. Because the Anglo-Saxons were holding their position, any battle board dice could then be used for special melee and shooting bonuses.

Olaf's war band of Vikings was composed of 4 units of warriors (8 figures and 1 point each) and one large combined unit of hearthguard (8 figures and 2 points). None of the Vikings were mounted. His plan was to focus the hearthguard warriors as a hammering attack on the right flank of the Anglo-Saxons. After the flank unit was crushed, the rest of the warriors would envelop and destroy these "farmers."

SAGA is a rules system that uses a battle board for activation of units and special bonuses for melee and shooting. Unique dice are rolled for each faction and then placed on the battle board prior to activating units. It is an easy, yet very subtle, system to spend a great 1-2 hours of wargaming.


The Game

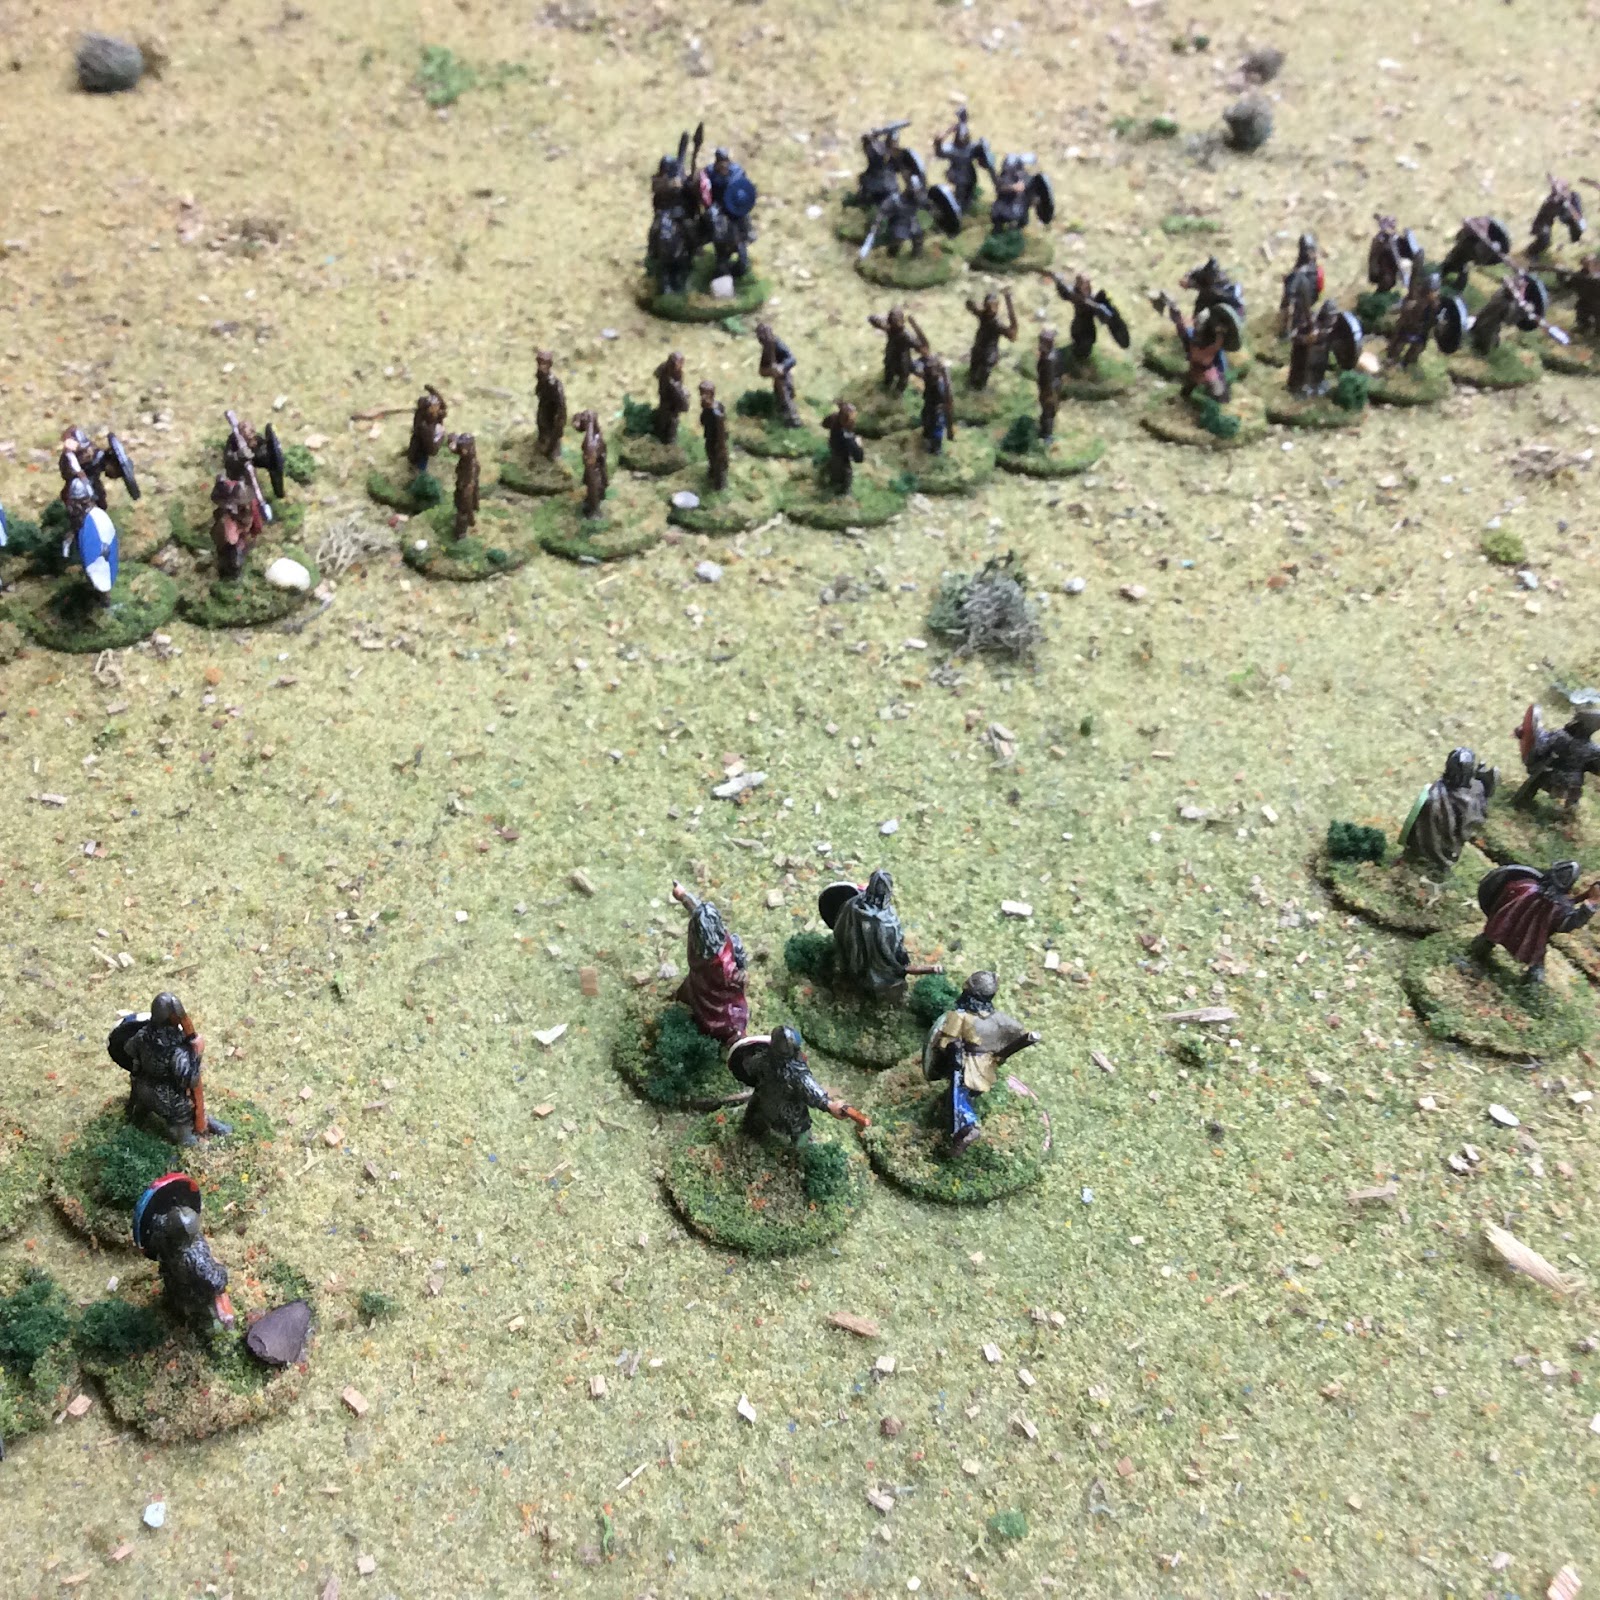
The Norsemen advance toward the Anglo-Saxons


Turn 1 began as the Vikings advanced toward the silent shield wall of the Anglo-Saxons. As the Vikings approached within archery range, the Anglo-Saxon archers let loose. The Vikings prepared for this though and used the "Asgard" bonus on the battle board to raise their armor rating one level. There were no casualties.

On turn 2, the Vikings rolled poorly with their battle board dice and were unable to activate the reserve unit of warriors, which was left behind as the front line units advanced. Olaf had to stay to the rear in order to use his free activation for the reserve unit next turn. Also, the Anglo-Saxon archers rolled extremely well for the next volley of arrows, while the center Viking unit rolled incredibly poorly to save any hits. This unit took 4 hits (half of the unit). Not a great start for the Vikings.


The Viking center unit is reduced to just 4 figures due to the volley of arrows


Subsequent turns saw the Viking hearthguard charge onto the Anglo-Saxon shield wall on the Wessex right. Even with help from the adjacent Viking warriors, the Anglo-Saxons held and the hearthguard suffered unaffordable casualties. All of the Viking front line units charged forward, but the Anglo-Saxons used their extra dice for bonus melee dice. The only Viking success saw the center unit of warriors that had taken casualties from the archers; instead of moving to the rear, these toughened warriors charged straight ahead and cut through the archers, forcing them back with massive casualties.

Over and over, the Viking warrior units charged the Saxons. The men from Wessex stood firm though (except for the pitiful archers, who were out of their element in a sword fight with Vikings).

The Norse hearthguard unit charges into the shield wall


Fatigue and casualties begin to mount on both sides


As the battle raged, the Vikings took a rising toll of casualties. The Anglo-Saxons took their share of casualties as well, but their units were larger and could absorb them better. As Olaf made the decision to fall back, consolidate, and plan his next move, Wolfred went on the offensive in a counterattack. The Anglo-Saxon hearthguard charged the depleted Viking warriors on Wolfred's left flank, throwing the exhausted Vikings back. Across the line, the Anglo-Saxons moved forward to attack (with the exception of the feeble archers, who only had 2 figures left). Wolfred threw himself into the fight as well, charging the isolated Viking unit that had charged the archers. The Vikings fought to the death but were eliminated.


The Anglo-Saxon hearthguard unit furiously counterattacks


 Wolfred himself mops up an isolated Viking warrior

In light of the Anglo-Saxon counterattack and in true Norse fashion, the Vikings attacked as well, succeeding in eliminating the small Anglo-Saxon hearthguard unit, but suffering many casualties in the process with the only fresh unit of warriors left (the reserve unit).

At this point, the battle was lost for the Vikings. They literally had no offensive power left, and the battle board dice was reduced to just 3 (instead of the original 6 at the battle's start). There just weren't many options left. Reluctantly, Olaf surrendered and the battle was over. The plundering was finally put to an end....at least for the moment.

Analysis

Considered more of a "game" with historical flavor, SAGA is not really considered  a strict simulation of Dark Ages conflict. In reality, this particular battle resulted in a very historic conclusion. The strength of the Anglo-Saxon battle board was to combine units into large masses and play defensively, while the Vikings' battle board favors going on the offensive and charging over and over. Therefore, proper strategy using the battle boards encourages to play each faction in a more historical fashion.

The Vikings used their offensive power and fiercely charged the Anglo-Saxons, who solidly stood and used defensive bonuses to cause attrition in the Norse ranks. When the time was right, the Anglo-Saxons went on the offensive and used the hearthguard unit to exploit any depleted Viking unit that got in its way. Olaf was heard muttering...."if I had only rolled the dice better.....til next time !"

Monday, March 21, 2016

SAGA: A Review and Summary

SAGA:  A Review and Summary

SAGA is a Dark Ages skirmish system that encompasses the time period from the Viking plundering of Lindisfarne in 793 to the battle of Hastings in 1066. It is fast, furious, dramatic, with simple mechanics, but also a great deal of subtlety. Subsequent expansions to the rules expand the time period and scope to include the Crusades and even Russia. I was personally introduced to the system at Historicon 2015 ...... my son and I have been hooked ever since. My primary periods for gaming reside in the horse and musket era, especially Napoleonics (emphasis on complexity and realism), but I have been seriously looking at the Ancients/Medieval/Dark Ages period as a side period (emphasis on fun).

Norsemen advance against Anglo-Saxons


Rules and battle boards are included (with the expansions) for the following factions: the Vikings, Anglo-Saxons, Normans, Anglo-Danes, Welsh, Irish, Scots, Pagan Rus, Crusaders, Bretons, Byzantines, Moors, Saracens, and more.


My copies of the original SAGA and the expansion Northern Fury


As you can see, there is a ton of variety that can be gamed with SAGA and a player can really shoot off in many different directions. I personally prefer the classic matchup of Vikings vs Anglo-Saxons. SAGA can be played with any miniature scale ( my warbands are all 15mm), and basing is per figure.

SAGA was originally intended as a scenario-based system, and several are included within the rules.  SAGA is also a natural system for tournament play as well, with most games consisting of warbands making up a number of "points." More and more tournaments are popping up in miniatures conventions around the world.

The organization of a warband

SAGA is a system in which a player controls a warband, which is made up of several units. A unit, depending on its classification (hearthguard, warriors, or levies) contains a certain number of figures. Each unit costs a point. An opponent fields a warband with the same number of points. A warlord is required and does not cost any points. The warlord is a unit in itself, with the ability to attack and defend.  For example, a unit of warriors contains 8 figures and is worth 1 point, while a hearthguard unit contains just 4 figures for 1 point, but these figures have higher capability.  So a warband can be fielded with a variety of figures, but the point total should be the same for both sides. Most battles are fielded with either 4 points or 6 points to a side. So a warband can typically contain as little as 17 figures in a 4 point game up to about 75 figures per side in a 6 point game. A typical 6-point game requires 40-50 figures on a side.  Here are two examples of a warband in a 4 point game:

A Viking warband can consist of a Warlord (free), 2 units of hearthguard (4 figures each for 2 points), a unit of warriors (8 figures for 1 point), and a unit of levy archers (12 figures for 1 point). Total: 4 points. 29 figures.

An opposing Anglo-Saxon warband could consist of a Warlord (free), 2 units of warriors (8 figures each for 2 points), and 2 units of levy archers (12 figures each for 2 points). Total: 4 points. 41 figures.


A typical Anglo-Saxon warband. In front, 1 point of levy archers. In back, from left to right, 1 point of hearthguard, 1 point of warriors, and another point of warriors. In the rear, the mounted warlord looks on


A player is free to field whatever types of units he chooses, as long as the points are equal for both sides. Six-point warbands are as large as the rules cover, due to the number of strategic dice that are generated for the battle board.

The battle board

The battle board is unique for each faction. This is where the bulk of the game's strategy occurs; a mastery of the battle board is critical for success. The battle board also contains much of the game's historical flavor. For example, the Viking battle board is loaded with offensive capabilities, while the Anglo-Saxon board is much more defensive in nature. This forces the player to fight each faction along similar lines as the faction's historical performance.

Specific dice for each faction (quite expensive if purchased, but in fairness, the rules cover a "do-it-yourself" guide for marking the dice) are rolled and used on the battle board. To summarize, the dice determine what skills or unit activations on the battle board can be used each turn, and the player has to assign the dice to skills accordingly. This is quite subtle and the system rewards the player that can think ahead and assign dice to powerful skills that can be used later in the game.

The game turn

The activated player rolls the dice for his faction (the number of dice is determined by the number of units on the table--levy units do not generate dice while warlords generate 2 dice). After the dice are rolled, each die is allocated to specific skills or actions on the faction's battle board. 
The activated side than Moves, Shoots, or Rests. If a move results in closing with an enemy unit, then melee is calculated at that time. All actions for each unit occur before another unit can be activated. Multiple moves for each unit can also occur, if the dice are available. The dice on the battleboard determine how many units can be activated, or what special skills can be used in shooting or melee.

When one player has finished activating as many units as possible, the opposing player then repeats the activation process for his units. After both players are finished, that is the end of 1 turn. The dice are then rolled for the next turn (there is an option to leave dice on the battle board for the next turn, but these dice are subtracted from the total number of dice that the player can roll for the next turn).


Battle board dice


The concept of Fatigue is also used for units that move multiple times in a turn or are engaged in melee. Fatigue points are used by an opposing player to negatively affect a unit. Be careful with Fatigue; it'll bite you in the butt.

Each unit has an armor rating and a number of attack dice for shooting and/or melee. For example, in order to "hit" a hearthguard unit, a 5-6 must be rolled due to its higher armor. A hearthguard unit rolling against a warrior unit only needs 4-6 in order to hit. Also, a hearthguard unit rolls 2 attack dice per figure as opposed to only 1 attack dice per warrior figure. After special skills are added in and "hits" are determined for each side, saving throws occur in order to cancel out hits. Figures for both sides are removed from the table. The unit that took the most casualties must then retreat out of melee. As units are eliminated, the available dice total drops for each turn. This in itself eventually causes one side or the other to be ineffective for the rest of the battle. Another way for a battle to be won is to eliminate the other side's warlord. A warlord is a powerful unit in itself, but beware the risks. A lucky hit that eliminates the warlord will immediately lose the game for a reckless player.

In summary

SAGA, for me, is a great skirmish system to just have fun with. Who doesn't enjoy bashing Vikings up against an Anglo-Saxon shield wall?  It is simple, fast-paced, but with enough flavor and strategy (especially with the battle board) to ensure a very competitive game. The system is not intended as a pure simulation. It is totally intended as a fun skirmish game with a minimum amount of required figures. I give it a thumbs up !  I may even have a closer look at those Crusaders and Saracens as well......