
After downloading the rules as a pdf, I was initially put off by a perception of complexity. These rules are not your typical "IGO-UGO" rules that I was used to, and it took me a bit of time to fully digest everything. Once I got the scenario onto the table, everything made total sense. In my humble opinion, Chain of Command is an outstanding set of rules. Not only do the rules allow a rollicking and entertaining game on the table (definitely one of the most fun games that I have played in a while), but the authors are serious about historical realism and results. The rules also allow for some realistic "surprises" and instances of chaos. If you are interested in World War 2 skirmish combat, I fully endorse Chain of Command. I think the rules are simply brilliant with a deep sense of subtlety that you really have to play in order to fully appreciate.
As for the scenario, I downloaded Operation Winter Storm (22 Eastern Front Scenarios) from the Too Fat Lardies website. I selected one of the simpler scenarios, The Road to Majorski (September 5th, 1942). Basically, the Soviets are pushing along the road to Majorski from the direction of Pokhlebin. A panzergrenadier platoon is tasked with throwing back the advance guard of the Soviets and pushing ahead towards Pokhlebin. Here we have a classic meeting engagement.
The terrain is open ground with 3 distinct areas of scrub and light woods. The road itself runs from north to south. Most of the natural trenches caused by the hilly terrain offer light cover and don't block line-of-sight. There is one section of hilly terrain between opposing areas of western woods on the western side of the table that does block LOS. The areas of woods count as broken ground for movement as well as providing light cover. The open ground is covered with clumps of grass, so units moving Tactically could assume light cover here as well. There are pockets of light snow on the ground, but this doesn't affect movement at all. Remember, this is Southern Russian !
I rolled for Force Morale, with the panzergrenadiers having a slight edge of 10 compared to the Soviets Force Morale of 9. I then selected some support for my platoons. Here, I deviated from the scenario a bit. The German units are portrayed below:

The panzergrenadiers begin with 3 squads of infantry, made up of 2 MG34 teams each. Each squad is commanded by a junior leader. I added a 2-man panzerschreck team that is commanded by a senior leader. The Germans have a large amount of firepower and are able to counter any Soviet armor that enters the table.
The Soviet units are below. The Soviets have 2 squads of infantry, each with a light machine gun, and another squad of infantry made up of purely riflemen. Each squad is commanded by a junior leader. The Soviets also have a medium machine gun team as well as a T-34 tank. One Soviet senior leader controls the force. The Soviets have less inherent firepower per squad when compared to the Germans, but the T-34 tank and the MMG team could very well tip the balance.

The table is a 6' x 5' surface. After the patrol phase, in which probing units maneuver to create "jump off points," it was obvious that the Germans had a slight advantage for deployment, with 2 main areas of light woods to deploy to when moving from the off-table area. Troops are not initially deployed on the table, they have to be activated by a roll of command dice. Here is the table with the various "jump off points" designated. The top of the picture is South, so the wooded areas on the right of the picture are the "western woods" while the wooded area on the left is the "eastern woods."

The German jump-off points are in black at the top of the picture, while the Soviets have decidedly less cover to deploy to.....their jump-off points are in red.
For those unfamiliar with the system, the command dice dictate which units may move, fire, or be deployed onto the table. In this scenario, each side has 5 six-sided dice to roll with. A roll of "1" allows a team to be activated or deploy. A roll of "2" activates an entire squad together. A roll of "3" activates a junior leader, who may in turn activate a team or squad, or use some special abilities (ie order a hand grenade thrown, rally a point of shock, etc), A roll of "4" allows your senior leader to use his command points and/or activate units. A roll of "5" gives your side a point towards a "Chain of Command" die, which contains some special abilities throughout the game. Then there are the "6's." One "6" thrown means nothing. Two "6's" allow the active player to move in the next phase. Three "6's" ends the turn and allows the player to move first in the next phase. And so on.....
The scenario called for the Soviets to activate first. They were able to deploy the MMG team to a jump-off point in a natural trench caused by the rolling terrain. Another squad was deployed to the rear of a large section of the western woods. Not bad. A couple of "5's" gave the Soviet player 2 points toward a chain of command dice.
The Germans deployed a full squad into the western woods, another squad to the rear of the eastern woods and the panzerschreck team to another edge of the western woods. The Germans definitely have the advantage of more cover to deploy into. Most of the Soviets will have to travel over some open ground in order to advance.

A Soviet squad "jumps off" to the rear of a large area of scrub

The Soviet MMG team deploying and putting down fire into the woods, directed at the panzerschreck team

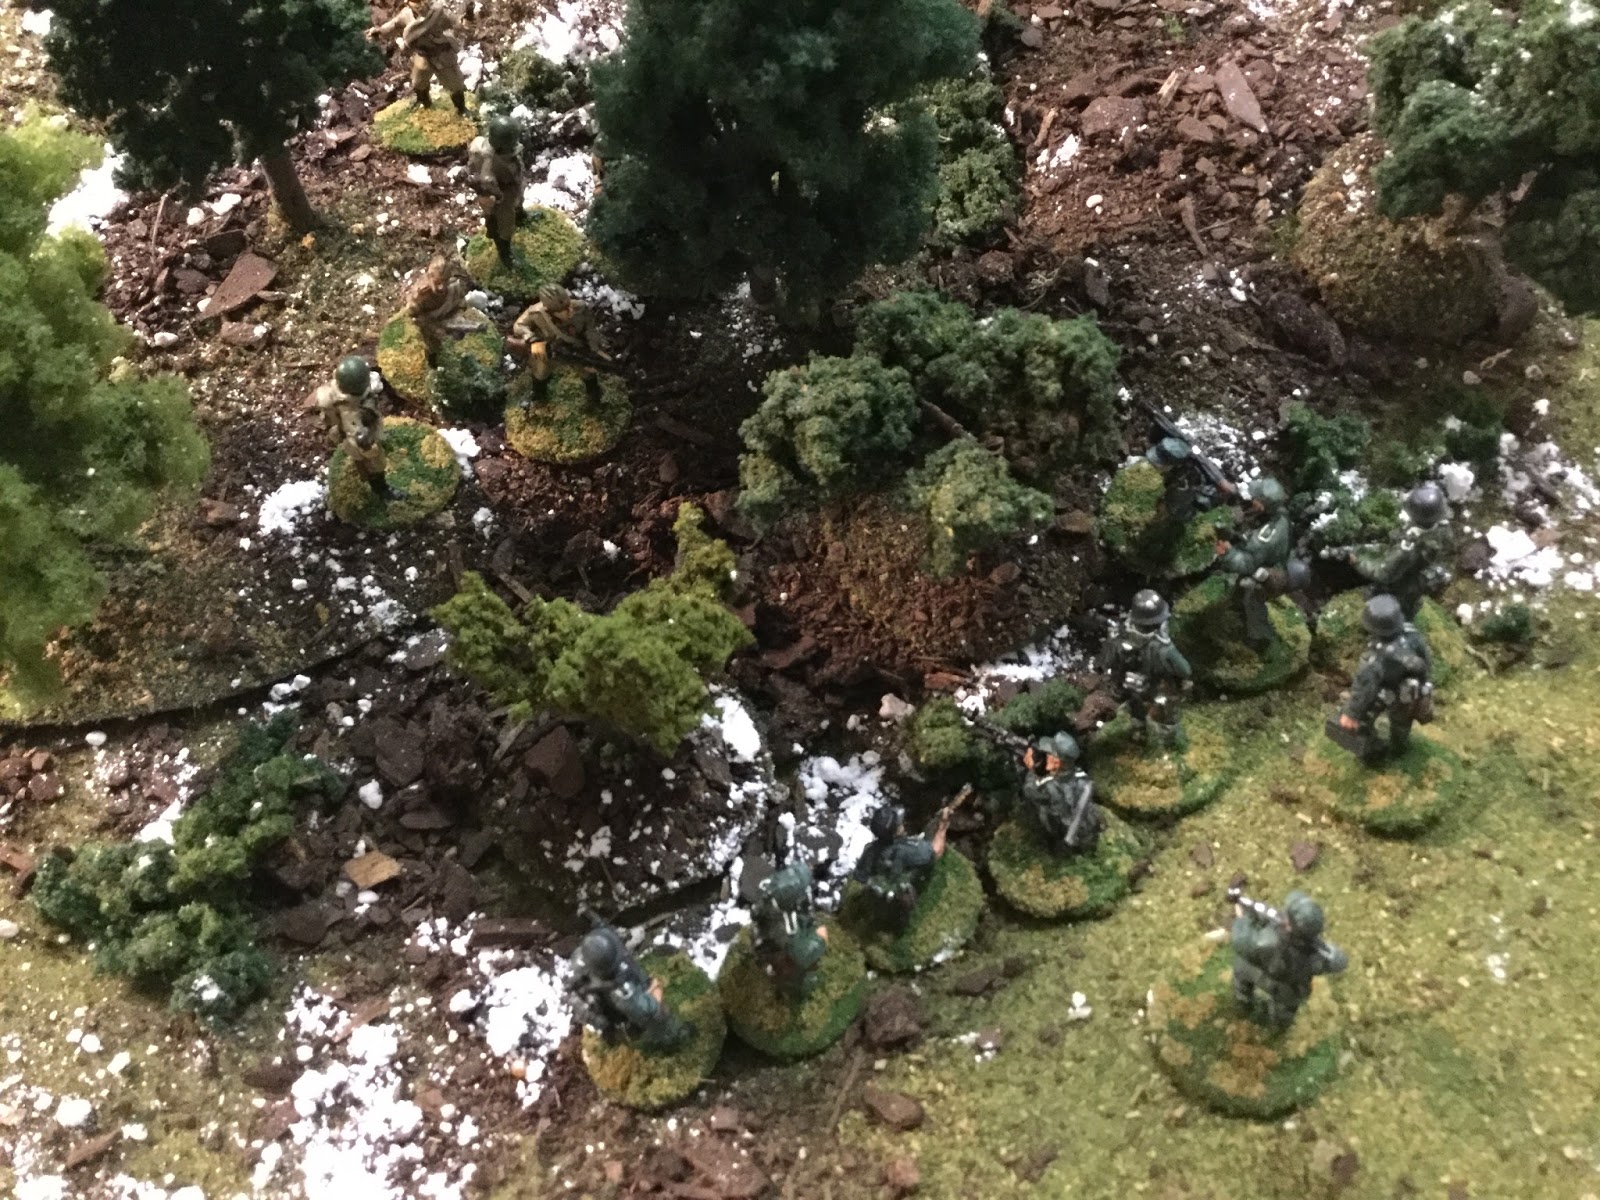
The western woods become infested with German infantry
In the following German phase, the Soviet MMG team was damaged and pinned (excess shock) in place due to withering fire coming out of the eastern woods. On the west side of the table, although a steep hill blocked the LOS of one German squad, the other panzergrenadier squad again put overwhelming fire into the Soviet infantry in the opposite woods. The Soviets here were considerably hurt by the accurate German fire.

Soviet infantry considerably damaged by opposing German panzergrenadiers
The Soviets, in the next phase, gained a stroke of luck. The T-34 tank deployed on the tabletop. In addition, a full Soviet squad deployed into the jump-off point in support of the damaged MMG team.

Soviet armor enters the table, as more Soviet infantry deploy to the eastern side of the table
The German player realizes that the Soviet plan was to hold the western woods while the rest of the Soviet force, supported by the T-34, attempted to concentrate fire onto the lone panzergrenadier squad in the eastern woods. Reacting quickly, knowing that the Soviet infantry in the western woods was considerably damaged (and now pinned), the junior leader threw his squad forward over the hill and down into the direction of the enemy. During this action, the Soviet infantry in the woods was completely wiped out by further fire from the other panzergrenadier squad opposing it. Luckily for the Soviets, they were able to deploy their last rifle squad to the jump-off point to the rear of the woods. The action was really heating up.

Seizing the moment, German panzergrenadiers advance over the hill into the opposing woods
On the other side of the table, the senior Soviet leader arrived and began to rally the shock on the MMG team while the supporting rifle squad advanced to the flank of the MMG team and began to throw fire into the German infantry in the eastern woods. The T-34 was advancing in tandem, firing its hull machine guns, and the German infantry began to waver. After a couple of phases, the panzergrenadier teams both broke and routed. The Soviet plan to clear this area through concentrated fire was working.

German infantry in the eastern woods catching hell
At the same time, the Soviet infantry advanced into the western woods to replace the squad that was decimated, running right into the charging panzergrenadiers. The game's first close combat was initiated. Although the Germans had the dice advantage, the Soviet riflemen threw the Germans back with a lucky roll, defeating the Nazis by one kill.
Close combat initiated by the panzergrenadiers

....and barely thrown out by the Soviets

The situation on the eastern section of the table looked great for the Soviets, as the Germans routed out of the cover
At this point in the game, both sides were experiencing a decrease in Force Morale, but the Soviets seemed to have the edge as far as territory. They were in control of the western woods, and only had to advance unopposed into the eastern woods to take control of this side of the table's area of cover. The T-34 was in the center of the table, menacingly about to advance again. Soviet total losses were slightly higher than the Germans, but they had a larger force that could absorb some extra punishment.
In the next phase, the Soviets advanced a rifle squad to the edge of the eastern woods. Soviet fire onto the western woods from the T-34 and the MMG team caused a bit of shock but effects were minimal. In the German phase, the panzergrenadier squad that was thrown out of the western woods regrouped and threw some massive firepower into the remaining Soviet riflemen. The rifle squad, which was victorious in combat just a couple of phases ago, were completely wiped out ! The power of 2 MG34's was truly evident.To end the phase, the Germans moved their remaining panzergrenadiers deeper into the wood to protect them from Soviet fire.

Soviet infantry move into the eastern woods recently vacated by the Germans

As Germans occupy the western woods, stepping over the bodies of dead Soviets

Panzergrenadiers sprint across the table to take the fight to Soviets in the eastern woods
In subsequent phases, the Germans advanced and occupied the western woods, while the other panzergrenadier squad sprinted across the table to begin an assault on the eastern woods, gaining a point of shock in the process. Rolling luckily, the squad made it across without being caught in the open by the T-34, which was covering the center of the table. The next phase saw some repositioning and regrouping, but the drama was really starting to begin.
Having accumulating a Chain of Command die, the Germans used one of the abilities of the die to interrupt the Soviets' move further into the eastern woods. The panzergrenadiers closed into combat, but the Soviets had a slight dice advantage this time around.
It was not to be for the Germans. Although the Soviets took about a half-squad worth of casualties, every panzergrenadier was killed in the fight. The entire squad was wiped out !

A dramatic close combat in the eastern woods sealed the Germans' fate
At this point, with the Soviets controlling the field with the T-34 and the MMG team, along with the eastern woods, the game was called. Casualties were heavy on both sides. The Germans only had the panzerschreck team and a half-squad of panzergrenadiers left. They had little offensive capability at this point. The Soviets had won the day, although it was a bloody price.
I was thoroughly impressed with Chain of Command. The game was incredibly entertaining and fast-moving. Although I may have balanced the scenario too much in the favor of the Soviets (the T-34 was a game-changer) it was touch and go for most of the game. I found out that once initiated, close combat can be totally decisive. Also, I found that you never quite have enough dice activations to do everything that you want in a turn, so some tough decision-making has to be made. In retrospect, I feel that the authors thought of just about everything when it comes to World War 2 combat. Every base was covered in a fun-to-play and historically realistic game. Both thumbs way up !


