Strategic Background: As Roman control of the outlying provinces of the empire began to fracture, these areas were ripe for Attilla the Hun to invade. After years of campaigning against the Eastern empire, the Hunnic leader had practically ignored the lands of the Western empire. The reasons for the invasion of Gaul ( modern-day France) were varied. One possible reason is that Attilla misinterpreted a wedding invitation from Justa Grata Honoria, the sister of Roman emperor Valentinian III, and invaded to claim his share of the Roman empire as a wedding gift. The reality of this was that Honoria was betrothed to someone she despised and meant to ask the Hunnic leader for help.....that went horribly wrong, didn't it? Another more plausible reason for Attilla's invasion was to split the Gothic tribes and the Franks and to take advantage of the disunity to gather more lands into the Hunnic empire. Either way, Attilla and his Huns, along with various other tribal allies, began to devastate villages and towns throughout eastern Gaul.
Enter Aetius, who Valentinian tasked to lead a force and defeat the barbarians once and for all. The climactic battle that ensued was in the area of Chalons and named the Battle of the Catalaunian Fields. Later in the year, I plan to simulate this large action, so more details on this particular battle later.
For this scenario, I planned a smaller action that featured a barbarian attack on a Roman force that was crossing a stream in order to join the main army under Aetius.

Late Imperial Roman infantry

The Hunnic hordes
The Scenario: Leading a force of two infantry forces (as per the rules) and one cavalry force, the Roman commander is attempting to cross a stream in the face of a sudden attack by a combined army of Goths and Huns. The scenario begins with the Roman cavalry already across the stream, with the barbarians advancing from the heights above the plain of battle. The barbarians are assumed to have the initiative, so therefore they will roll for movement first throughout the game. The scenario is scheduled for 10 turns, as the start time of the battle is late afternoon. The positions of the armies are detailed below.

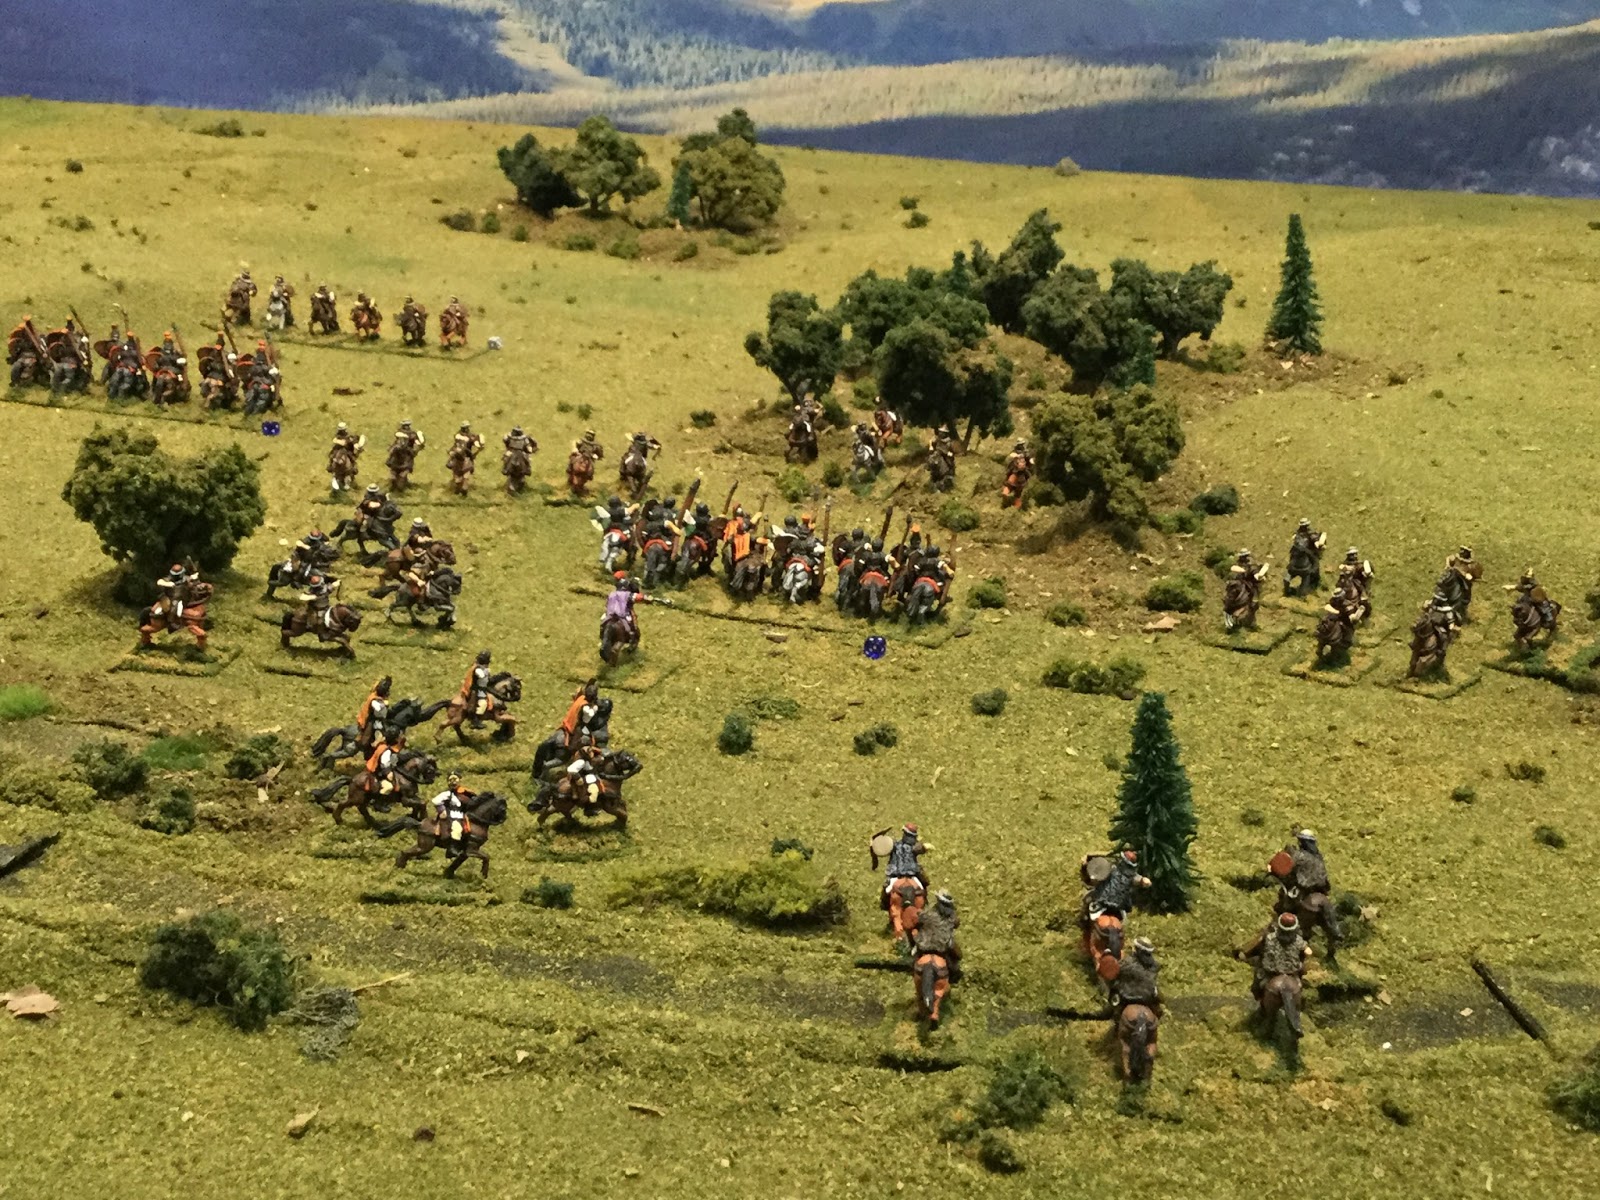
Initial deployment of the combatants
Orders of Battle:
Roman
Roman General: Rating 9 (obviously an up and coming leader)
1st Division - Commander, Rating 8
2 Comitanses Medium Infantry (Pilum, Drilled)
2 Limitanses Medium Infantry (Pilum, Levy)
1 Skirmishers (bow)
2nd Division - Commander, Rating 8
2 Comitanses Medium Infantry (Pilum, Drilled)
1 Limitanses Medium Infantry (Pilum, Levy)
1 Skirmishers (bow)
1 Light Artillery Battery (Scorpion) (Drilled)
3rd Division - Commander, Rating 8
2 Heavy Cavalry
2 Sagitarii (Horse Archers)
Barbarian
Hun Warlord: Rating 8
1st Division - Commander, Rating 8
3 Goth Heavy Cavalry
2nd Division - Commander, Rating 8
3 Goth Warbands
1 Goth Skirmishers (javelins)
3rd Division - Commander, Rating 8
4 Hun Light Cavalry (bows, Feigned Flight, Parthian Shot, Marauders)
4th Division - Commander, Rating 8
4 Hun Light Cavalry (bows, Feigned Flight, Parthian Shot, Marauders)
** All units were standard-sized, with the exception of Sagitarii, Hun Light Cavalry, and Skirmisher units.
The Battle: With the Roman infantry behind the stream, and only the cavalry deployed on the plains beyond, the barbarian force attempted to move aggressively forward to catch the Romans in the rough terrain.

Roman infantry behind the stream faces approaching barbarian warbands

Roman cavalry across the stream sights hordes of Hun cavalry

The Roman right flank
As the Goth cavalry and infantry advance aggressively towards the Roman infantry, the Romans attempt to get across the stream as fast as possible. The Huns moved forward, but not as aggressively as their Goth allies. Seeing that the right flank was in very real danger of collapsing to the Hunnic hordes, the Roman cavalry rushed forward to engage the enemy. Instead of sitting back and assuming a defensive position, the Roman commander quickly assumed the attack.

Roman infantry rush across the stream to engage the warbands

Roman cavalry also attempt to take the initiative against the Huns
Although the Romans decided that the best defense was a good offense, the barbarians had the same idea. The Goth cavalry on the Roman left flank moved rapidly to engage the infantry. A barbarian heavy cavalry unit launched a charge on this flank against one of the leading Comitanses units. Although the first round was a slight barbarian victory, the two sides were locked in combat during the following turn. The next turn would go badly for the Roman infantry, which broke in the face of the Goth cavalry.
On the right flank, a Roman sagitarii unit also charged an open order Hun unit and quickly broke in the ensuing combat. After a couple of turns, the Romans lost 2 units as the barbarians continued to advance. Add to this the fact that the Hun cavalry had already encircled the Roman right flank with at least one unit. In the center, the two opposing sides of infantry were still approaching each other; swords and shields were not yet crossed.

Goth cavalry charges into Roman infantry; the Romans would break shortly thereafter

After a Roman horse archer unit breaks, the Hun cavalry begins to envelope the Roman right flank
A wide view of the Roman right

The opposing infantry in the center continue to ominously approach each other
After the successful charge of the Goth cavalry, the barbarian horsemen actually retired slightly to stay out of Roman missile fire range. The strategy here was to bait the Roman infantry to move out of the disrupted terrain across the stream to enable further charges by the cavalry.
On the Roman right flank, the Roman heavy cavalry were successful in forcing back the lighter Hun cavalry, with the unintended result of opening up more room on the flank for the Huns to envelope. The action quickly turned into complete chaos as the Huns saw their advantage and began to overlap the Roman units. The Hun missile fire was taking its toll, as well as the ability to evade the Roman cavalry charges. This is one of the interesting matchups that I wanted to test out: lighter Hun cavalry versus heavy Roman cavalry.

Chaos on the Roman right

More Hun versus Roman cavalry action
The center finally saw the Goth warbands charge against the Roman wall of infantry. In the initial clash, the Romans formed close order to minimize the shock effect of the Goth charges. The Goths did prevail though, but the Romans held their ground, albeit disordered with heavy casualties.

Goths charge Roman infantry in the center
We were half-way through the scenario, and it looked like the barbarians were winning. The Goth cavalry had the Romans pinned on the left flank. The center saw the Goth warbands slowly pushing the Roman infantry back (although it was very slow going in this sector). On the right, the Hun cavalry was surrounding isolated Roman cavalry units and even threatening the Roman infantry in the center.
But owing to Roman discipline (and not just a little stubbornness on the part of the Roman commander), the Romans bent but did not break. The Romans slowly advanced on their left flank, wisely using supports in case of a cavalry charge, attempting to inflict casualties on the Goth horsemen via missile fire. The center turned into a bloodbath, with heavy casualties on both sides. The Roman infantry was pushed back a bit, but never broke. Although the right flank was up in the air, the Roman heavy cavalry finally managed to charge the formed Hun cavalry in front of it, breaking a couple of units, and forcing one of the Hun commands to retreat from the field. The other Hun cavalry division had effectively broken through on the Roman flank and rear. One Hun unit forced a Roman infantry unit in the center (after managing to break one Goth warband) to form Testudo, a formation virtually invincible against the Hun arrows.
As the Roman infantry on the left flank cautiously advanced against the Goth cavalry, the Goths (not wanting to stick around to absorb javelin casualties) charged. Incredibly, the lowly Roman limitanses unit in its path formed close order and repelled the Goths ! The other lead Goth cavalry unit decided to get into the action as well and charged in on another Roman unit, forcing it to retire, but advancing to stay locked in combat.

The Goths launch a charge but were repulsed by close order Roman infantry

The Romans bend but refuse to be broken

One Goth warband has had enough and runs for the hills

The Romans, although enveloped, stay in the fight on the right flank
With but a turn left before nightfall, the Roman left stabilized as the Goth cavalry stepped back disordered, unable to break the disciplined Roman infantry. In the center, the combat continued, with neither side gaining an advantage. On the right flank, the Roman cavalry, after eliminating the formed Hun cavalry in front of them, about faced and threw back a charge by more Hun cavalry, totally defeating the barbarian horse archers.

The high point of the Goth cavalry charge. It would be thrown back.

Hun horse archers attack a Roman unit in testudo formation with no effect

A wide view of the Roman left and center

Bloody combat in the center
As the game ended, it was obvious that the barbarian force was not going to force the Romans off of the field. In fact, there were more barbarian units that were shaken than Romans. Both sides took heavy casualties, but the barbarians withdrew to the hills and left the Romans to lick their wounds and set up a fortified camp in the plain. It was a tremendous game with two very well-matched forces. Hail Caesar, as a rules set, did a great job of simulating the scenario. The results were very believable and there were no dice rolls that seemed implausible. I actually played the scenario with the Picquet rules system first, before trying Hail Caesar out for the blog post. Both rules demonstrated a minor Roman victory.
One of the main situations that I wanted to test Hail Caesar with was the capability of Hunnic light cavalry against Roman cavalry. The Huns had more units that primarily operated in open order, but the Roman heavy cavalry was unbeatable in direct combat. The ability of the Huns to maneuver freely around the flanks and rear of the Romans caused many casualties and consternation. The result was what I expected and the rules simulated this well.
Another ancients game in the books. On to Napoleonics and, later in the year, the battle of the Catalaunian Field.
No comments:
Post a Comment