Sunday, January 29, 2017

Napoleonic Spanish Troops

The Spanish troops throughout the Napoleonic Wars had a reputation of incompetence and cowardice with only a few successes versus the French. But in reality, although the Spanish leadership was often incredibly poor, Spanish soldiers fought as hard for their country as any other nationality. Spanish infantry, when led well, proved to be very courageous, while the artillery was particularly stubborn in holding a position. The Spanish cavalry proved pretty poor most of the time though.

The fact that the Spanish hung in there and continued to fight the French on the field, while waging a guerilla war at the same time proved to be a major factor in the ultimate defeat of Napoleon.

The Spanish often fought with their British allies as well as independently against the French. Although most of the time the French were victorious over the Spaniards, there were some bright moments. The Spanish victory at Bailen cannot be understated, while the Spanish troops that died where they stood on the ridge at Albuera allowed the British to counterattack and push the French from the field.


Spanish Dragoons


Spanish Heavy Cavalry


Spanish Light Cavalry


Spanish Artillery


Spanish 1st Brigade


Spanish 2nd Brigade


Spanish 3rd Brigade


Spanish 4th Brigade


Spanish 5th Brigade


Spanish Skirmishers


Wednesday, January 25, 2017

Dark Age Anglo-Saxons

The Anglo-Saxons, after the raid on Lindisfarne in 793, were literally pushed all the way across England by the Viking hordes. But, Alfred the Great and his Kingdom of Wessex stiffened and fought valiantly against the Norsemen.

I based these second-hand figures for Hail Caesar. They portray the Anglo-Saxons in the early years of the Viking invasion, from 793 until about 900 A.D. Sometimes, you just need some figures to bash around on the table, paint jobs be damned.


The Anglo-Saxons !


Troops of Wessex ....Form ShieldWall !


Dark Age Vikings

I've always been obsessed with the Scandinavian raiders attacking Anglo-Saxon England, Scotland, and Ireland. From the first major attack on Lindisfarne monastery in 793, the Anglo-Saxons lost most of their kingdoms until Alfred the Great and the Anglo-Saxons of Wessex turned the tide.

Here are some second-hand Vikings that I picked up that I based for Hail Caesar. The paint job isn't great but they will certainly do for some action-packed pick-up games.


The Vikings !


Fury of the Norsemen


Monday, January 23, 2017

A Review and Summary of Impetus

I am admittedly a novice when it comes to Ancient and Medieval wargaming. An obsessive Napoleonic gamer for many years, I have only recently (about a year) crept into this black hole of the gaming world. Starting off with the Hail Caesar rules and being happy with them as an introductory set, I have tried a couple of other rules here and there. Impetus is the latest rules system that I have gravitated to.......and I have found myself playing it almost exclusively now.


Impetus originated in Italy and is published by Dadi and Piombo.   I started, as most gamers have done, by downloading the free rules Basic Impetus and trying them out before jumping into the more complex and comprehensive Impetus rules.  It wasn't long before I purchased the full rules and the Extra Impetus issues filled with army lists (all pdf downloads). Although Basic Impetus is a nice game for quick and dirty battles with a minimum of figures, Impetus contains rules for command and control, discipline tests, and army lists for much larger armies. As a plug, Basic Impetus 2 was just released and is highly recommended for anyone interested in the rules. As for this review, it will be focused on the full Impetus rules.


An Extra Impetus publication featuring a myriad of army lists for specific periods


Scale

Each unit represents hundreds of men. Specifically heavy infantry is made up of 600-1200 troops, light Infantry and most cavalry units are made up of 400-800 men, while skirmishers / light cavalry units symbolize 200-300 men. Basing for all figure scales are included in the rules. Since I have units at 15mm scale, each unit has a frontage of 8 cm and adjustable depth based on the type of unit.  As an example, an Anglo-Saxon unit of fyrd (heavy infantry) consists of 12 figures on 2 bases equaling 8cm of frontage and 2.5 cm of depth.


A typical unit of infantry


Units have point values and Impetus armies typically consist of 100, 300, or 500 points (for competition purposes -- I am primarily a scenario gamer).

Ground scale is based on a standard distance called "U," which equals 6-7 meters in real-life distance. For example, "U" for 25mm equals 2 cm on the table, while "U" equals 1 cm for 15mm scale figures.

Each turn simulates approximately 15-20 minutes of time.

Unit ratings

A unit is classified by type (for example heavy infantry, missile troops, light cavalry) and contains several statistics:  movement allowance, VBU (Basic Unit Value) which is a composite rating of typical unit strength and combat/fire capability, and an Impetus rating (dice added to the VBU when charging). Discipline Rating and Demoralization Value (VD -- units that have routed compare their VD to the army total VD to determine victory or defeat) are also present.


For example, the heavy infantry unit above may have the following statistics:

Move = 5U, VBU= 4, Impetus=4, Discipline=C, VD=3, Point value=12, Impetuous


In another example, the Light cavalry unit above has the following statistics:

Move=12U, VBU=3, Impetus=1, Discipline=B, VD=3, Point value=21, Short bow B


Turn Sequence

1. The first step is to decide Initiative, which is very different than most rules. An Impetus army consists of 1-4 commands consisting of multiple units each. To decide Initiative, each player designates one of their commands, adds any leadership bonus, and rolls 2d6. The command with the higher score moves.

2. The command with the initiative activates one unit at a time, either rallying off disorder, placed on opportunity (unit can react to the enemy), moved, fired, or charged into melee.

3. After all units complete their actions, the opposing commanders designate 2 more commands and roll for initiative again.

4. When all commands have been activated (on both sides), the turn is over and the next turn begins.


Command and Control

One of the biggest differences between Basic Impetus and Impetus, command and control is one of the primary aspects of the full rules system. Each army list contains a Command Structure (CS) rating of good, average, or poor. This command structure has a specific range in "U," which is the range that dictates a commander's bonus for rallying from disorder or a negative modifier (if outside this range) for discipline tests.

Each commander has a rating from Charismatic to Cowardly that also dictates how many rallying attempts can be conducted as well as the dice bonus for Initiative rolls.


Moving and Discipline Tests

Moving units, as opposed to rules like Hail Caesar, is pretty restricted. An oblique move or movement to the rear will result in disorder unless the troops are considered light. Multiple moves require a passed discipline test or disorder results. Broken or Difficult ground severely restricts movement as well.

The bottom line is that lighter infantry or cavalry are more flexible in movement, while more disciplined troops and a higher command structure are easier to move around the battlefield. This sounds pretty realistic to me. There is an additional rating for typically barbarian troops, called "Impetuous." Impetuous troops must advance within 30U of the enemy.....imagine hundreds of hairy Germans just itching to charge into those implacable Roman legionaries.

Disorder must be avoided as much as possible. Disorder affects movement, firing, combat-- pretty much everything in the game.

Although "free and easy" movement in other rules systems are fun and quicker to play, I have to say that the restrictive movement in Impetus adds flavor and a strategic subtlety to the game, but is not so complex that it is overwhelming.  As an admirer of realism in miniatures rules, I prefer this approach.


Impetus is especially popular as a tournament game


Opportunity

Placing a unit on opportunity allows the unit to react to the enemy in future phases. The unit on opportunity may fire, opportunity charge, or countercharge. Units within 5"U" of an enemy unit may also react without being placed on opportunity. This is a great way for the non-activated side to remain engaged and turn the game away from a strictly IGO-UGO system.

I need to spend a bit more time with the opportunity rules -- I find that this is one of the more complex concepts within the system.

Firing

Firing also makes up a major part of the system. Typically, lighter troops or skirmishers conduct firing (with the exception of a few heavy infantry units, most notably the Roman pila). Firing can cause disorder or actual casualties.

Firing is range and weapon dependent. Bonus dice are added to the VBU and rolled for hits. As in combat, 6's and double 5's result in hits. The number of hits are then rolled against the critical number (VBU rating plus or minus other modifiers) to determine actual casualties.

Firing can be damaging but is typically not as decisive as combat.

Charging and Combat

Units that charge receive a charge distance bonus (1d6 for cavalry, 1d6/2 for infantry). Only units with an Impetus rating of at least 1 may charge (most skirmishers for example have a rating of 0 and therefore cannot charge).

Charged units may attempt to countercharge or, if skirmishers or light cavalry, may evade. Charging units add their VBU and their Impetus rating to determine the number of combat dice to throw. Again, like firing, 6's and double 5's equal hits, and actual casualties are determined in the same way of rolling hits against the modified VBU.

A defeated unit must retreat (rolled dice) a certain distance. If the defeated unit's VBU reaches 0, then it is considered routed and removed from the battlefield.

Period-flavor rules

To add to the realism of the system, there are several special rules for specific armies. For example, the Roman practice of throwing pila either before charging or receiving a charge is covered. Another example is the Shieldwall rule for the Dark Ages. A unit forming a shield wall is restricted in its movement, but if receiving a charge cancels out the Impetus rating dice of the enemy.

Other rules like forming large units, scythed chariots, long spears, and pikes are contained in the rules. This adds considerable period flavor to the system.


Final thoughts

After only about a half-dozen games, I have found Impetus to be a very smooth playing game, but one loaded with subtlety and tactical challenge. After searching through various forum entries and other reviews, the prevailing wisdom is that it takes about 50 games to fully appreciate the "elegance" of the system. I don't know about that, but I can tell you that the more I play it, the more I'm hooked on it.

As for the jewels of the system, I think the command and control and discipline rules are the strengths of Impetus. VBU and the Impetus ratings truly demonstrate differences between different types of troops in an easy to understand format.

I have seen criticism of the system's portrayal of missile fire, which on the surface seems extremely detailed, versus that of combat, which seems simplified. I typically don't have an issue with this, as there is a great variety of missile weapons and artillery that were very range-dependent. When it comes to close combat, a sword kills as easily as a spear. I'm ok with this.

The addition of special rules (detailed above) provide the necessary historic flavor to a period that spans such a great period of years.

Although Hail Caesar, for example, looks great on the table, Impetus requires a smaller number of figures to field an army. It is therefore less expensive to field full armies for any game.

So, in summary, I feel that Impetus is a challenging, yet not overly complex, game that should satisfy any serious gamer. It firmly resides in the spectrum between DBA and rules like Hail Caesar. I'm hooked.....and I'm looking forward to posting more AAR's for Impetus games in the future.


Sunday, January 15, 2017

Napoleonic Portuguese Troops

Portugal was an important economic and military ally of Great Britain before and during the Napoleonic Wars. Militarily, the Portuguese combined with British forces right after the French occupation of Lisbon in 1808.  Suffering from poor morale and training in the early years, British officers (most notably Marshal Beresford) whipped the Portuguese into very solid troops over the years. The Portuguese almost always fought alongside their British allies during the Peninsular War and, by the end of the conflict, were regarded very highly by friend and foe alike.


Portuguese Dragoon brigade


Portuguese Artillery


1st Portuguese Infantry Brigade


2nd Portuguese Infantry Brigade


Portuguese formed Cacadores and skirmishers


Sunday, January 1, 2017

Napoleonic British Troops

The British during the Napoleonic Wars were the Emperor's most consistent opponent, either through the funding of the continental powers or by the power of the Royal Navy, if not always in land combat.

During the Peninsular War, the British under Arthur Wellesley landed in Portugal in 1808 and never left the continent until the Emperor Napoleon's eventual abdication in 1814. During the Hundred Days campaign of 1815, British troops fought alongside Prussians, Brunswickers, Nassauers, Hanoverians, Dutch and Belgians in order to defeat the French at Waterloo.

Either in Spain or in Belgium, British armies were small yet very professional. The British almost always had to be supported by allies in order to counter the larger French armies. But in the end, the British infantry and cavalry had earned the reputation of being among the most effective troops in the Napoleonic wars.


British Artillery


British Hussars


British Light Dragoons


British Dragoons


British 1st Infantry Brigade


British 2nd Infantry Brigade


British 3rd Infantry Brigade


British 4th Infantry Brigade


British 5th Infantry Brigade


British 6th Infantry Brigade


British Light Infantry Skirmishers and Riflemen


British leaders


Sunday, December 25, 2016

Auerstadt,1806 using Carnage and Glory 2

The Battle of Auerstadt

Gathering in beautiful Roanoke, Virginia for the last big game of the year, this past weekend turned out to be one of our most impressive and bloodiest fights to date. Doug Kline of Battlefield Terrain Concepts provided the terrain, figures, and German beer. Doug has been researching this landmark battle for over a year, while simultaneously gathering the entire orders of battle for both sides. He fielded approximately 75,000 troops at a 33:1 scale on some of the most magnificent terrain that we have ever had the pleasure of playing on. That's approximately 2,275 of finely painted figures folks ! As always, we used the Carnage and Glory 2 computer-moderated rules. The experience was tremendous; what a way to end the year.


The gang......ready to do battle !


The Scenario

After the victory against the Austrians and Russians in 1805,  the Emperor Napoleon and France were faced with a new coalition, with Prussia as the major belligerent. So setting its sights on the destruction of the Prussian army, the Grande Armee under Napoleon moved in a lightning strike against their totally unprepared enemy, who had advanced into Saxony. After a skirmish on October 9th at Schleiz, the day after saw Marshal Lannes' corps destroying a Prussian division under Prince Louis Ferdinand at Saalfield. The stage was set for the major battle against the main Prussian army that Napoleon was looking for.

On October 14th, 1806, the Emperor Napoleon led the bulk of the Grande Armee against what he assumed was the main Prussian army at Jena. It turned out to be only a contingent of the Prussians and they were duly crushed. Meanwhile, north of Jena in the vicinity of Auerstadt, Marshal Davout's lone corps tangled with the primary Prussian force under the Duke of Brunswick and von Schmettau. The Prussian King William was also present for the fight. Although outnumbered almost 2 to 1, Davout's  III Corps decisively defeated the Prussians in one of the most famous of all Napoleonic battles.

In the historical battle. Napoleon intended for Marshal Bernadotte to march with Davout, but either through miscommunication or outright insubordination, Bernadotte ended up marching between the battles and failing to take part in either Jena or Auerstadt.

The battlefield of Auerstadt was located in hilly terrain west of the Saale river. The central position was dominated by the village of Hassenhausen. The road to the town of Auerstadt continued on through the villages of Tauchwitz and Poppel.


Map of the battle


In the early morning of October 14th, Gudin's division was on the move in the fog at 4 am towards Hassenhausen. French chasseurs scouting ahead came into contact with Prussian cavalry at the village of Poppel around 7 am. The French cavalry fell back to Hassenhausen and Gudin deployed into squares. As the fog lifted , Gudin saw that his division faced up to ten squadrons of Prussian cavalry under Blucher on his flank. At this point, our tabletop battle began, as Gudin faced the rest of the advancing Prussian army.

Historically, Friant's infantry division of III Corps arrived to support Gudin's right flank, advancing in square formations to push Blucher's cavalry. The rest of the corps cavalry arrived and later in the day, Morand's division arrived on Gudin's left. The French not only held their ground against superior odds, but commenced to go on the attack. As Davout launched his assault, the Prussians melted. The battle was a disaster for the Prussians, as they lost approximately 15,000 troops while Davout lost approximately 6,850. The Prussians also lost the venerable Duke of Brunswick, as well as several other key officers.

Our scenario began with Gudin's French division deployed around Hassenhausen. Blucher's Prussian cavalry was deployed facing Gudin's right flank and von Schmettau's division was deployed and advancing from the vicinity of Poppel and Tauchwitz.

Various victory points were also designated for terrain features, which would help to determine the final victory resolution. The game was slated for 20 turns (we ended at 16 turns).


The Game

The game opened with General de Division Gudin's infantry division deployed around the village of Hassenhausen in the center of the table. Opposing the right flank of the French was a large force of cavalry under Blucher, located in front of Spielberg. Most of Gudin's battalions were formed in square formation on his right, while his left were held by 2 battalions of the 85th Ligne. In the distance, Prussian infantry and cavalry were advancing from the direction of Auerstadt in force.


Blucher's cavalry threaten Gudin's right as Prussian infantry and cavalry advance in the center


Gudin's left flank seemed very vulnerable


The first several turns saw Blucher's cavalry attempting to engage the French infantry squares (with little success - although 2 squadrons of the Bunting Kurassier did destroy a small French battery of two 4 pounders), with the Queen's Dragoons attempting to flow around the right flank of the French. This forced the French to activate his own light cavalry, the 1st Chasseurs a Cheval, to counter this move. The French cavalry threw the Prussians back. Prussian artillery began to punish the tightly packed French in squares while von Schmettau's division continued its advance onto the French center. On the French left, von Wartensleben's division rapidly advanced in maneuver columns towards the 85th Ligne. The cavalry advanced so rapidly that the 2 French battalions on the left flank had to double back in open order to a more secure position (one battalion of the 85th moving into the village of Hassenhausen, the other battalion attempting to take advantage of a sunken road for cover).


Gudin's division in the center


 von Schmettau's division on the move !


On Turn 3, General de Division Friant's force arrived on Gudin's right and immediately formed the 33rd Ligne to advance in squares, which pushed Blucher's cavalry away from the French right flank. In the center, French skirmishers put very disruptive fire on a Prussian battery that moved a bit too close for comfort. French light cavalry under General de Brigade Viallanes arrived with Friant's force but were diverted to the left flank to counter the rapidly advancing Prussian cavalry.


Nice shot of von Schmettau's infantry advancing


The 85th Ligne falls back in open order on the left flank


Gudin and von Schmettau are fully engaged in the center around Hassenhausen


French Chasseurs drive back Prussian Dragoons as the infantry in squares continue to take a pounding. Notice the regimental square formed by two battalions of the 25th and 21st Ligne


At this point in the battle, the Prussians engage and pound Gudin's division around Hassenhausen, while Prussian cavalry and artillery continue to build up on the French left. Cavalry then engage each other on the French left with neither side overcoming the other. With more Prussians arriving all over the field, the fatigue that is setting in on the French is starting to become a real concern.


Prussians and French infantry fight over Hassenhausen. This savage fight would continue throughout the entire game, with the French barely hanging onto the village


The fight over Hassenhausen was just starting, but would continue until the end of the battle. Although stretched to their limits and considerably bloodied, the French infantry would continue to hold out in this important victory objective. The next several turns would see more and more chaos on the French left, with Morand's division arriving on Turn 7 to bolster the fatigued French cavalry. More and more Prussian troops continued to arrive on the left flank and in front of Hassenhausen. On the French right and center, the Prince of Orange's division was advancing admirably. The beleaguered French infantry of Gudin's division were being stretched across the table; this fresh Prussian infantry was not a welcome sight (although the troops looked handsome marching in maneuver columns).


Chaos erupts on the French left !


Magnificent troops of the Prince of Orange's division march against the fatigued French


At this point, the battle turned into a slow grind, with the Prussians steadily wearing down their French opponents. With a Prussian battery wreaking havoc on Friant's infantry on the right flank, the French attempted to charge and eliminate it. Failing in the face of ferocious canister fire, the 2/33rd Ligne was then charged by Prussian cavalry and decimated. The battery had to withdraw due to fatigue, but the French had to reorganize their defense on this flank with one less battalion. In the center, the 2/1st Chasseurs charged Prussian infantry and overran it, but ended up isolating itself in front of multiple Prussian cavalry units. One after another, the French Chasseurs charged and countercharged Prussian cavalry and ended up winning 3 melees before finally succumbing to fatigue. Another lucky charge by the 1/21st Ligne overran 2 Prussian infantry battalions and an unlucky artillery battery that deployed at the last minute. But the grind continued and the Prussians were gaining ground inch by inch. As a matter of satisfaction for Marshal Davout, the 2/1st Chasseurs would end up winning honors by the end of the game.

Also, by this point, the Prussians had occupied two terrain points for Victory conditions, Hill 266 on the French left flank and Spielberg on the right. The French were holding their own on all fronts, but the possibility of an offensive move was looking more and more dim. The Prussians were winning this battle.


The 2/21st Ligne charging !


The Prussians continuing to advance on the French right -- the Lieb Karabiniers look especially striking


The Prince of Orange continues to advance on the French center and right flank


With the withdrawal of the exhausted 2/1st Chasseurs, Prussian cavalry advance against a French 12 pounder battery, with nasty results -- the battery held its ground......for now


At this point, Prussian infantry and French infantry were fully engaged in the center and both flanks. On the right, the Prussians succeeded in stepping up and blowing holes in the French ranks, with the French infantry obliging as well. Although the French were holding due to an overall morale superiority, the Prussian infantry was incredibly damaging (with fresh Prussians advancing in support). The French confidence was beginning to waver....


Prussian and French infantry trade murderous fire in the center and on the French right flank


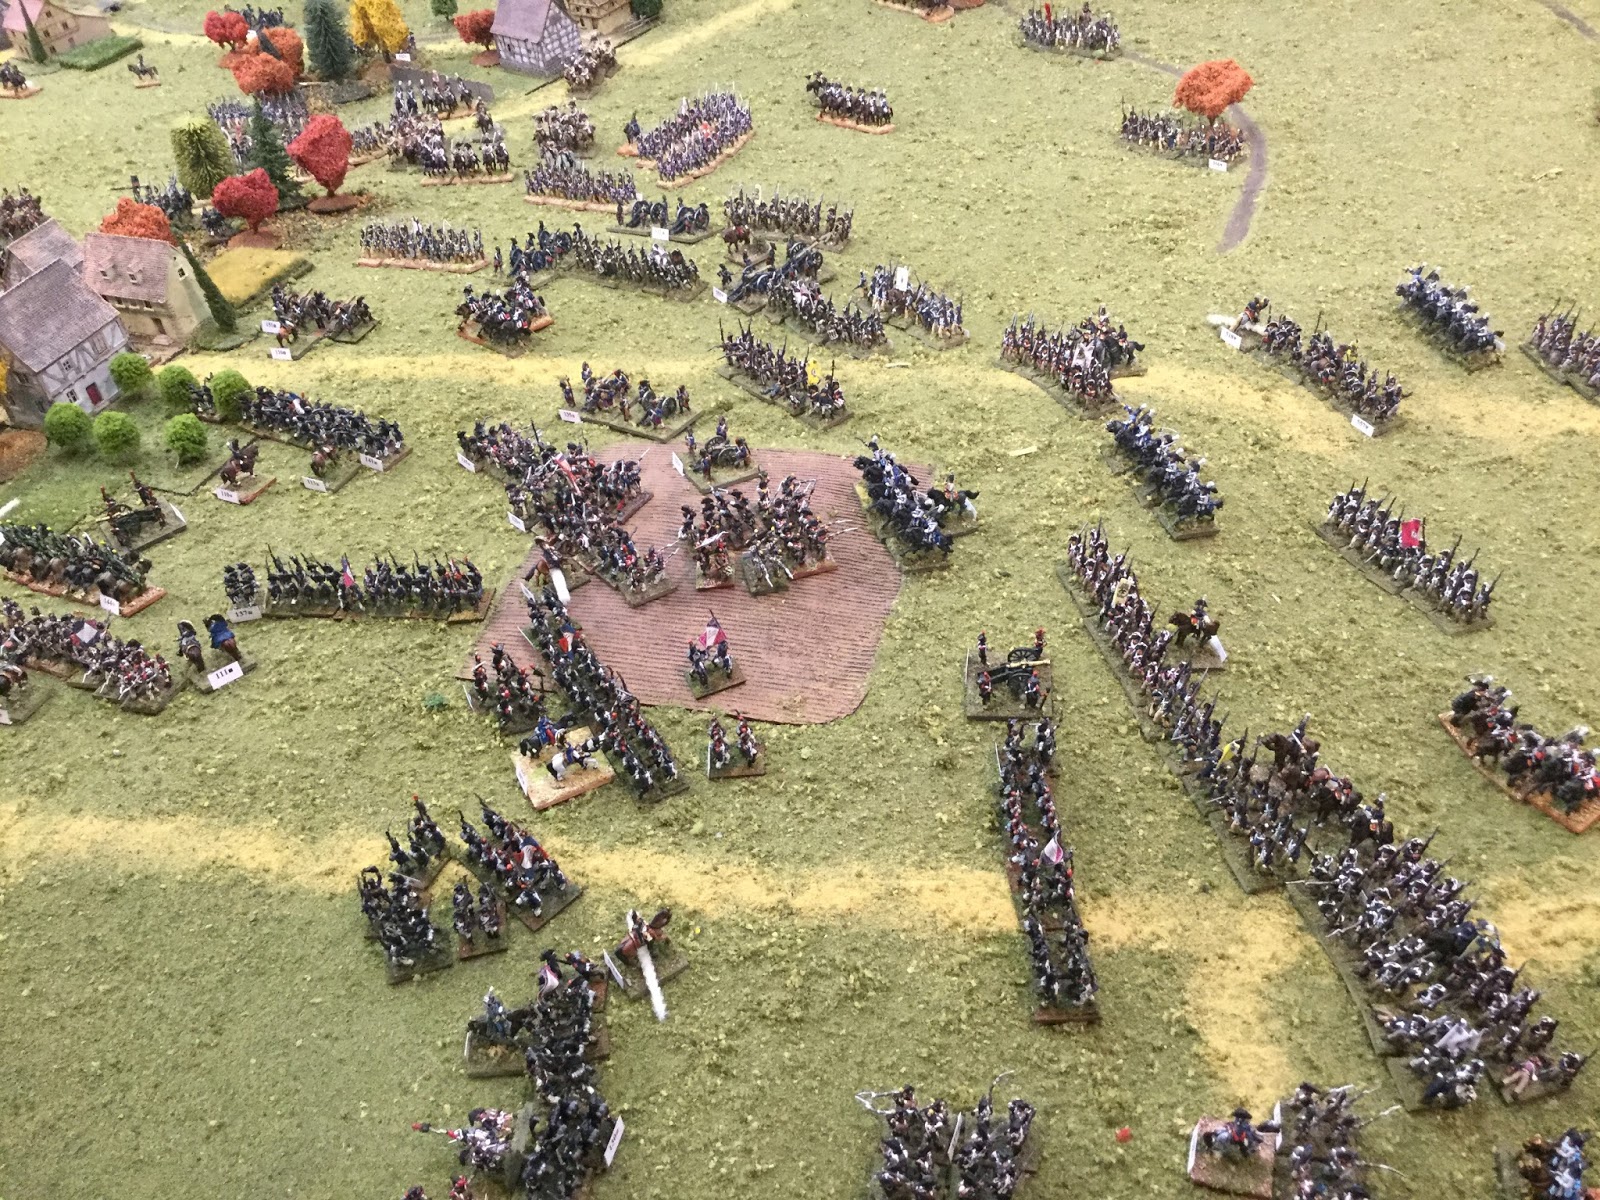
Across the entire field, the action was total chaos. Both sides charged, countercharged, and traded vicious fire. This was some of the bloodiest fighting that we have ever simulated on the tabletop. By turn 16, we had gamed for over 18 hours over 2 days. At this point, with even more Prussian reinforcements arriving, the French were close to their breaking point. We called the game at that point, due to the impossibility of the French to mount a proper counterattack and recapture the important terrain features for victory point purposes.


More chaos in the center


....and more chaos on the French left


Panoramic view of the table at the end of battle


The game was one of the finest gaming experiences that we have ever had. Although Davout's III Corps was an incredible war machine with very high ratings, the continuous advance of a seemingly unstoppable flow of Prussians rendered it exhausted by the end of the game. Although 4 more turns remained in the formal game, it was obvious what the end result would be. When adding in the Victory points for the captured terrain features, the game ended as a Major Prussian victory, although the French admirably fought tooth and nail. Both sides played incredibly well, and it was a fitting end to an awesome weekend. Another outstanding battle using Carnage and Glory 2 was in the books !

Final casualties were 8964 men of all arms for the French, while the Prussians suffered 9537 men of all arms. This was 29% of the total French force but only 20% of the Prussians. The Prussians also controlled a majority of the available victory points for the terrain objectives.