Wednesday, September 27, 2017

Neresheim, 1796

A couple of weekends ago, we gathered in Roanoke, Virginia to fight out a small "what-if" engagement pitting French versus Austrians and Saxons in 1796 Germany. The rules used were the Carnage and Glory 2 computer-moderated system. The games also gave us a chance to utilize the recent updates for the rules system, most notably the "extended line" formation instead of "open order."


Imperial forces advance against French infantry in 1796 Germany


We ended up playing 2 games over the weekend. The after action report and pictures are featured for the second game. It was an interesting and very challenging scenario for the French (who were on the defense), who had to make some critical decisions on deployment in the face of a strong Austrian advance. The outstanding miniatures and superb terrain were provided by Doug Kline of Battlefield Terrain Concepts, who also provided great hospitality, meals, good German beer and schnapps.

Doug also initiated the historical research and developed the scenario.

To summarize the games, they served as great learning experiences in deploying properly and having a plan based on the defense of objectives. In other words, the French got their heads handed to them in both games because decisions were made to hold too much ground (and victory point objectives) with their meager initial forces. I always approach a wargame with the objective to learn just a bit more about strategy and tactics. I really enjoyed the gaming atmosphere and experience....unfortunately I played the French in both games.

The Scenario

The scenario pitted the Archduke Charles' Austrian and Saxon force against a French wing under General de Division Dessaix (of later Marengo fame). Charles' object was to catch one of Dessaix' isolated divisions and batter it before reinforcements could arrive. Both sides contained slightly over 19,000 troops of all arms, but roughly half of the French wing was due to arrive on the battlefield rather late. Reinforcements were rolled for, with one Imperial column beginning to roll on Turn 1, the rest of the Imperials to begin rolling on Turn 6, and the French to begin rolling on Turn 7. To enhance fog of war, both players had to secretly plan where their reinforcements would arrive onto the table. As the picture below demonstrates, the victory points for the various villages or bridges were keys to a geographic victory at the end of the game. The French were allowed to deploy on the majority of the table, but were very thin at the start. Some major grand-tactical decisions had to be made due to the uncertainty of the direction of marching Imperial reinforcements. In both games, the French elected to rest their right flank on the area around Iggenhausen, but also attempted to stretch their defensive line all the way to the area around Burg Enlingen, which proved to be too much of an area for one division to defend. The critical bridges at the bottom of the picture would allow Imperial troops  to threaten the French right flank unless they were blocked.

The premise of the game was that the French had to defend an area long enough for their reinforcements to arrive and then hopefully counterattack. The Imperial force's goal was to batter the French early enough so that the French reinforcements could not be used to gain valuable victory points.

Army morale for both sides were set in the system at 75% and the weather was clear at the start.


The battlefield, with initial deployment areas and victory points marked.


The Game

With the French division under Beaupuy stretched from Burg Enlingen to Iggenhausen, the first large Austrian column consisting of brigades Giulay and Baillet marched towards the French left flank arriving on road 1 near Hoffen. This force under Generalleutnant Starray consisted of 13 units and was very mobile, with the bulk of the force consisting of grenzers and hussars. Immediately the French decided to refuse this flank by occupying the woods next to Burg Enlingen, and advancing to the castle ruins in this area. Unfortunately, this move only served to isolate units further in the face of the rapidly advancing Austrians. The French cavalry, which was placed in reserve in the center, also began to move to this threatened flank. 


Imperial forces marching through Hoffen towards the French left flank


Initial French deployment area

On the French right flank, the area in front of Iggenhausen was empty. The French decided to take the initiative and advance to the bridges and the village of Dunstelkingen in order to cut off or slow down any Imperial troops arriving in this sector. Although this stretched the French even further, the importance of the bridges and Dunstelkingen was obvious to any approaching Imperials.


 Absent any threat at this time, French troops advance from Iggenhausen to occupy Dunstelkingen and block the bridges in this sector.


In subsequent turns, the Austrians wasted no time in occupying the heights above Burg Enlingen with a strong battery, supported by cavalry, and pounding the isolated French infantry occupying the castle ruins. French cavalry arriving to bolster the left flank found themselves under horrific artillery fire and were forced to retire. The French legere occupying the castle ruins also took devastating losses before being thrown out by a battalion of the Austrian 1/Pelegrino infantry regiment. In the blink of an eye, the French left flank was crumbling and the defending units were crushed and retreating. The French 3/10th Legere was demolished, having to retreat from the castle ruins and then being scooped up by supporting cavalry (this battalion lost 709 out of 734...ouch). At this early point in the battle, the French abandoned all hope of regaining the initiative in the Carnage and Glory 2 program, a very important part of the game which allows one side to move first or to react to the opposing side. 


Austrians driving in the French left flank


The French 1/10th Legere suffering horrible losses from Imperial infantry and artillery fire.


The 1/Pelegrino IR occupies the castle ruins

On the right flank, the French continued to advance, occupying the town strongpoint in Dunstelkingen and the woods next to the village. By this time, the Saxon force under Feldmarschall-Leutnant Lindt also marched onto the table in this sector. Due to the aggressive French advance, the movement was slowed dramatically.


Aggressive French advance on the right flank near Dunstelkingen


The Saxons arrive on the tabletop 


Lindt's Saxon infantry advances toward Dunstelingen, while the cavalry races for the bridge


At this point, the Austrian hussars and French  chasseurs collided on the French left flank, with the chasseurs giving way almost immediately. The grenz were moving through the wooded area past the castle ruins as well. The entire French left flank was crushed. One bright spot was that the 1/10th legere formed extended order in the woods on the extreme left and forced the Austrian infantry to deal with it.  On the right flank, the French occupied the woods next to Dunstelkingen, while Saxon cavalry raced to get over the bridge in order to threaten the French right flank and rear. The French countered by advancing the last remaining cavalry unit and a line battalion to guard the crossing. 


French infantry infests the woods around Dunstelkingen, while chasseurs attempt to advance over the bridge


French chasseurs retreat back over the bridge in the face of superior numbers of Saxon cavalry

Austrian reinforcements then arrived in the center of the field, as Kaim's grenadier brigade, supported by Canisus' dragoons marched toward the primary objective of  Iggenhausen. 


Austrian reinforcements arrive in the center


On the French left flank, matters were continuing to deteriorate, as the 2/10th legere attempted to form square when threatened by Austrian cavalry to protect what was left of the flank, opening itself up to fire from the grenz infantry emerging from the woods. Austrian line infantry was  threatening the square as well.


The "new" French left flank, with the 2/10th legere forming square in the face of Austrian cavalry


It was turn 8 by this time (the French having failed their first reinforcement roll) and the Austrians were advancing at will on the French left flank and the center. The Saxons on the right were bogged down in front of Dunstelkingen and the woods, but with the French forces pinned in this area, there were only two battalions left to defend Iggenhausen from the advancing grenadiers. Austrian cavalry was exhausted by this time, but were facing a wide-open French left flank and rear. Canusis' dragoons were already moving to the left of Iggenhausen to fill the void. To make matters worse, the 2/10th legere had already retreated in substantial disorder and was halted in square. 


Saxon infantry bogged down in front of Dunstelkingen


The decision was made to bring the French reinforcements onto the table prematurely to this disastrous situation. Delmas' division was marched onto the table, with fresh cavalry threatening the blown Austrian hussars, who were in turn menacing the French rear. 

The situation on the French right sees the Saxons making headway through the woods and over the bridge. The Weimar Jagers formed extended order and began throttling the French infantry formed up in the woods. The greencoats inflicted terrible losses. The French infantry was slowly being forced back, while the Saxon cavalry maneuvered across the bridge and sent the chasseurs flying. 


Saxons advancing on the French right flank


....and Saxons pushing the French on the right flank

In the center, the French occupied the strong point in Iggenhausen, while the Austrian grenadiers continued to advance on the town. 


Austrian grenadiers begin to push into Iggenhausen


Arriving French cavalry attempting to save the day


By this point, the French had already been attempting to refuse the right flank and form up next to Iggenhausen in the face of the Austrian onslaught into the French center. On the left flank, Austrian dragoons began pouring into the area next to Iggenhausen to face off with the arriving French cavalry. The combat here was touch and go, but the Austrians began to come out on top. 


The Austrian assault into Iggenhausen


A
Austrian dragoons pour into the void against French cavalry


With a final push, the Austrian grenadiers took Iggenhausen, with the exception of the town strongpoint. The French infantry ended up retreating due to a compulsory brigade movement, leaving the town undefended. The French infantry on the right was beginning to fall back in disorder, while the chasseurs were defeated by the Austrian dragoons. General de Division Dessaix was mortally wounded as the 2/10th legere was destroyed by Austrian cavalry. Dessaix would not go on to historical fame at the field of Marengo, 1800.


The game was called at this point and declared a Major Imperial victory. The French were reeling at all points. Although the French right flank proved to be stubborn in its defense, Dessaix' position elsewhere on the field was extremely weak and was ripe for a strong Austrian attack.


It was a disaster for the French, who lost 3096 troops. For the Austrians, their losses were 595. The Archduke Charles reached his goal: to maul Dessaix and send his command reeling back in order to delay any offensive by Moreau.

In the discussion following the game, we noted how powerful the extended line formation was for units defending woods, which seemed to mirror historical results well. The only issue we found was that the units in extended line never seemed to fatigue. We also talked about how important the initial deployment was in this game. If the French deployed too thinly, the result was a disaster; a lesson well learned. As always, the Carnage and Glory 2 system simulated this action extremely well. Also, the scenario proved to be challenging, yet very well thought-out. Even with the lop-sided results, a great time was had by all !


The After-action orders of battle are included below:


Corps Dessaix

[ 101] General de Division Dessaix - Mortally wounded B+ [1400 paces]

  Division Beaupuy - Attack

  [ 102] General de Division Beaupuy - Active B+ [950 paces]

    [W]  [ 101] 1/4th Artillery a Cheval          0/ 100 [ 4] C        ( 3)

            [ 102] 1/2nd Artillery a Pied            0/ 150 [ 4] C        ( 4)

    Brigade Jobat - Attack

    [ 103] General de Brigade Jobat - Active C [350 paces]

            [ 103] 1/10 Legere                      12/ 722      C+ [sk+] ( 5)

    [D]   [ 104] 2/10 Legere                     703/  31      C  [sk+]    

    [D]   [ 105] 3/10 Legere                     709/  25      C  [sk+]    

    Regiment Jeanat - Attack [Retire]

    [ 104] Colonel Jeanat - Active C [175 paces]

[ 104] Colonel Jeanat - Active C [175 paces]

    [R]   [ 106] 1/10 Ligne                      177/ 623      C  [sk+]    

            [ 107] 2/10 Ligne                        0/ 800      C- [sk+] ( 6)

    [D]   [ 108] 3/10 Ligne                      800/   0      C- [sk+]    

    Regiment Carartin - Attack [Retire]

    [ 105] Colonel Carartin - Active B+ [250 paces]

            [ 109] 1/62 Ligne                      156/ 678      C  [sk+] ( 2)

    [R]   [ 110] 2/62 Ligne                      320/ 513      C- [sk+]    

    [D]   [ 111] 3/62 Ligne                      272/ 561      C- [sk+]    

    Regiment Marbote - Attack [No Advance]

    [ 106] Colonel Marbote - Active B+ [250 paces]

            [ 112] 1/103 Ligne                     118/ 770      C  [sk+] ( 7)

            [ 113] 2/103 Ligne                      28/ 860      C- [sk+] ( 1)

[ 114] 3/103 Ligne                      62/ 826      C- [sk+] ( 4)

    Brigade Ste. Suzanne - Disengaged

    [ 107] General de Brigade Ste. Suzanne - Lightly wounded B+ [500 paces]

    [D]   [ 115] 6th Dragoon                     108/ 242      C- [sk+]    

    [D]   [ 116] 4th Chasseur a Cheval            93/ 177      C- [sk+]    

    [D]   [ 117] 1/8th Chasseur a Cheval          87/ 171      C- [sk+]    

    [D]   [ 118] 2/8th Chasseur a Cheval          19/ 239      C- [sk+]    


  Division Delmas - Attack

  [ 108] General de Division Delmas - Active B+ [950 paces]

            [ 128] 2/4th Artillerie a Cheval         7/ 143 [ 6] C        ( 2)

            [ 129] 2/2nd Artillerie a Pied           0/ 150 [ 6] C           

    Brigade Eckmeier - Attack

[ 109] General de Brigade Eckmeier - Active B- [400 paces]

            [ 119] 1/16 Legere                       0/ 794      C+ [sk+]    

            [ 120] 2/16 Legere                       0/ 793      C  [sk+]    

            [ 121] 3/16 Legere                       0/ 793      C  [sk+]    

    Regiment Lancia - Attack

    [ 110] Colonel Lancia - Active D+ [150 paces]

            [ 122] 1/50 Ligne                        0/ 840      C  [sk+]    

            [ 123] 2/50 Ligne                       96/ 744      C- [sk+] ( 2)

            [ 124] 3/50 Ligne                       48/ 792      C- [sk+] ( 2)

    Regiment Repiear - Attack

    [ 111] Colonel Repiear - Active B [250 paces]

    [W]  [ 125] 1/97 Ligne                       34/ 780      C  [sk+]    

            [ 126] 2/97 Ligne                        0/ 813      C- [sk+]  


[ 127] 3/97 Ligne                        0/ 813      C- [sk+]    


    Brigade Frimont - Attack [Retire]


    [ 112] General de Brigade Frimont - Active B+ [500 paces]


            [ 130] 10th Dragoons                     0/ 340      C- [sk+] ( 6)


            [ 131] 17th Dragoons                    14/ 306      C- [sk+] (10)


    [D]   [ 132] 7th Hussars                      29/ 251      C+ [sk+]    


            Strengths:
                        losses/active
                          3535/ 13571  Bayonets
                           350/  1726    Sabres
                             7/   543       Artillerists
                             2/    20        Cannon
                          3892/ 15840    Total of all arms
                                   22         Colors present
                                    2          Colors lost

 Generalissimus Archduke Charles - Active B [1300 paces]

  Division Starray - Attack
  [ 502] Generalleutnant Starray - Active B- [800 paces]

    Brigade Giulay - Attack
    [ 503] Generalmajor Giulay - Active C [400 paces]

            [ 501] 1/Bannat Grenz                   35/ 705 [ 1] C- [sk+] ( 4)

[ 502] 2/Bannat Grenz                   15/ 725 [ 1] C- [sk+] ( 2)

            [ 503] 1st Horse Artillery               0/ 100 [ 4] C-       ( 4)

            [ 504] 1/Szekler Hussars                 9/ 261      C  [sk+] (10)

            [ 505] 2/Szekler Hussars                42/ 168      C  [sk+] ( 6)

            [ 506] 3/Szekler Hussars                 4/ 206      C  [sk+] (10)

    [W]  [ 507] 4/Szekler Hussars                11/ 199      C  [sk+] (18)

    Brigade Baillet - Attack

    [ 504] Generalmajor Baillet - Active B [450 paces]

            [ 508] 1/Wenckheim IR                    0/ 825 [ 1] C-          

            [ 509] 1/D'Alton IR                      0/ 600 [ 1] C           

    [R]   [ 510] 2/D'Alton IR                     67/ 533      C           

    [W]  [ 511] 1/Pelegrino IR                  148/ 727 [ 1] C-       ( 9)

            [ 512] 2/Pelegrino IR                   91/ 784      C-       ( 8)

[ 513] 1st Brigade Battery               0/ 150 [ 6] C-       ( 6)

    Brigade Kaim - Attack
    [ 505] Generalmajor Kaim - Active B- [500 paces]

            [ 514] 2nd Brigade Battery              10/ 140 [ 6] C-       ( 2)

    [W]  [ 515] Abfaltern Grenadiers             86/ 614 [ 1] C+       ( 1)

            [ 516] Candian Grenadiers                0/ 680 [ 1] C+ 
         
            [ 517] Retz Grenadiers                   0/ 690 [ 1] C+ 
         
            [ 518] Reisinger Grenadiers              0/ 675 [ 1] C+
          
    [W]  [ 519] Waren Grenadiers                 79/ 621 [ 1] C+       ( 1)

    Brigade Canisus - Attack
    [ 506] Generalmajor Canisus - Active C [400 paces]

            [ 520] 1/Empress Dragoons                6/ 254      C- [sk+] ( 5)

            [ 521] 2/Empress Dragoons                1/ 259      C- [sk+] ( 6)

[ 522] 3/Empress Dragoons                0/ 260      C- [sk+]   
 
            [ 523] 1/Herzog Johan Dragoons           0/ 260      C- [sk+]    

    [W]  [ 524] 2/Herzog Johan Dragoons          62/ 198      C- [sk+] ( 4)

            [ 525] 3/Herzog Johan Dragoons           0/ 260      C- [sk+]    

  Division Lindt - Attack
  [ 507] Feldmarschall-Leutnant Lindt - Active B [875 paces]

    Brigade Zeschwitz - Attack
    [ 508] Generalmajor Zeschwitz - Active B [450 paces]

            [ 526] 1/Carabiniers                     0/ 260      C  [sk+]  
  
            [ 527] 2/Carabiniers                     4/ 256      C  [sk+] ( 6)

            [ 528] 3/Carabiniers                     0/ 260      C  [sk+] 
   
            [ 529] 1/Kurland Chevauleger             7/ 193      C- [sk+] (11)

[ 530] 2/Kurland Chevauleger             0/ 200      C- [sk+]   
 
            [ 531] 3/Kurland Chevauleger             7/ 193      C- [sk+] ( 3)

    Brigade Nostitz - Attack [No Advance]
    [ 509] Generalmajor Nostitz - Active B [450 paces]

            [ 532] Brandenstein Grenadiers         114/ 566 [ 1] C+       ( 3)

            [ 533] Kurfust IR                        7/ 678 [ 1] C-       (10)

    [R]   [ 534] Prince Anton IR                 189/ 493      C-  
        
            [ 535] 1/van der Hayde IR              104/ 546 [ 1] C-       ( 1)

            [ 536] 2/van der Hayde IR               65/ 585 [ 1] C-       ( 4)

            [ 537] Setzler Artillery                 0/ 200 [ 8] C-       ( 3)

    Brigade Niesemeuschel - Attack
    [ 510] Generalmajor Niesemeuschel - Active B [450 paces]

            [ 538] Werner Artillery                  0/ 200 [ 8] C-       ( 3)

            [ 539] Prince Gothan IR                  0/ 685 [ 1] C-     
     
            [ 540] Prince Clemons                    0/ 685 [ 1] C-       ( 2)

            [ 541] Glaffay Grenadiers                0/ 685 [ 1] C+
          
            [ 542] Weimar Jaegers                    8/ 572      C+ [sk+]    

            Strengths:
                        losses/active
                          1008/ 13674  Bayonets
                           153/  3687    Sabres
                            10/   790      Artillerists
                             3/    49        Cannon

                          1171/ 18151  Total of all arms
           30         Colors present


The French Army has suffered losses of:
            [ 15%]   3096 men of all arms
   incl.[  9%]   1886 prisoners of all arms

            [ 16%]   2848 bayonets
            [ 11%]    241 sabres
            [  1%]      7 artillerists
                    2 cannon[s] lost
Honors: [ 118] 2/8th Chasseur a Cheval
[ 90%] ammunition available

Losses include 2 Color[s]:
        [ 105] 3/10 Legere [1]
        [ 108] 3/10 Ligne [1]

Losses include 2 General[s]:
        [ 101] Dessaix - Mortally wounded
        [ 107] Ste. Suzanne - Lightly wounded


The Imperial Army has suffered losses of:
            [  3%]    595 men of all arms
   incl.[  0%]    140 prisoners of all arms
[  3%]    539 bayonets
            [  1%]     56 sabres
            [  0%]      0 artillerists
                    3 cannon[s] lost
Honors: [ 507] 4/Szekler Hussars
            [ 91%] ammunition available


Thursday, September 21, 2017

Edington, May 878 A.D. (Part two - The Game)

A Hail Caesar game set in the Dark Ages.


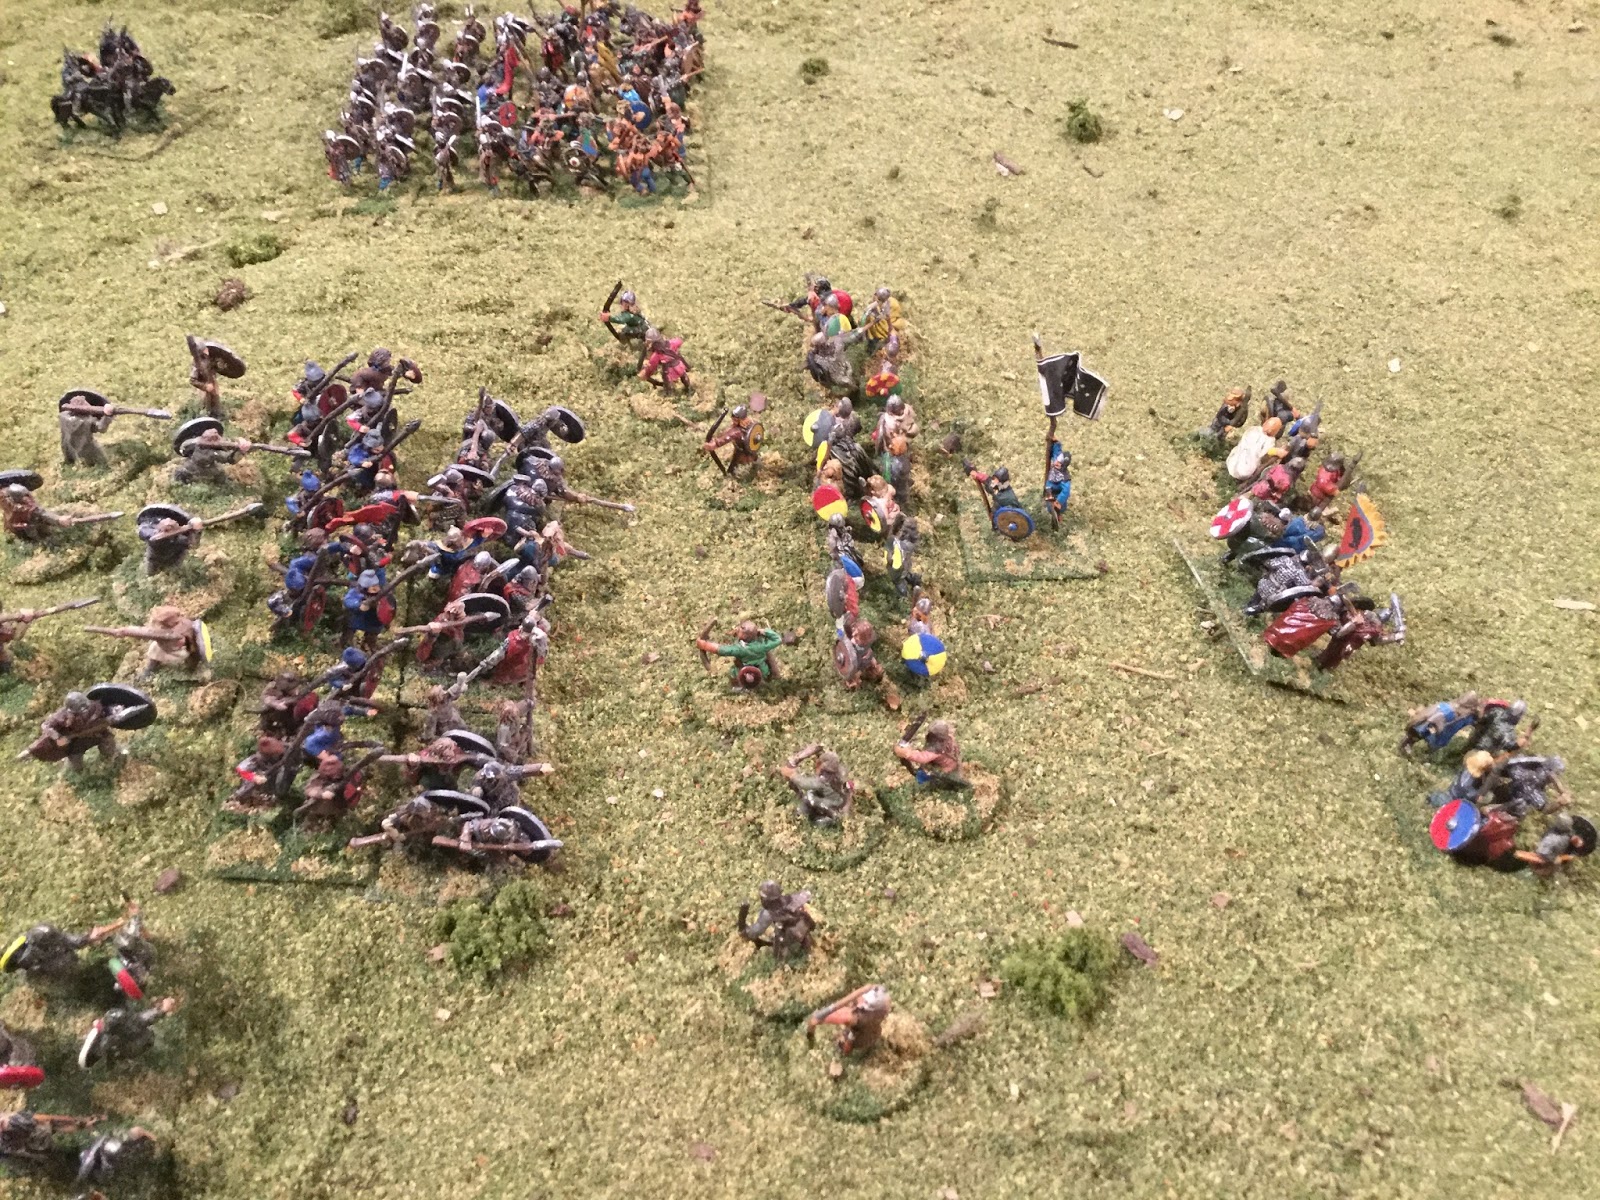
Saxons charge the heights


A battle between Saxon and Viking shield walls was documented as a brutally prolonged fight which could take an exceedingly long time for one side to give way. Meanwhile, men were gouged and maimed between the opposing shields in a bloody manner. In short, there was nothing very subtle or quick about shield wall combat. Two sides literally pounded, pushed, and butted up against each other until one side blinked. Our game was no different. With a couple of house rules added, Hail Caesar proved to be an excellent rules set for simulating Dark Ages combat.

The scenario, special rules, and orders of battle were detailed in part one of this post. You can find it here at:  http://madmacsattic.blogspot.com/2017/09/edington-may-878-ad-part-one-scenario.html

Deployment was relatively simple. The Vikings under Guthrum positioned themselves upon the heights with a wooded area anchoring the Danish left and the steepest part of the heights protecting the right flank (from mounted cavalry at least). The Saxons lined up directly opposite the Danish positions. 

View of the entire battlefield, Danes at the top


Opposing troops line up against each other

Alfred's general battle plan was to advance and attack both flanks and deliver the coup de grace with the center division. Guthrum's goal was to simply repulse the Saxons at every point and then pursue down the hill and beyond. On turn 1, the Saxons slowly advanced across the entire line. The only action saw the Saxon bowmen came under long range fire from Danish skirmishers hiding in the woods; the fire was ineffective at this long range. 

As the Saxons continued to advance, the front line of the Vikings all formed shield wall. Skirmishers on both flanks traded bow fire with little effect. 

On turn three, the front line units in the Saxon left and center divisions form shield walls, while the Saxon right blunders forward in confusion. Danish bowmen on both flanks begin to hit their mark as the Saxon skirmishers begin to take casualties. Turn four sees the Saxons beginning to advance up the heights while javelins fly. Casualties across the line are beginning to appear. One Saxon unit in the center is forced to retire from the missile casualties.


The Saxon center and left closes against the Danish shield walls, while the Saxon right lags just a bit


Another view of the closing of the ranks


An exchange of javelins causes a center unit of Saxons to retire


Turn 5 really saw the action as the Saxons from Hampshire under Dunstan charged up the hill and, as the shield walls clashed, both of the front line Danish units broke immediately and began running for the cover of the fort to the rear. This movement disordered and pushed back the supporting units in this sector. The entire left flank of Oscatel's Danes was in serious trouble from the start. 


The Danish left flank is beginning to crumble in the face of the large Saxon shield walls


The Saxon center and left divisions, seeing the Vikings break on their right flank, exchanged javelins again and then launched their slow, powerful, shield walls up the hill and into the awaiting Vikings. Unlike Oscatel's division, these Danish warriors did not budge and the combat ground into a swirling maelstrom of blood and bone. 


The action across the entire line is furious and brutal


By turn six, the results across the line are mixed. At some points, the Vikings were pushed backwards. At others, the Saxons were forced to retire. Instead of a continuous line of shield wall combat, the combat begins to fragment into isolated fights. Casualties on both sides were mounting and the exhaustion of the warriors was becoming very evident. 


The action begins to fragment into combat between individual units and their supports


Furious combat on the Danish right

By turn seven, the Viking left flank is in serious trouble and just barely holding on, pursued by the Saxon warriors. In this sector, the beleaguered Danish defenders did manage to break one Saxon unit. In the center and Viking right flank, the combats were winding down into grinding matches. The warriors were becoming exhausted. And just like that, the centermost Viking unit (with Guthrum's raven banner no less) broke and ran. 


The Danes begin to break in the center!  The raven banner is retiring !


The Saxons are pushing the Danes into the fortress, while Guthrum's Vikings in the center begin to bend

Turn 8 sees a flurry of action. Oscatel's division completely breaks as the Saxon mounted thegns begin to pursue (although the remaining shield wall stops the cavalry, not without losses though). Both Alfred and Guthrum sense that this is the pivotal point in the battle. Alfred leads a charge up the hill towards Anwend's division on the right and breaks two Danish units immediately. Guthrum attaches himself to the rearmost support unit in the center and launches a counterattack that throws  Orthun's Wiltshire fyrd back in the center. 

Turn 9 sees Guthrum continuing to countercharge, breaking another Saxon unit and forcing back another, but alas, the Viking chief was surrounded by 4 Saxons and speared. Guthrum died a Viking's death as he took out two of the opposing warriors on his way to Valhalla. 

Upon seeing their chief slain, panic begins to overtake the remaining Danes and the entire army begins to run. The game is over. The pagans were defeated and the exhausted Saxons were surveying the blood-red field in triumph. 


King Alfred the Great stands victorious on the field at Edington


Hail Caesar proved to simulate Dark Age warfare well. The shield walls typically held for several turns until finally one of the exhausted units broke. All across the line, it was critically important to use support units wisely and attach leaders for extra attacks when the situation called for it. As per the victory conditions, Guthrum's death counted as a broken division, and with the left flank division broken, the Saxons were victorious. The fight was back and forth for many turns, but by turn seven, it was evident that the Saxons were winning. Guthrum's counterattack put some doubt into that, but his death was the final blow for the Danes. 


Edington, May 878 A.D. (Part one - The Scenario)

A Hail Caesar scenario.

The invasion of the British isles by the Danes and Norwegians is a particular area of interest for me.  There's something about Viking warriors clashing with the Anglo-Saxons, Irish, and Scots that inspire vivid images of a particularly brutal period of history. The emergence of a strong Saxon leader in Alfred, who fought against the Danes and defeated them, is also an inspirational tale of courage and perseverance against a determined foe. The Battle of Edington occurred between the 6th and 12th of May, 878, and was one of the most critical battles of  early English civilization.


Saxons form up and prepare to advance against the Danes lining the ridge 


As a side note, I was exposed to this period through Bernard Cornwell's outstanding series "The Last Kingdom," which is also featured as a dramatic TV series. The Battle of Edington is featured in the series as the important historical event that it, in reality, was.


Still from "The Last Kingdom" which portrays the clash of shield walls at Edington


The Battle of Edington


Background

The first Viking raid has typically been documented as the attack on the monastery at Lindisfarne in 793. The Danes continued to ravage the coasts and raid throughout the Anglo-Saxon kingdoms for many years thereafter. In the year 865 or 866, there was a dramatic escalation; the Great Heathen Army under the command of Ubba, Ivar the Boneless, and Halfdan Ragnarsson  began a systematic conquest of the Anglo-Saxon kingdoms. East Anglia, Deira, and Mercia all fell, accompanied by  regular attacks into the Kingdom of Wessex. The Danes were almost always victorious over the Saxons during this period (with a notable exception at Ash Down in 871). By 875, the Great Heathen Army had largely broken apart, with Halfdan Ragnarsson departing for his lands in Northumbria and further north. The remnant of the Great Heathen Army was then led by a powerful Danish warlord, Guthrum, who promptly conquered East Anglia and began to attack Wessex.

Guthrum attacked Chippenham in Wessex after "Twelfth Night" and almost captured a vacationing Alfred, who fled into the marshes of Athelney and evaded detection by the Danes. The legend of Alfred burning cakes and being castigated by a local maid was born in these marshes. At this time, things looked bleak for the Saxons, with the Danes seemingly in control of Wessex. Alfred was a fugitive who commanded a non-existent army.

After hiding in the marshes during the winter months, Alfred was ready to go on the offensive in the spring, but had to gather a large enough force to counter Guthrum. Calling out the "fyrds" of Somerset, Wiltshire, and Hampshire to concentrate at Egbert's Stone and march, Alfred gambled for the fate of Wessex; it was doubtful that he could muster enough warriors in these dark times. Heroically, his men did not disappoint and mustered as a potent force.  Guthrum and the Danes still occupied Chippenham and learned of Alfred's advance, quickly departing in order to meet the Saxons. Attempting to follow the tried-and-true Dane strategy of demanding tribute in return for leaving Wessex, Guthrum miscalculated the stubborness of Alfred this time. There would be no payoff in silver this time.

Although the exact location is not known (debated vigorously) the forces met at a place called Ethandun (Edington). The Danes occupied the high ground and the advantage. The scene was set for one of the most important battles of the Viking wars.

The Battle

Details of the battle are sketchy, but it is assumed that the Danes occupied the high ground with a fortified structure to fall back on if necessary. Thus, King Alfred was forced to not only assault uphill, but supposedly against a superior force. After a long and brutal struggle between the opposing shield walls, the Saxons eventually prevailed and the Vikings fled in panic, Guthrum losing about a third of his army in the process. The Danes were forced back into Chippenham and, after a couple of weeks of starvation, sued for peace. Guthrum was baptized as a Christian and forced to depart Wessex with his warriors. He settled in as king of East Anglia until his death in 890 A.D. King Alfred then proceeded to rebuild and refortify Wessex on his way to forming what would eventually be known as the Kingdom of England. Although Alfred had been fighting the Danes as a warrior-king for years, the victory at Edington would solidify his reputation as "Alfred the Great."


A purported location of the battle at Bratton Park, with the Danes in blue holding the high ground and the Saxons in red fighting uphill. 

In retrospect, Edington was a critical battle for the Saxons. A defeat would probably have shattered  Alfred's reputation and forced the Saxons to allow the Danes control of the majority of Wessex. The end result was that the battle established Alfred as "the Great" and provided for an extended period of peace for the Saxon kingdom. A defeat would have also guaranteed Alfred's placement in the "dustbin of history" as just another ineffective Saxon leader in the age of the Vikings.

The Scenario

The terrain was relatively simple. The ground was mostly open with prominent heights upon which the Vikings were deployed. Wooded areas protected the Danish left flank and a very steep cliff would anchor the Viking right. A fortified village lay to the rear of the Danish position. The Saxons would deploy facing these heights. The steep cliff on the extreme Viking right flank will block cavalry movement. 

Very little is known of the orders of battle. The three Viking commanders were Guthrum, Oscatel, and Anwend. On the Saxon side, the commanders were unknown, but the fyrds were gathered from three counties: Somerset, Wiltshire, and Hampshire. The armies were built along guidelines in the Hail Caesar Army Lists for Late Antiquity to Early Medieval Periods. Hail Caesar ratings for each unit are detailed below: 

The Saxons

King Alfred     Command Rating: 9    Number of added attacks: up to 3
_____________________________
Left Division   Aethelbricht  (Somerset)     Command Rating: 8     Number of added attacks: 1

4 units of heavy infantry (standard) Thegns    Clash/Sustained attack 7,  Short range 3,    Morale Save  4+,   Stamina 6

1 unit of bowmen / skirmishers (small)     Clash/Sustained attack 2, Long/Short range 2, Morale Save 0, Stamina 4   
____________________________
Center Division  Berthun  (Wiltshire) Command Rating: 8   Number of added attacks: 1

3 units of heavy infantry (large) Mixed Thegns/Ceorls    Clash/Sustained attack 9/8, Short range 4, Morale Save 4+/5+, Stamina 8

1 unit of skirmishers with javelins (small)    Clash/Sustained attack 3/2, Short range 2, Morale Save 0, Stamina 4
_____________________________
Right Division  Dunstan (Hampshire)      Command Rating: 8      Number of added attacks: 1

2 units of heavy infantry (large) Mixed Thegns/Ceorls    Clash/Sustained attack 9/8, Short range 4, Morale Save 4+/5+, Stamina 8

1 unit of bowmen/skirmishers (small)    Clash/Sustained attack 2, Long/Short range 2, Morale Save 0, Stamina 4

1 unit of Mounted Thegns (small)      Clash/Sustained attack 6/3, Short range 2, Morale Save 5+, Stamina 4


Special Rules for the Saxons: 

- Alfred is granted a reroll each turn for any unit commanded by his subordinates. He is also allowed up to 3 extra attack dice if attached to a unit in melee. But if Alfred is killed in the melee, his loss will count as a complete division lost for victory purposes. 

- I have modified the Shield Wall rule (Close ranks) from Hail Caesar. Troops in this period used Shield Walls as the primary tactic in melee. Shield Wall has to be formed as a formation change in movement and only has a maximum of one move. Also, there is no penalty for hits for a unit in Shield Wall, but there is a +1 bonus for Morale Saves. So, in summary, Shield Wall is a powerful formation that all heavy/medium infantry may utilize but it is not very mobile.

- The mixed Thegn/Ceorl units is a reflection of the Saxon "fyrd," which mobilized not only warriors, but simple peasants and farmers. The units have the advantage of being large in size, but once the unit is shaken for the first time, the unit reverts to the Ceorl ratings for Attack and Morale Saves. 


The Vikings

____________________________
Left Division   Oscatel    Command Rating:  8    Number of added attacks:  1

4 units of heavy infantry Hirdmen (standard)   Clash/Sustained attack 7, Short range 3, Morale Save 4+, Stamina 6

1 unit of Bowmen/Skirmishers (small)     Clash/Sustained attack 3, Long/Short range 2, Morale Save 6+, Stamina 4

1 unit of Thrall skirmishers (small)     Clash/Sustained attack 3/2, Short range 2, Morale Save 0, Stamina 4
____________________________
Central Division  Guthrum   Command Rating: 8   Number of added attacks: 2 

4 units heavy infantry Hirdmen (standard)   Clash/Sustained attack 7, Short range 3, Morale Save 4+, Stamina 6

1 unit of Bowmen/Skirmishers (small)   Clash/Sustained attack  3, Long/Short range  2, Morale Save 6+, Stamina 4
_____________________________
Right Division  Anwend   Command Rating: 8   Number of added attacks: 1

4 units of heavy infantry Hirdmen (standard)   Clash/Sustained attack 7, Short range 3, Morale Save 4+, Stamina 6

1 unit of Bowmen/Skirmishers (small)    Clash/Sustained attack  3, Long/Short range 2, Morale Save 6+, Stamina  4


Special Rules for the Vikings: 

- All heavy infantry Hirdmen are considered Tough Fighters and may roll 1 missed melee hit every turn.

- Guthrum  is the overall Danish commander, but he controls his own division as well. He does not have a re-roll capability like Alfred. He does have up to 2 additional attacks, but if killed, his loss counts as an entire broken division for victory purposes. 

- All Bondi bowmen/skirmishers are considered Marauders and may ignore distance penalties for command rolls. Thrall skirmishers are not considered Marauders.

I have modified the Shield Wall rule (Close ranks) from Hail Caesar. Troops in this period used Shield Walls as the primary tactic in melee. Shield Wall has to be formed as a formation change in movement and only has a maximum of one move. Also, there is no penalty for hits for a unit in Shield Wall, but there is a +1 bonus for Morale Saves. So, in summary, Shield Wall is a powerful formation that all heavy/medium infantry may utilize but it is not very mobile.

Victory Conditions: The standard victory conditions apply from the Hail Caesar rules.  


Sunday, July 23, 2017

The Sea Wolves: A History Of The Vikings

I've always been interested in Viking lore, from the invasion of England to the exploration of North America.  There is something mystical about the reputation of the bloodthirsty Norsemen, with their raven banners and dragon-prowed longboats.

Recently, I have been building some Viking and Anglo-Saxon forces for Hail Caesar battles.  Although my interest has been deep concerning the Viking age, I realized that I needed to expand my knowledge past my rudimentary ideas about what really happened in the Dark Ages.

I ordered Lars Brownworth's book The Sea Wolves: A History Of The Vikings and read it cover to cover quickly.  The writing is easy to follow and keeps the reader engaged throughout. As a concise, yet thorough, history of the entire Viking age, I highly recommend it to all dark age history buffs.


Although the book doesn't go into great detail on battle tactics and only has basic information about some of the larger battles in England or continental Europe, it excels as a broad overview of the two and a half centuries that encompass the Viking age.

First off, the author explains that the term "Viking" is actually a word for "raider" and goes on to detail the different regions that made up the Scandinavian world: namely the modern-day countries of Norway, Denmark, and Sweden. Although the brutality of the Norse exploits are described in a graphic manner, the author always keeps the overall accomplishment of the impact of the Viking age at the forefront.

The book is organized by regions of Viking influence and flows in a generally chronological manner and  opens with a description of the raids of Lindisfarne and the Irish monastery at Iona. After a general description of Norse culture and the geographic areas of Scandinavia in which the Vikings are described as adventurous sea-wanderers, the text shifts to the raids and campaigns in continental Europe and the plundering and ultimate breakup of Charlemagne's Frankish empire.

Several key characters from legend are discussed in great detail, especially Ragnar Lothbrok and Thorgils "the Devil." The campaigns in England are covered in chronological detail including the conquering of Northumbria and East Anglia. The rise and steadfastness of Alfred the Great's Kingdom of Wessex is covered as well. The major battles of this era are covered in general, but not in great detail.

The Viking adventure in Ireland is also covered nicely, and this is a section that I found especially enlightening. When one thinks of the Vikings, Anglo-Saxon England comes to the forefront, yet the Norwegian and Danish campaigns in Ireland and western Scotland are equally as exciting.

The book shifts at this point to discuss the exploration of the Norsemen in the discoveries of Iceland, Greenland, and Leif Erikson's landing in North America. This was an interesting focus away from the bloodthirsty raids that everyone thinks of and highlights the Norse impact on world history.

The Viking adventures in the Slavic lands and what is now modern-day Russia is discussed in a great amount of detail, demonstrating the adventures of primarily Swedish Norsemen in this area of the world. The impact of the opposing empire of Byzantium and the eventual creation of the Varangian Guard is also discussed. Many ideas were brought back to Scandinavia from the Byzantine Empire and served to begin the process of modernizing the Norse world.

The evolution of paganism to Christianity is covered throughout the book. The impact of the Anglo-Saxon and Byzantine cultures were especially important to the hesitant, but ultimately successful, conversion of the Norse beliefs in the Christian God. It's important to note that there were still holdouts to the end and continued embrace of the worship and cultural impact of Odin, Thor, and the rest of the pagan Norse gods.  

Sea Wolves winds down with a discussion of the struggles and evolution of Scandinavian culture at home, highlighting real upheaval and legendary personalities especially in Norway and Denmark.  

As the story winds down, the battle of Stamford Bridge is acknowledged as the sunset of what is known as the Viking Age. The quest for the English crown by Harald Hardrada is described in great detail and Harald's death is heralded as a great Viking death and ultimate entry into Valhalla.

The impact of the Vikings that helped to shape the modern world is huge, although this era of history occurred over a thousand years ago. The ultimate creation of a united England, the formation of Russia, and the discovery of the New World, were but a few of the major consequences of that Norse sea-lust. Lars Brownworth has written an excellent general history of the entire Viking age that is a great starting point for any historian interested in this time period.

As a great beginning to the journey of researching the Dark Ages, this book is outstanding.