Monday, July 17, 2017

Historicon 2017 Recap in Fredericksburg, Virginia

Historicon 2017 is now in the books and, unfortunately for me, was the last miniature gaming convention held in historic Fredericksburg (at least for the time being). Held from July 13th-17th, the temperatures were high, the restaurants and hotels were great, and I had a blast at the convention center.


One of the many impressive games during Historicon 2017


My son accompanied me and we were determined to play in more games and buy more "toys" this year, knowing it was our last Historicon for awhile (we are not planning on making the trek next year to Lancaster, Pennsylvania).

I'm not privy to the convention statistics, but it seemed that attendance was very high throughout the week. The parking lot was almost always full and the gaming rooms were packed. On the negative front,  it seemed that the vendors, for the most part, were experiencing a decrease in total sales. Again, I'm not sure of the accuracy of that statement, but heard several merchants lamenting about the lack of traffic in the vendor hall.

As for gaming, I was able to play in a Chain of Command game (great), an Et Sans Resultat demonstration game (great), a SAGA multi-player game (awesome), and learned how to play the Triumph ancient rules  (Very Good). My son played his hand at Frostgrave, played a critical part in the Battle of Bouvines, more SAGA, and was my opponent in Triumph. I enjoyed all of the games, but James McWilliams' SAGA game was my favorite part of the convention. James, again, proved to be the consummate game master, ensuring that everyone not only had a great time, but taught the details of SAGA in a way that made all of us believers in the system.

I particularly enjoyed chatting about game mechanics with David of Et Sans Resultat, and admired the huge amount of work and original ideas that he put into this relatively new Napoleonic rules system.

The quality of the games and terrain seemed excellent. My pick for "best terrain" was Bill Johnson's Age of Piracy game in Exhibit Hall A. It was obvious that the host went way "over the top" in putting on an impressively beautiful game.


Incredible Terrain !


So here are some of the highlights of Historicon 2017.....what a great show !


Monday, July 10, 2017

Napoleonic Russian Troops

The Imperial Russian Army was the largest and, arguably, the most powerful of the forces that confronted Napoleon. Considered slightly barbaric by their more "enlightened" allies, the Russians had a reputation for toughness and stoic behavior, especially on the defense. The Russian artillery was large in numbers and deadly on the battlefield. Although the Russian line cavalry was solid and dependable, the infamous Cossacks would fill their opponents with fear while on campaign.

A Russian army in miniature is definitely a colorful and powerful force to build and game.


My Russian Napoleonic collection is primarily made up of troops of the 1812-1814 campaigns


History

In the 1790's, during the Revolutionary wars, the Russian army was patterned after the Prussian model and was linear in nature. Tsar Paul I had an almost unhealthy obsession for anything Prussian and this was definitely reflected throughout the army. For infantry, the line formation was considered the primary formation for battle, while the column by platoons (company column) was to be used for maneuver only.

Tsar Paul I committed his forces to ally with the British in Holland and the Austrians in Switzerland and Italy against the dreaded French foe. The Holland expedition was a disaster, but the Russo/Austrian force under Marshal Suvarov was initially victorious in Italy. Notable victories at Trebbia and Novi cemented the brilliant Suvarov's reputation. Although defeated in Switzerland by Massena (Suvarov was not present at the battle), the Russians built on their reputation for toughness and a particular fondness for the bayonet.

Unfortunately for the Russians, Marshal Suvarov was an exceptional representative of Russian leadership. As a whole, the officer corps in the Russian army was typically horrible and drunk most of the time. Although the officers on the regimental and brigade levels were capable, the higher echelon of leaders were considered deplorable.

In 1805, the Russians and their Austrian allies were beaten decisively at Napoleon's crown jewel of battles, Austerlitz. The Austrians promptly sued for peace, while the Russians retreated.

In 1806, allying itself with Prussia against the French, the Russian army had reorganized with a fixed divisional structure, which greatly increased its administrative and command capability.  The Prussians engaged the Grande Armee before the Russians could arrive and the army was essentially destroyed at the battles of Jena and Auerstadt. The Russians retreated into Poland and waited for Napoleon's advance.

The 1807 campaign in Poland featured the most brutal fighting up to this point in the Napoleonic Wars. The Russians fought the French to a standstill in the snow of Eylau. Although a bloody draw, the Russians abandoned the field, allowing Napoleon to proclaim victory. Eylau saw the massive use of Russian artillery to decisively damage the French. Marshal Augereau's Corps was effectively blown apart by the Russian guns. Although later defeated by Napoleon at Friedland, the 1807, the Russians proved in 1807 that they were worthy foes.


Russian artillery was especially dominating on the fields of Eylau and Borodino


The Treaty of Tilsit  agreed upon between the Emperor Napoleon and the Emperor Alexander temporarily tied Russian interests to France. 

Russian imperial interests eventually collided with France as well as Alexander's disdain for the continental system, which steadily weakened the Russian economy. The formation of Poland as the Duchy of Warsaw also threatened Russia. War was on the horizon and Napoleon gathered a massive Grande Armee and invaded Russia in 1812.

The Russians had utilized  the years of peace wisely and reorganized their forces along the Corps system. This was evident in the battles for "Mother Russia" in 1812. Employing a "scorched earth" policy to draw the French and their allies further into the interior of Russia, the Russians finally made their stand outside Moscow at the Battle of Borodino. Borodino was the bloodiest battle to date in the Napoleonic Wars. Both sides butchered each other, with the Russian guns and unyielding infantry proving to be especially stubborn. At the end of the day, the Russians left the field, but had damaged the Grande Armee severely. Napoleon entered an abandoned Moscow but soon began the long and devastating retreat as winter reared its head. The fearsome Cossacks were especially brutal and established a fearsome reputation among the French. By the end of the campaign, Napoleon's proud army had disappeared and the Russians continued to pursue.


Russian Cossacks and Bashkirs developed a fearsome reputation for raiding in the 1812 campaign


Napoleon proved to be a magician in order to build another army from scratch in the spring campaign of 1813. Although Napoleon had lost an army in Russia, the 1812 campaign was no less kind to the Russian armies. Allying themselves with a resurgent Prussia, the battles of Lutzen and Bautzen were fought and considered minor French victories, but with a substantial lack of cavalry, Napoleon was unable to pursue effectively. A cautious Austria finally joined the coalition with the Prussians and Russians and, after a lengthy campaign, finally defeated the French at the massive battle of Leipzig.

A final campaign for the occupation of France followed in 1814, with Napoleon pulling off miracle after miracle against the allies. Eventually, the French army was diminished to the point of annihilation and Napoleon abdicated. Except for the Hundred Days campaign in 1815 in which the Russians did not see combat, the Napoleonic Wars were over.

Infantry

The Russian line infantry and jagers were organized into 4 company battalions, 2-3 battalions to a regiment, 2-3 regiments per brigade, and 2-3 brigades per division. Although the line battalions, on paper, contained a grenadier company (the jagers had a carabineer company), these elite troops were typically formed into combined grenadier battalions and brigaded as a reserve force.

The Russian infantry endured harsh discipline that owed much to the cultural treatment of the serfs and peasants of the Russian population by the nobility. This discipline did indeed produce extremely tough soldiers who seemed to withstand hardship of any kind.

The Russian army boasted a powerful Imperial Guard as well and was considered second only to Napoleon's Imperial Guard in size and reputation.


Russian infantry had a reputation for extreme toughness


Russian grenadiers form a powerful brigade


Cavalry

Russian cavalry of the line was made up of Curassiers, Dragoons, and Hussars. The cavalry typically performed well but was overmatched in the earlier years by the extremely well-led French cavalry.

The irregular Russian cavalry consisted of a large number of Cossacks, as well as Bashkirs. Although no match for formed European cavalry on the battlefield, these irregular horsemen excelled at ambushes, woods fighting, and lightning raids on supply lines. Their reputation for not offering quarter and their particular fondness for plunder created a strong fear among the French.


Russian armored cuirassiers in reserve


Russian Hussars at the ready


Ural Cossacks support the infantry


Artillery

The Russian artillery arm also had a reputation for toughness and tenacity on the field. Batteries were typically huge, sporting 12 guns on the average. The Russians were essentially the first nation to employ massed batteries at Eylau, to horrific effect. Training and leadership was considered excellent. Equipment was maintained at a high level, although gunpowder has been mentioned as a weak spot. The artillery's philosophy was also one of defense, whereas the French tactical philosophy was to use their guns in support of an attack, therefore Russian position batteries typically were immobile and static.

Supply and Logistics

Due to the poor leadership within the Russian officer corps, supply was always a problematic area. When allied with the Austrians and Prussians, the Russian armies benefitted directly from their allies' logistical prowess. When left to their own devices, the Russians subsisted on very little food and forage (another example of the toughness of the Russian soldier).

Leadership

Especially in the early years, the Russian officer corps was probably the most inefficient and amateurish of all of the coalition nations. The exception was the superb Marshal Suvarov. The inability of the Russians to employ offensive power dictated that many battles were fought on the defense. The years between 1807 and 1812 saw many reforms and the reputation of Russian leadership greatly improved. Leaders like Platov, Kutusov, and Bagration proved to be outstanding generals in the fight against Napoleon.

Summary 

As a wargaming army, the Russians are one of my favorites. Extremely tough on defense, they are colorful and unique among their European allies.


Monday, July 3, 2017

Search For The Holy Grail: The Best Napoleonic Rules Pt. 7

In this ongoing series, I have analyzed several Napoleonic rules sets in order to find the elusive "holy grail" that most Napoleonic gamers seek. The specific rules rated are tactical in nature; in other words, these rules feature tactical units at the level of infantry battalions, batteries, and cavalry regimentsl. I also reviewed rules that did not feature "simultaneous movement." Grand-tactical rules sets were not reviewed.

This post features General d' Armee, the new Napoleonic system from David Brown (of General de Brigade fame). I have recently reviewed the author's American Civil War rules, Pickett's Charge, and am glad to report that General d' Armee is even more impressive.

General d' Armee is not a clone of Pickett's Charge with a few Napoleonic adjectives added. A great deal of work has gone into this rules set to encompass the overall feel of Napoleonic warfare. Although the basic mechanisms are similar to Pickett's Charge, the details are purely Napoleonic in nature. I actually feel that releasing Pickett's Charge several months ago was a brilliant marketing move to pave the way for the masterful General d' Armee.


Scale:  In my analysis of any rules set, I always take a look at game scale first. The rules can be used for any figure scale available, but are geared towards 15mm and 25mm. Ground scale is approximately 1 yard per millimeter while time scale is 10-15 simulated minutes per game turn. As for figure ratio, the author devised an interesting system that gives the gamer all options. Each tactical unit is classified as Small, Standard, or Large. The rules do not dictate how many figures equals each size unit (although several options are given), as long as players are consistent within the game. I first saw this concept in the Black Powder rules and was impressed with the idea. It is a refreshing change from General de Brigade (which I think very highly of, by the way) with its very stringent basing and figure ratio requirements. It allows me to use my figures for these rules as well as Carnage and Glory 2  (my other favorite rules system).

For my 15mm collection, I personally settled on a figure ratio based on the following:

- A small infantry unit equals 16 casting, while a small cavalry unit equals 8 figures.
- A standard infantry unit equals 24 figures, a standard cavalry unit is made up of 16 figures and a standard 6-8 gun battery equals 2 bases.
- A large infantry unit equals 36 figures, a large cavalry unit equals 24 figures, and a large battery has 3 bases.

Again, this was my choice that reflected my collection and "look" that I wanted on the tabletop and may not be shared by others.

Turn Sequence:  The turn consists of the following phases.

     Command and Initiative. ADC's are rolled for and allocated to brigades by the Division commander. Brigade activations are rolled for. Initiative is rolled for to determine the first side in movement, charges, and firing.
     Charges. Charges are declared, defensive fire occurs, and Charge results are determined.  
     Movement. Normal movement occurs in a UGO/IGO system, with the side winning initiative moving first.
     Firing. All skirmish, musketry, and artillery fire is conducted with the side winning initiative firing first and causing casualties and possible discipline tests before the other side has a chance to fire.
     Melee. All charge results that indicate Melee are conducted at the end of the turn.

Command and Control:  General d' Armee has an interesting "game within a game" when it comes to command and control. In a division-sized game, the division commander is the commander-in-chief and rolls to determine ADC's (aides de camp). The quality of the division commander can impact the number of ADC's rolled for. These ADC's can then be attached to brigades for several different functions.

Each brigade is required to make an activation roll. Passing the activation roll ensures that the brigade follows orders and may move at the player's discretion that turn. When a brigade fails its activation roll, it becomes "hesitant" and is severely limited as to the actions each unit may undertake. Faltering brigades have experienced unit routs or dispersals in previous turns and must be rolled for on a separate table and may end up following orders, retiring, retreating, or routing away.

Here is where the ADC's come in handy. They are always limited in number but extremely valuable in order to keep the division moving.

Attached ADC's can allow another brigade activation roll if the first one is failed. ADC's can also be used to activate reserve brigades, increase artillery rate of fire, add to the brigade skirmish line, order an infantry assault, and other missions. A Faltering brigade must have an ADC attached or the entire brigade conducts a "Sauve Qui Peut."  This is a rather annoying use of a valuable ADC and is a brilliant method of simulating a deteriorating command structure in a division.

For Corps and Army-sized battles, the Corps commander allocates extra ADC's (depending on commander quality) to a particular division or divisions. This is an excellent method of allowing the Corps commander the ability to influence a particular area of the battle.

Tactical command and control is simple and based on a command span of a brigade commander. Units outside this distance are severely limited in their actions.

Charges:  Once initiative is determined, the first player announces all charges, while the second player announces reactions to those charges, whether it is to stand and deliver defensive fire or form square versus a cavalry attack. The charging unit are then moved to within 5 cm of the target, receives any defensive or supporting fire, and then the charge is rolled for depending on the tactical situation. Most of the time, one unit or the other will either falter, retire, retreat, or rout. In some cases, the units close into melee which are conducted at the end of the turn. In comparison to Pickett's Charge, cavalry versus cavalry charges will most often result in melees.

Supporting units in a charge are discussed as well as Massed Columns in a charge. This section takes some extra digestion and is probably the most complex part of the rules (for me, anyway).

The Discipline Test and Morale: As another change to General de Brigade, there is no separate Morale phase. Morale is determined on the unit level during charges, melees, or when a unit suffers destructive fire. When called for, a unit must roll a discipline test to determine any effect on morale.

Morale on the grand-tactical level is dealt with during the command phase. Again, brigades suffering routs or dispersals become Faltering and must roll on a separate activation table.

Movement: After charges are conducted, the first player conducts normal movement. Terrain, changing formations, and movement distances are easily understood for each type of unit. After the first player moves, the second player then conducts all movement. All formations including open order and column by platoons are discussed in detail.

Fire: The first player conducts all fire. Skirmish fire from either the brigade skirmish screens or an open order unit is one of my favorite parts of the system. The formation of brigade skirmish screens are covered as well, with the differences covered in detail between French impulse systems and linear systems of the early Russians or Austrians used. Musketry and Artillery fire are also completely covered in the rules and utilizes a simple 2d6 roll on the fire table plus or minus modifiers. After the first player finishes all fire and all casualties and discipline tests are suffered, the second player then conducts all fire. National characteristics are ingrained in the tables; one example is that 2 rank infantry (British) in line fire on the "superior volley" table as opposed to the standard or inferior volley table. As a unit takes casualties, it not only gets closer to dispersal, its performance in fire and charge ability suffers as well. For certain modifiers (like large battalions or batteries, or Elite units) a number of casualty dice (six sided dice) are generated in addition to the fire table. A nice optional rule that I also use is an extra casualty die for a unit's initial volley.

Melee: For any charges that result in a close combat, these melees are conducted at the end of the turn. Each side will generate a number of casualty dice depending on each unit's tactical situation (size of unit, unformed, morale rating, etc). Casualty dice (six sided dice) are rolled, with hits occurring on 4-6. The difference in hits between opposing units determine what happens. Again, this system is generally similar to Black Powder and is simple and effective.

Summary:  After testing the system out on the table, I felt the rules flow extremely smoothly. One of my primary measures of a great rules set is how it portrays a "story" on the tabletop. These rules do that very well. I am also impressed with the realism and detail that is contained within the rules. The command and control phase in particular inspires excellence.  Not only does it provide dramatic tension, a player is literally forced to keep the grand-tactical big picture in mind...........if not, the battle can be lost solely due to command issues.

As an admirer of Mr. Brown's General de Brigade rules, I feel that the author took the best parts of that rules system and married some truly groundbreaking ideas to create General d' Armee.

As for playability, I rate General d' Armee as a 9 even though there is a large amount of detail ingrained within the pages. Mr. Brown has also certainly done his historical research as the detail and accuracy also seem right on point. I rate General d' Armee an 8.5 in historical accuracy for an overall score of 8.75. 

I think I've found my Holy Grail !

Tuesday, June 13, 2017

Battle of Oak Grove, June 25th 1862

Summer is finally here in Virginia and it hit a sweltering 96 degrees this past Sunday. So I figured it was a fine time to combine a few of my favorite summer activities:  wargaming interspersed with dips in the pool, and ice-cold beer.

I've been wanting to set up a wargaming table outside for a while now. After ensuring that the weather was going to cooperate (nothing like a rain storm on wargame terrain...ugh) I set up the Oak Grove scenario from the Guns at Gettysburg On To Richmond scenario book and proceeded to use my new favorite ACW rules Pickett's Charge.

It was hotter than hell and we had to take multiple breaks, but the game was a blast and solidified my opinion of Pickett's Charge; these rules are outstanding !


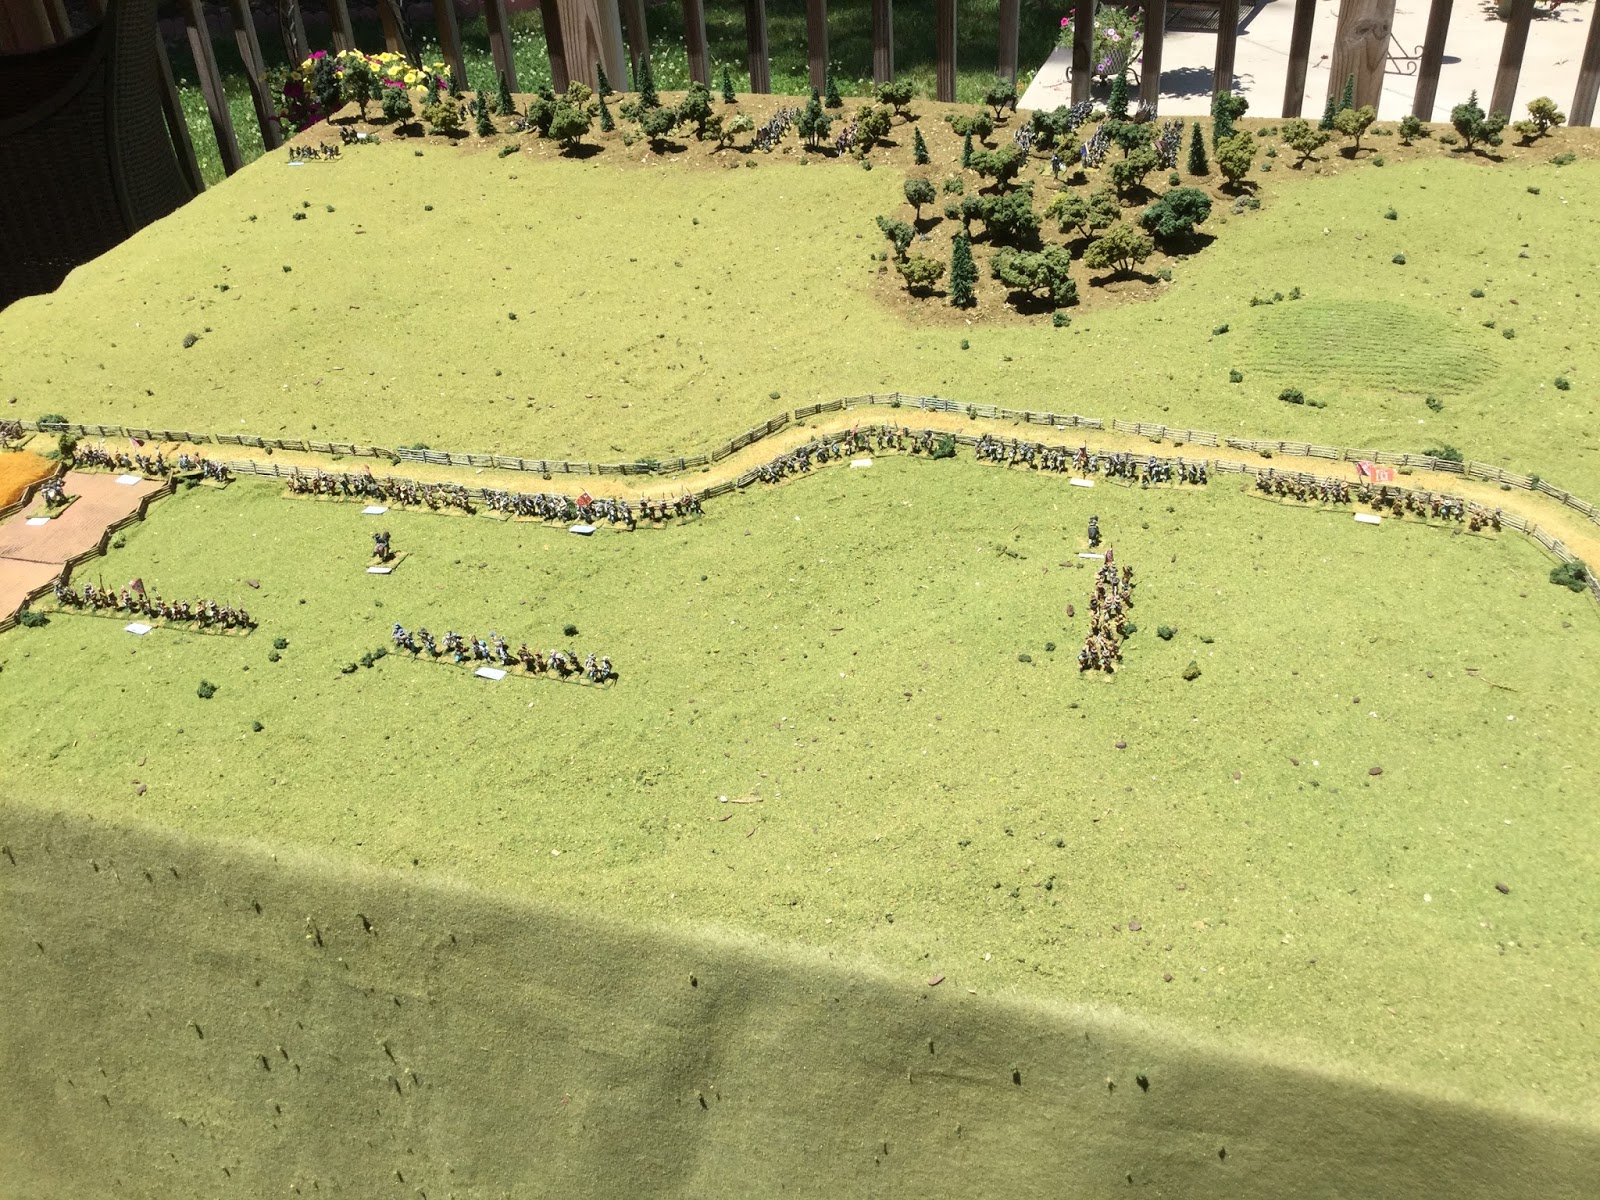
A view of the initial set-up with the Confederates defending on the right and the Union infantry advancing through the wooded terrain on the left side of the table


The Scenario: On the 25th of June, 1862, General McClellan was focused on gaining the high ground at Old Tavern in order to place the heavy batteries of the Union army and pound the Confederate capital of Richmond. In order to accomplish this, the Confederate forces had to be pushed south of the Chickahominy River. While the main advance was at Old Tavern (to the left of the table), this action at Oak Grove represented Brigadier General Hooker's attack on the Confederate right flank. Two brigades under Major General Huger defended the King Schoolhouse Road and awaited the Union advance through the woods into the open fields.

Historically, Hooker thought he was outnumbered by the Confederates, but threw Sickles' and Grover's brigades ahead anyway. The 71st New York actually bolted as the action commenced, but Sickles rallied his brigade and continued the advance. After being initially repulsed, General McClellan made an appearance and ordered the attack to continue. Although the Federals advanced to the King Schoolhouse Road, the Confederates under Huger held their ground and the battle fizzled out at sunset. Old Tavern to the left of the table, remained in Confederate hands as night fell. In the Oak Grove sector, Union casualties were 626 while Confederate casualties ended up as 441.

For this scenario, the Union objective is to occupy (or advance past) over half of the King Schoolhouse Road. The Confederate objective is to deny the Yanks the road.

Hooker's lead two brigades under Sickles and Grover were deployed in march columns in the wooded terrain on-table. Two supporting brigades under Carr and Robinson would arrive as on-table reserves at the beginning of turn three.

Major General Huger had two brigades at his disposal and decided to deploy Ransom's North Carolinians to the left of the line near Brick Chimney while Wright's Georgians and Louisianans  deployed to the right of the line.

While the Union troops definitely had the numbers, most of the Yanks were green troops. The Confederates, although outnumbered approximately 2:1, had quality on their side. Major General Huger's infantry were equally split between regulars and elites.


 View from the Confederate side of the table with North Carolinians, Georgians, and Louisianans lining the King Schoolhouse Road


Grover's brigade to the left and Sickles' regiments on the right advance to the attack through the woods


The Game: On the first turn, Hooker had command and control issues and Grover's brigade was hesitant. Sickles' brigade and an attached 3# rifled battery advanced into the open field. Immediately, the Confederates made their presence known as their own battery deployed on the flank devastated the Union guns while limbered (and at long range), proceeding to roll "boxcars." The battery did pass the "See the Elephant" test. Not a good start to Hooker's attack !


The Confederates rolled well at the beginning of the battle, while using ADC's for rerolls, continuously keeping both brigades under orders


Brigadier General Hooker struggled with command and control in the early going, with poor ADC availability rolls, but managed to get "squared away" as the game went on


The next turn saw Grover's brigade continue to be "hesitant," even with an attached ADC. Meanwhile, Sickles' brigade, which was made up of green troops, began to change formation and assume an attack formation. The beleaguered battery attached to Sickles' brigade continued to get hammered by Confederate artillery.

Turn 3 saw Carr and Robinson's brigades arrive on-table as reserves. With an attached ADC, Grover's brigade finally started to move, but Sickles' brigade now became "hesitant." Due to the limited availability of Union ADC's, no ADC's could be spared to activate the two reserve brigades, so they sat on the edge of the table.

Although Turn 4 saw Sickles and Grover's brigades continue to advance, the Union battery couldn't catch a break. After deploying and firing at Confederate infantry, the battery rolled so poorly that a "fatigue casualty" was inflicted. After the Confederate guns throttled the battery again, the Yankee guns reached their dispersal point and routed away. The few Union guns that Hooker had proved to be entirely useless in the attack.


Union infantry approaches the Confederate line


Another angle showing the Federal advance

Turn 5 finally sees Hooker solve his command and control issues. Robinson's brigade becomes activated and all troops with the exception of Carr's brigade are under orders. Now that the Union guns have dispersed, the Confederate guns have now targeted the infantry of Sickles' brigade. The 71st New York has also come into musketry range of the 3rd Georgia, which takes its initial shot, causing 3 hits at long range. The Yanks are beginning to be bloodied.


Yanks approach the Confederate line


The entire table as the Federal attack takes shape


The following turn saw Carr's brigade activated as well as the other three brigades acting under orders. General Hooker seems to have shrugged off his initial command issues and is on a roll. Sickles and Grover's brigades were within effective range of the Confederate line now and were punished by all of the front-line Confederate units opening up with initial volleys. The Confederate musketry punished the Union troops, most of whom were green in quality.


The action heats up !


Musketry at close range


Sickles and Grover are fully engaged with Huger's Confederates


Turn 7 sees Hooker attach 3 ADC's to Robinson's brigade, ordering it to move at the "double quick" and ensuring that there is a reroll in place. Grover's brigade becomes hesitant. After the brutal Confederate vollies, the Union infantry opens up on their adversaries, causing moderate casualties. Robinson's regiments move up fast, threatening the Confederate right flank.


Robinson's Pennsylvanians move up at the double-quick to hit the Confederate right flank


Turn 8 saw Union ADC's being committed to Carr and Robinson's brigades to keep them moving forward. The strategy worked, although Sickles and Grover's brigades became hesitant. It was especially important for Robinson's regiments to keep moving due to Wright's Confederate brigade becoming hesitant and unable to react effectively. The entire . Caline erupted in musketry, casualties becoming heavy on both sides. The Union infantry begin to get the upper hand in the vicious firefight that was erupting.


Robinson's brigade continues to move around the Confederate flank


The next turn saw the first charge of the game, as the 11th Massachusetts of Grover's brigade attacking the 3rd Georgia. The formation test for passing over the fence line was passed and the Georgians' defensive volley was pitiful (the unit had lost fire discipline during the preceding turn). Although the 11th Massachusetts didn't close into melee, the unit opened up with a powerful volley in the face of the Georgians. The 3rd Georgia was definitely in trouble. Carr's brigade moves up to support Sickles, whose brigade has been heavily damaged. The good news is that the green New Yorkers have caused some damage on Ransom's Confederates as well.


The 11th Massachusetts charges the 3rd Georgia


On Turn 10, Grover's brigade became hesitant, which was exceptionally bad timing as the 3rd Georgia was about to break. This turn was pretty dramatic as the Confederates launched charges on both flanks to regain the initiative. The 25th North Carolina charged, routed, and dispersed the 74th New York, causing Sickles' brigade to falter. On the right, the 22nd Georgia boldly launched an attack on the 105th Pennsylvania, whipping it, and causing the 57th Pennsylvania to become unformed behind it. The Confederates were taking control.


The 25th North Carolina crashes into the 105th Pennsylvania


At this point, Sickles' brigade was faltering. In the next command phase, his brigades moves to the rear with a "catawamptiously  chewed up" result. Wright's brigade, with the dispersal of the 3rd Georgia (dispersed finally due to casualties from the trading of volleys with the 11th Massachusetts), also became faltered. On their command roll, Wright's brigade was forced to retire.

The difference, at this point in the game, was that Carr's brigade was in support of Sickles' retreating brigade, while Wright's Confederate brigade had zero support to the rear. The Union numbers were finally beginning to force the issue.

In the final two turns, Grover's brigade advanced and passed the King Schoolhouse Road in the void left by Wright's retreating brigade. Although Ransom's brigade was still in decent shape, Carr's troops were fresh in front of the Confederate infantry. Surprisingly, Wright's brigade failed a second falter test and continued to retreat. The die was cast. The Yanks had occupied over half of the King Schoolhouse Road and were threatening Ransom's worn troops. There didn't seem to be any conceivable way for the Confederates to re-occupy the road, so the game was declared a Union phyrric victory.


Grover's brigade advances past the King Schoolhouse Road in pursuit of Wright's brigade


Ransom's troops were now being pressed to the front and now on the right flank


The rules provided an outstanding game. The command rolls at the end sealed the fate for the outnumbered Confederates,  whose lack of reserves yielded the field to the Yanks. As for casualties (I have my own system for determining end of game casualties), the Union suffered 825 and the loss of 2 guns, while the Confederates absorbed 700 casualties. The game also proved a bit more bloody than the historical action, but that's the way we like it. I was disappointed that my Confederates ended up withdrawing from the field, but the Union player fought well and used his reserves smartly.


Pickett's Charge excelled in the tactical aspects of the game, but I think that the command and control system truly shined and kept the commanders on the edge the entire game. There was uncertainty and drama throughout...........truly a story that unfolded on the table. Now, it's time to hit the pool and cool off !


Wednesday, May 24, 2017

American Civil War Confederates

Here's my Confederate collection in 15mm. Based for Pickett's Charge, there are 21 regiments organized into 5 infantry brigades, 4 4-gun batteries, and several regiments of mounted and dismounted cavalry.


1st Confederate Infantry Brigade


2nd Confederate Infantry Brigade


3rd Confederate Infantry Brigade


4th Confederate Infantty Brigade


5th Confederate Infantry Brigade


Confederate Cavalry


Confederate Artillery


Saturday, May 20, 2017

A Review and Summary of Pickett's Charge

David Brown of General de Brigade fame, recently released (a few months ago that is) his new American Civil War rules Pickett's Charge, available from the Too Fat Lardies website. As a fan of Mr. Brown's approach to miniatures rules, it'll be my pleasure to review these rules. In short, I think these rules are outstanding not only in gameplay, but in historical realism as well.


Scale

Scale is one of the first things I look for in rules to ensure that my collection matches up. Pickett's Charge utilizes a flexible approach to basing figures; the number of figures per base is up to the individual gamer.......it's the number of bases per unit that is important. Each base represents approximately 75 infantry or cavalry, while an artillery base equals two guns. As for figure scale, the rules allow for any size miniature, although movement and fire distances are designated in the rules for 15mm and 25mm figures.

As a fan of David Brown's earlier ACW rules, Guns At Gettysburg, I have to admit that it is refreshing to get away from a very strict figure ratio and focus on the number of bases per unit instead. Instead of counting figures on fire or melee charts, one only needs to know if a unit is considered small, standard, or large. The appropriate bonuses or negative modifiers are contained on the tactical charts. A large infantry unit, for example, would have more than 6 bases, while a small unit would have 4 or less bases.

As an example using my collection, each one of my units' bases has 3 figures. A standard unit would contain 5-6 bases, or 15-18 figures. This represents between 375 to 450 troops per unit.

Ground scale for 15mm figures is 1mm = 1 yard. As for time scale, the author is hesitant to define a specific number of minutes per turn. If I had to guess from the movement distances per turn, I would guess about 10-15 minutes per turn.

Unit Organization

The basic unit is an infantry regiment (or even a battalion for small units), cavalry regiment, and artillery battery. Units are organized into brigades, while a number of brigades are commanded by a commander-in-chief (or division commander). There are rules for deploying up to a corps on the table as well, with the corps commander acting as the CinC.

The rules also cover all appropriate unit formations including line, double line, skirmish, march column, dismounted cavalry, etc.


Brigadier General Hampton's brigade consisting of 4 regiments of infantry


The Game Turn

Each game turn consists of 4 phases: the Command Phase, Charges (including defensive fire and possible melees), Movement, and finally, the Fire Phase.

The Command Phase

Command and control is one of the most interesting aspects of Pickett's Charge. A CinC, depending on his rating, typically gains one ADC (Aide de Camp) per brigade in his command. At the beginning of the command phase, the availability of these ADC's are rolled for. Once the final number of ADC's is determined, the player must determine how to use these valuable assets. Assigning an ADC (or multiple ADC's) to a brigade can enable the brigade commander to execute specific functions. Examples of these include Double Quick movement, Re-roll of a brigade activation, Committing reserves, and Artillery assault fire (added chance of artillery fire bonuses with the chance of added fatigue). I won't go into every function that requires ADC's.....suffice it to say that this phase is very important and much thought is required to ensure a successful game.

After ADC's are placed, brigades must be rolled for activation. A brigade that passes its roll may conduct all movement, charges, and firing. A brigade that fails becomes "hesitant," which restricts the forward movement of all units as well as limiting fire arc. Hesitant brigades will ensure a challenging game for a player. For example, a well-placed ADC can supply a brigade activation re-roll, which may keep an important attack moving on a sector of the battlefield.

A brigade that suffers a routing or dispersed unit (or two "whipped" units) is considered "faltering," and its activation roll must occur on a special table. The brigade may end up following orders, it may retreat, or even rout ("catawamptiously chewed up").

In addition, details like command distance, optional "fog of war" cards, and commander attachment are all covered in the rules.

At the end of the Command phase, initiative is rolled for with each CinC throwing 2d6 and subtracting  the number of "hesitant" brigades as a modifier.  The winner is the first phasing player in charge declaration, regular movement, and firing.

The Charge Phase

The phasing player (winner of the initiative) declares all charges while his opponent declares charge reactions (stand and fire, wheel and fire, evade, cavalry countercharge). Then, the second player declares charges. Charging units are moved towards their targets and defensive fire is conducted. At this point, charge reactions are rolled for; after modifiers are computed (morale class, defensive fire casualties, etc) each side rolls 2d6 with various results for either side. Only if the die rolls equal a tie does a melee occur. If this happens, each side will roll a number of "casualty dice" depending on the situation and the side which inflicts the most casualties wins the melee.

By the way, casualty dice are six-sided dice in which a rolled 4,5,or 6 equals a casualty. Besides melee, casualty dice can also be added in the Fire phase for certain conditions (ie large regiment, 12 pound smoothbore battery firing canister, etc).

The Movement Phase

After charges, charge reactions, and melees are conducted, the phasing player then moves all available units. Movement is formation-specific and distances are detailed in the movement chart. Units move strictly (as opposed to a flexible movement system like Black Powder), all oblique movement is completed by wheeling and are prohibited from coming closer than 5 cm to an enemy unit. Once the phasing player moves all units, the second player then moves all units.

Movement through rough terrain, severe terrain, and over fence rails / walls are covered. A unit may become "unformed" through this kind of movement if a formation test is failed. Certain formations like skirmish or march columns do not have to take a formation test if moving in rough terrain for example. Retrograde movement and about-faces are also included.

Units that become "unformed" are considered disorganized and require a full movement turn to reform. Units may also become "unformed" through charge results, morale tests, or being involuntarily interpenetrated.

The Fire Phase

Again, the phasing player conducts fire first (with all casualties being suffered before the opposing unit fires) and the second player then conducts fire. Typically, 2d6 are rolled for each firing unit with modifiers added. Certain circumstances add "casualty dice" as well. Truly effective fire may also prompt a morale test ("See the Elephant Test"). Infantry volley fire is rolled on one of three tables: Standard volley at effective range, all long range fire, and "deadbeat" volley at effective range. Units that are small, in double line, attack column, inferior muskets, or have previously lost fire discipline are considered to fire a "deadbeat" volley.

Skirmish fire and snipers are conducted in a different manner, with a variable number of "casualty dice" thrown instead of rolling on the volley table.

All period weapons and ranges are listed, including artillery pieces. Bouncethrough and cannister fire is also discussed. As it should be, my experience with artillery in the game is that battery fire can be  deadly, especially the destructive power of canister.

At the end of the fire phase, the game turn is considered ended.

My thoughts on Pickett's Charge

I think these rules are superb. The game turn ensures a nice flow to the proceedings and the mechanics are simple and built on common sense and period tactics. After playing the rules several times, I noticed an absence of "clunky" mechanisms that plague many games. Here are some specific examples of what I like:
  
     - The command phase is a "turn within a turn" and is critical to a successful game. Thoroughly comprehensive but easily executed, the command phase adds a significant "pucker factor" to each and every game. Differences in command capability are represented by the number of ADC's available.......I really like this. Therefore, a totally incompetent commander will automatically have one less ADC to use, while excellent commanders will have an extra ADC to work with. The command phase is a brilliant hallmark of the system but does not bog the game down in any way.
     - The weaponry and casualty tables seem right on the money with respect to historical accuracy.
     - Unit morale checks happen at the time of the event. In other words, there is no separate morale phase at the end. If a unit gets slaughtered by a cannon barrage, the effects of morale are tested at that moment. Brigade morale checks are simulated by the Falter table during the command phase.
     - Charges seem historically accurate. Melees are actually uncommon and charge reactions are rolled for as a result of the charge. Typically, one side or the other would give way before crossing bayonets. This is accurately represented in the charge mechanics.
     - All modifiers throughout the game seem very accurate. There are no "head scratchers" anywhere to be found.
     - Units are made up of bases when determining small, standard, and large units. When firing, figures do not have to be counted up anymore. This has streamlined the game immeasurably.
     - Because it doesn't matter how many figures are on a base, the gamer has full flexibility to build an army the way he / she wants.
     - The research is impeccable. There are rules for "tuckered out" brigades, units going to ground, optional rules for brigadier command span within woods, and more.
     - The rules are simply put....FUN.

Things that I found frustrating about the rules:

- Nothing really, but there are a couple of areas that I might add a house rule or two. Specifically, the winner of the initiative in the rules always moves and fires first. There may be a situation in which it is desirable to move second, even though a player will lose the benefit of firing first. I might add a rule that the winner of the initiative may decide who the first phasing player is. Another area is the subject of leader attachment. The rules do not spell out any possible leader casualties in a melee or charge reaction. Also, for regular or elite units, the attachment of a leader really doesn't give much of a modifier in charges.


Overall, I think these rules are fantastic. They have everything that I desire from ACW simulation: command and control, historical results, accurate weapon ranges and effect, and they are simply fun as hell to play. I tested the rules out pretty rigorously and I was impressed with the overall experience and the results each time. Kudos to David Brown ! Pickett's Charge is highly recommended.