Thursday, May 4, 2023

Comparison: Empire vs From Valmy To Waterloo (FVTW)

 Empire vs From Valmy To Waterloo


Today is a comparison between 2 “old school” Napoleonic rules. Both caused a stir back in the 80s and 90’s, although Empire has a larger following overall. Both rules systems are aimed primarily at a simulation and are extremely chart-heavy and packed with detail. I personally invested a ton of time with both systems in the past, but prefer less complicated rules now.


1. Table appearance (do the unit sizes and organization look like a battle?) Both systems have a similar basing system, although FVTW has a separate option based on the Napoleon’s Battles rules. Both look similar on the tabletop. I personally prefer beefier looking units. So a Draw here.


2. Command and Control (Is C/C challenging and realistic?) Both systems are very complex when it comes to Command and Control. C/C is obviously critical to both games. Although both systems are very complex, Empire is a bit easier to understand. FVTW is so detailed in this area, it’s still hard to digest after all of these years. Empire has the edge here; very detailed but a bit more workable. 


3. Flow of the turn (Is it clunky or smoothly elegant?) Empire features the Time Telescoping Concept for grand-tactical movement while tactical movement is still going on. I always found it a bit clunky though, especially since each Maneuver Element rolls to see how many tactical turns they are active. FVTW uses a cheat sheet book that matches the turn sequence. FVTW definitely has a more streamlined turn sequence, so it gets the nod in this area. 


4. Mechanics (Are the mechanics easy to pick up? Do the mechanics have enough detail? Do the mechanics slow the battle down?) The mechanics of both are very complex, especially when compared with modern rules. Both rules systems sport a huge amount of detail. I will say that Empire forces players to move and fire skirmish companies, whereas the Skirmishers are ingrained in Fire Discipline in FVTW. There is much more math when playing Empire, as Fire results are calculated per figure. There is an effort with FVTW to streamline this process, while keeping as much detail as possible. FVTW gets the win in this area.


5. Historic results (Do the results seem realistic? Are there wild swings of outcomes?) Both systems pride themselves on recreating historical outcomes. Both rules do a great job in this area. This is a Draw. 


6. Historic tactics (Do historic tactics work? Does the system reward the use of historic tactics?) Again, both systems excel in this area. FVTW explains tactical philosophy in a more clear way, empathizing the Napoleonic impulse system. But frankly, both systems have done their homework and this a strong area of both rules. The artillery rules in FVTW are especially some of the finest ever written, emphasizing the beaten zone of a bombardment. Again, a Draw is in order.


7. Morale (Does morale feel right on the unit or brigade/divisional level?) Again, both systems feature realistic morale outcomes for units, and higher formations. Another easy Draw.


8. Playability (Do the rules provide for a fun game, or is it mired in too much detail, etc) Both systems suffer from overly complex detail. Modern gamers run away screaming when taking a peek at both systems’ charts. Although FVTW packs a bit more detail into the charts, the turn sequence is smoother than Empire and actually plays a bit faster. FVTW has the slight edge here.


9. Ease of setup (what does pre-scenario work look like? Is figure basing too specific? Do the rules require very specific basing?) Both rules are scenario-based and do not feature a points system for units. Both systems have exhaustive addendums for leader and unit ratings that make them extremely valuable to have even if not playing. A Draw.


10. End of battle (Do the rules give results that can be useful if conducting a campaign? Are Victory objectives taken account? Is Victory defined by the rules?) Neither system really discusses the post-Battle results or Victory conditions. Because both are geared for researched scenario play, it’s up to the scenario designer to establish victory conditions. A Draw. 


Both Empire and From Valmy To Waterloo have reputations for intricate and complex detail. Both systems still have many fans. In our comparison, FVTW won 3 categories and Empire won 1. In the other 6 categories, the results were about even. I cut my teeth on Empire when I was a young Wargamer, but was exposed to FVTW by the rules author, William Keyser, and was hooked. From Valmy To Waterloo was an evolution of the principles laid out by Empire. Both systems are legendary and are important cornerstones of Napoleonic wargaming.


Ancients: Romans vs Carthaginians

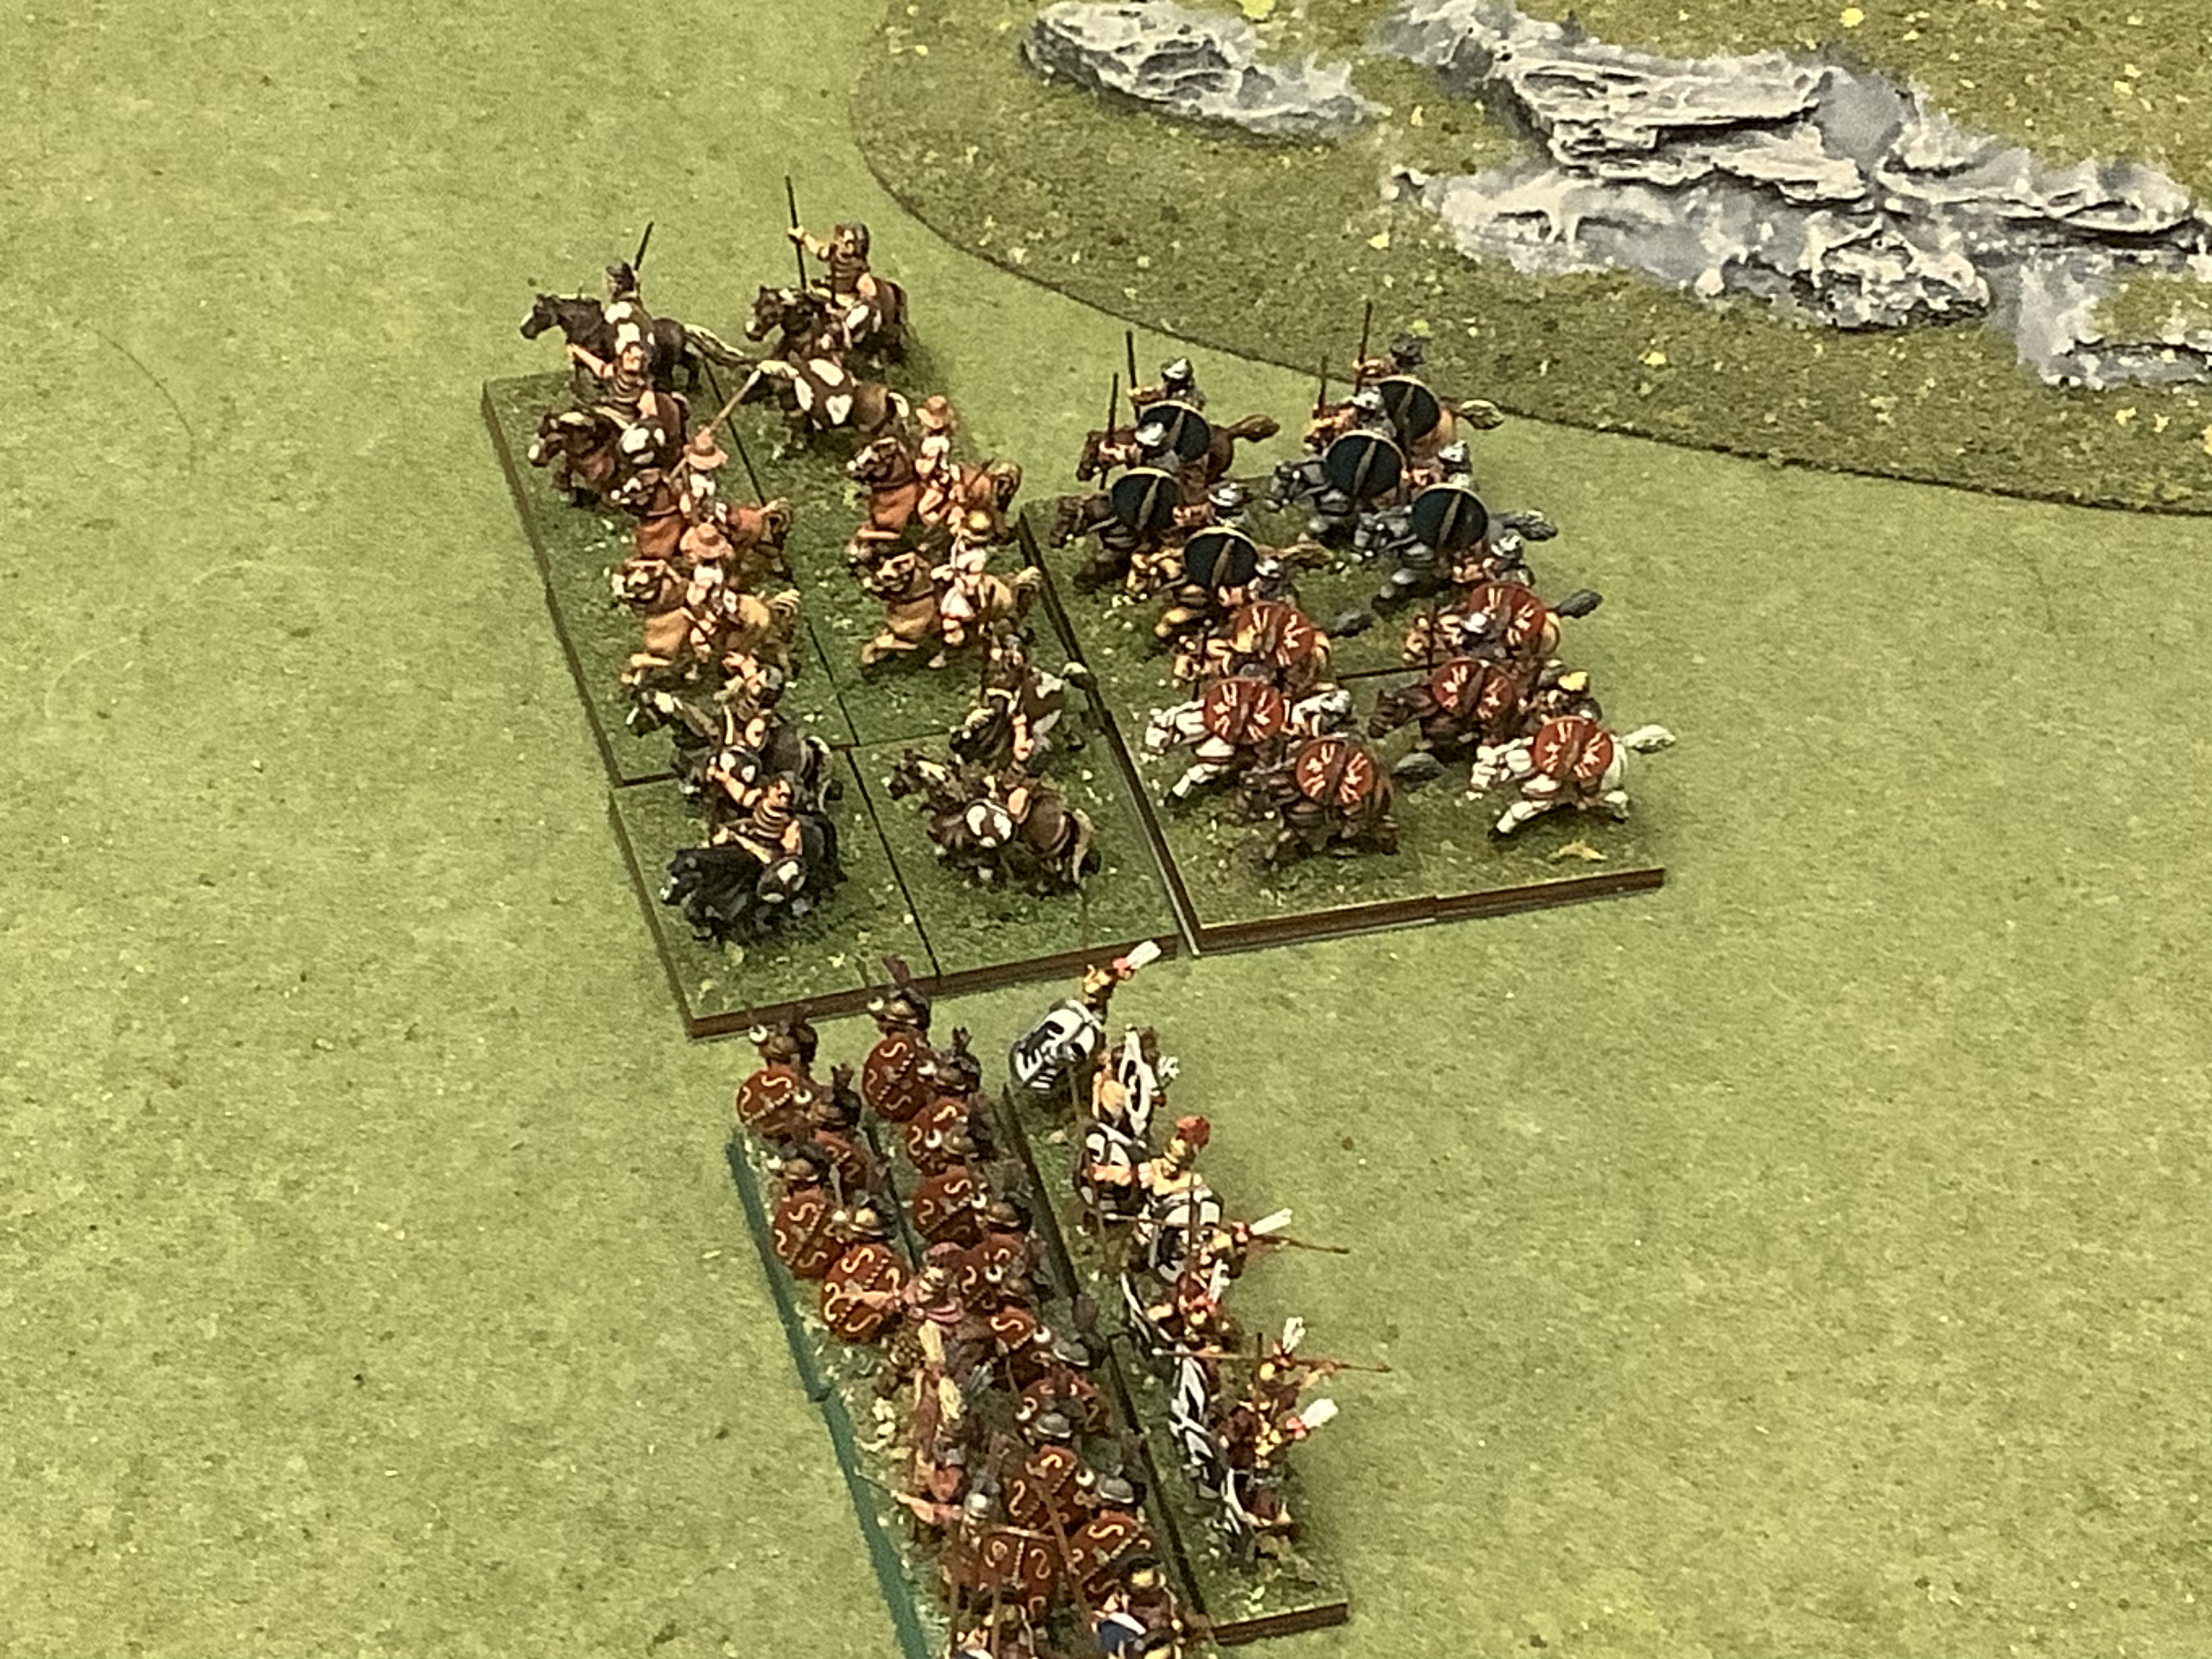
 It’s been a while since I have updated the blog, but it’s time to get going again. Over the last year, our group has adopted the Mortem et Gloriam rules for most of our Ancients wargaming. The emphasis on command and control, the efficient color-coded tables and dice, and quick resolution make this rules set an ideal choice for club nights or tournaments. 

This past Tuesday evening, our resident painter Bradley brought his beautiful Carthaginian army and pitted it against Dave’s Republican Romans. What a great matchup ! The Romans ultimately prevailed, but the Carthaginians gave them a run for their money. 

We are looking forward to regular matches using Mortem et Gloriam in the future. Stay tuned !


Tuesday, February 8, 2022

Spring 1809 Napoleonic action Part two

Mid-way thru the battle and the French are in attack position. At that moment, disaster struck. A 3lb Grenz battery rolled a 12 on 2d6, the result of which was the immediate death of the leading French brigade, GdB Leisure. The following turn, three French brigades (including Colbert's cavalry, became Hesitant. At least Leisure's brigade rallied from Falter. This proved to considerably slow the French advance down. Coehorn's brigade continued to push on the Austrian right, forcing one Austrian unit to Retreat, and then suffering the same fate from an Austrian counterattack. French columns were snaking around the woods to the right as well. Still, French casualties were moderately heavy on this flank. On the Austrian left flank, the O'Reilly Chevaulegers took advantage of the French heaitation and promptly attacked, routing a unit of Hussars and throwing the French cavalry into Falter. Finally, by the beginning of Turn 8, French infantry was advancing to the attack onto the center town. The defenders belched musketry from the buildings in defiance of the approaching columns. Unfortunately though, Colbert's cavalry brigade fell back in Sauve qui Peut! This was an inopportune time to open up the French right flank.
At this point, French columns attacked the left-hand town sector, suffering severe musket fire. In the ensuing melee, the French infantry was forced back in Disorder.
On the Austrian right flank, the Tirailleurs du Po continued to engage Austrian skirmishers in the woods, while French columns maneuvered to envelope the flank, and was promptly met by supporting Austrian infantry. French casualties in this sector were beginning to add up. Meanwhile, Colbert successfully rallied the French cavalry and threw them back into action against the confident Hapsburg horse.
By this time, GdB Ficatier's brigade swung into action, attacking the right sector of the village, but suffering the same fate as the previous attack. Although worn down, the beleagured Austrians held onto the town, denying the French access to the crossroads. On the Austrian left, the Grenzers and cavalry advanced, with the Chevaulegers trouncing the French Hussars, throwing Colbert's brigade into Demoralization. On Turn 10, with attacks against the village failing, and the French right vulnerable, the decision was made to retire from the field. The battle was an Austrian victory ! Approximate casualties were 1,300 French to 400 Austrians. General de Division Claparede had indeed suffered a bloody nose !

Sunday, February 6, 2022

Spring 1809 Napoleonic action, Part one

I decided to run a small rearguard action based on the aftermath of the battle of Abensberg (April 1809). I chose Jellacic's division to defend a crossroads against General de Division Claparede's division with some attached cavalry. The premise was simple; the outnumbered Austrians had to hold their position for 13 turns (nightfall). The rules used were the excellent General d'Armee rules by David Brown, but with modified ADC rules. FML Jellacic's force consisted of one line infantry brigade made up of 6 battalions and an advanced guard brigade that included two large Grenz battalions and the famed O'Reilly Chevaulegers. Jellacic also had 12 guns split into a battery per brigade. Claparede's force consisted of GdB Colbert's cavalry brigade (minus the elite 7th Chasseurs), two brigades of line infantry (4th battalions, so graded as Reservists), and one light brigade made up of 4 battalions of legere infantry but included the famous Tirailleurs du Po and Tirailleurs Corses. The Austrian commander decided to deploy the Grenz infantry in and around a large wood that covered the Austrian left flank. The Chevaulegers were positioned as reserve elements behind the woods and the center town. The line battalions were garrisoned into both zones of the town at the crossroads as well as the right flank. Third-rank skirmishers were placed in the woods on the right flank, but supported from the rear. GdD Clapatede's leading light brigade was deployed along the main road leading to the village, while Colbert's cavalry supported the right flank of the marching infantry. The other two infantry brigades were to march onto the table. The French only had 13 turns to capture the crossroads, so they had to move fast.
Austrian infantry deployed to the right of the town.
The leading French brigades march onto the field.
Colbert's hussars and Chasseurs support the French right. Quickly, the French skirmishers of GdB Coehorn's light brigade engaged the Austrian right flank, with both sides suffering minor losses. Two French brigades used the "forwards" ADC tasking to quickly maneuver into position to attack the center town. French cavalry moved slowly forward on the right flank, attempting to evade the Grenz sharpshooters in the woods. The O'Reilly Chevaulegers, seeing the French threat on their leftflank, began to maneuver around for an obvious showdown with the French cavalry.
French infantry begins to mass. On the Austrian right, French skirmishers suffer moderate casualties, primarily caused by the 6-pounder battery that the position was anchored on, the guns spewing forth cannister at a deadly rate. A Grenz 3-pound battery did get off a lucky shot (rolled a natural 12), dramatically killing GdB Lesuire, throwing his brigade into a Falter situation. It was now at the half-way point. The sun was beginning to drop, the French brigades were now in attacking position. En avant !

Tuesday, July 6, 2021

Waterloo 2021, Pt. 2

With the British right flank bent back, Hougomont taken by the French, Picton’s division holding the center, La Haye Saint and Frischermont still occupied by the allies, and the leading Prussian elements on the field, it was time for a dramatic measure. 


The Attack of the Old and Middle Guard

The British in the center had repulsed D’Erlon’s attack, but were fatigued and weakened. Lobau’s VI Corps had succeeded in attacking in conjunction with D’Erlon. The British position in the center was becoming precarious. Napoleon (played brilliantly by Jackson) then made the decision to commit a division of the Old/Middle Guard and the Guard heavy cavalry to puncture the center. The remainder of the guard would mobilize to the French right to help counter the Prussians. 

The Grenadiers a Cheval and the Empress Dragoons struck first, sending the allied infantry backwards. The artillery of the Imperial Guard also opened up as the bearskin-clad guardsmen marched up the ridge. Uxbridge, seeing the center buckle, began to siphon cavalry to help bolster the position around La Haye Saint. The fighting was fierce, but the French guards prevailed and Picton was forced to retreat and La Haye Saint was taken by the French as well. 


Allied troops brace for the impact

British cavalry counterattacked but the commitment of the Guard prevailed. The center was pierced and the right flank was reeling backwards. Only Cole’s small command remained unmolested at Frischermont.

The Prussians Advance

Meanwhile, Blucher’s leading elements had emerged from the Bossu du Paris and were engaging Kellermann’s heavy cavalry. French infantry from D’Erlon’s Corps and Lobau’s command were reforming against the Prussians while the French Cuirassiers and Carabiniers fought to buy time. Brilliantly, the Prussian cavalry overwhelmed the French with the loss of only one formation. Fierce fighting punctuated the Prussian advance. As the infantry began to deploy out of the woods to face the fatigued French, the game was called as Wellington ordered a full allied retreat. 

The Prussians were making substantial progress by this point, but had 2 lines of French infantry to fight through before reaching Plancenoit. Coupled with the arrival of the rest of the Old/Middle Guard infantry, it was determined that, no matter the outcome in this sector it would be a long fight. With Wellington’s troops out of the action, it was meaningless to continue the fight against Plancenoit. 


The climactic battle was over. After calculating Victory Points, it was determined that the French had over a 25% advantage, therefore the game was considered a Major French Victory. 

Thanks to all of the Tidewater Warriors, Doug Kline of Battlefield Terrain Concepts for donating a portion of the terrain, Bradley Elliott for his extraordinary painting skills (many hours ), and Mark Bruce’s donation of British heavy cavalry and Highlanders. 

We really put Et Sans Resultat through the ringer and the system was up to the task. We look forward to using these fantastic rules in the future. 


Sunday, July 4, 2021

Waterloo 2021, Part 1

During the weekend of June 18-20, our local gaming group simulated the legendary Battle Of Waterloo. We used the grand-tactical rules, Et Sans Resultat (ESR), at the 75 yard per inch scale. Our gaming table was 12.5’ by 6’ and we featured every unit down to the battalion level. After 14 hours of action over a two-day period (not counting deployment time on Friday evening), we got a result. The ESR system worked well; two practice games prior to the big battle enabled almost everyone to learn the rules well. 

 
Most of the gang at the conclusion of battle

 
The gaming table

The battle itself was scored using a combination of geographic objectives and retreating/ broken formations making up the available victory points. Hougomont, La Haye Saint, La Belle Alliance, Plancenoit, and Frischermont made up the geographic prizes.

The British deployed with Picton holding the center, supported by Uxbridge’s cavalry Corps. The Prince of Orange held the right flank, while Hill anchored the left flank at Frischermont. 

The French deployed Reille’s Corps against Hougomont and the British right flank. In addition, Milhaud’s cavalry Corps, the Young Guard, and the light cavalry of the Imperial Guard were added here to add power to the main attack against the Dutch-Belgians. D’Erlon’s I Corps held the center and the French right flank. The Imperial Guard, Lobau’s VI Corps and Kellermann’s cavalry Corps were held in reserve in the center. 

Elements of D’Erlon’s Corps at Plancenoit

Reille, Milhaud, and Ney commanding the Young Guard gear up for the main thrust

The Old and Middle Guard in reserve

The crew in action


Action commenced on the 1120 turn as the French attack on the British right began in full earnest. A well-placed grand battery on the ridge between Hougomont and La Haye Saint repulsed two French divisions of Reille’s Corps with bloody losses. Seeing this strong British position, Ney held up the advance of the Young Guard. Shortly afterward, the Young Guard was redirected  to continue the attack on the British right. The Dutch-Belgians, along with Cooke and Alten’s British troops, began to give ground and the Dutch-Belgian cavalry had to committed. D’Erlon advanced, but only to pin the British center and left flank in place. Bombardment from both sides in this sector yielded minor casualties. 

 
The action in full earnest

 
The French attack on the Dutch-Belgians

 
Allied cavalry attempt to save the right flank

 
Milhaud’s Cuirassiers attack !

 
The battle was intense at this point


As the British right flank was giving ground, Wellington made the decision to shift Uxbridge’s cavalry to that sector. The French, in turn, launched Milhaud’s heavy cavalry and the Guard Chasseurs a Cheval against the Dutch-Belgians. Hougomont was attacked and changed hands multiple times. 

Seeing the British cavalry shift to the flank, D’Erlon then launched his Corps against the center. The Brunswick division and Clinton’s command melted away as the the French took Papelotte. Picton held his ground though, then counterattacked, and repulsed D’Erlon’s attack. The Highlanders especially covered themselves with glory! D’Erlon fell back in good order to reform.

The action at Hougomont saw the Young Guard take the chateaux, but were then forced out by British Foot Guards. 

 
French Cuirassiers in action

The Imperial Guard begins to stir

 
Dutch-Belgians giving ground

 
Reille’s Corps regroups


Action on the British right saw the Guard Chasseurs a Cheval burn through the flank, but eventually countered by the Scot Greys. Milhaud’s Cuirassiers launched multiple attacks as well. The damage was done, as the British right was beginning to buckle. Hougomont was in French hands. The British held onto the center ridge and La Haye Saint, while the French occupied Papelotte. Hill still clung onto Frischermont and anchored the British left flank. 

By this time, the Prussians were approaching the battlefield. It was time for something dramatic ! 

Next: The attack of the Old and Middle Guard. The Prussians arrive !