Friday, January 29, 2016

Dice versus Technology ?

With today's technology comes progress. Or does it? We, as gamers, can either embrace technology or discard it. After wargaming for over 25 years, I have witnessed (and fully participated in) the rapid rise of computer-moderated rules, such as the Carnage and Glory systems and the Computer Strategies systems (I'm sure there are others, but those are the ones I am most familiar with). I have also witnessed great resistance to computer-moderated rules. Which camp do you fall in?  Or like me, do you see the benefits of both methods of miniature gaming?

The bucket of dice approach......or the technological power of a computer???

Let's face it, computers can calculate and store data faster than any of us. The ease of letting the computer "do all of the heavy lifting" while we, as gamers, focus on making tactical decisions is very appealing. With no charts or math to worry about, gamers can focus more on the game itself and the social aspect of gaming. I have participated in many computer-moderated games that were smooth-flowing and, to put it simply, great fun. Computer-moderated games seem more like historical simulations than "games." The luck factor is very small, but a gamer needs to understand period tactics and how to make sound decisions to master a computer-moderated wargame. Though there are no charts, successful gamers need to fully understand how to manipulate variables such as mass, flanks, and formations in order to get a historical result. The common complaint of computer-moderated wargames is the "bottleneck" factor. Because a computer can only compute the data that it's given, someone has to manage this data. If this "game master" is slow or inexperienced, players will become restless waiting for their turn to move, fire, or charge. The key to a smooth-flowing game is an experienced GM that can manage the data.....and the players. A veteran team with a veteran GM can breeze through a game with very realistic results. This equates to more beer drinking and socializing.

On the other hand, most gamers started with "dice and charts" games. These games never seem to go out of style. Gamers love throwing dice! Personally, I think most gamers have a psychological need to test their luck and to see if they can beat the odds. I mean, there is really something truly satisfying when your beat-up unit of Confederates destroys a much larger Union unit by your throwing of  "boxcars" at point-blank range. I could lose the game miserably, but I'll remember that throw of the dice for years! Wargaming is connected to gambling in a way (with no money lost......in most cases) and to many gamers, that is the true spirit of miniature gaming. In contrast to the excitement of the luck factor, there are usually some charts or rules (and maybe some math) that have to be frequently checked throughout the game. That is the "bottleneck" when it comes to traditional miniature gaming.

The truth is that both methods of gaming have pros and cons and will appeal to different gamers. That is the real beauty of our hobby; there are so many choices out there that all gamers can find their niche. My personal feeling is that I like both........I love the historical accuracy and freedom that computer-moderated systems give me. I also love throwing those dice and battling it out with Lady Luck. I think, as wargamers, that we should try both methods and embrace what technology has to offer as well as having a grand old time with dice and charts.

Sunday, January 24, 2016

Maida 1806 using Carnage and Glory 2 (Part 2)

Maida     July 4th, 1806          Part Two: The Game           

In Part One, we discussed the historical background, terrain, and OOBs of the Battle of Maida. Now, to the game itself. After programming all data into the Carnage and Glory 2 system, we decided to deploy our forces historically. My son took the British under Stuart, while I took the French under Reynier. We both decided to switch sides as GM when the other was moving.


The historical deployment


The terrain from the British point of entry


....and from the French perspective


British view of the table deployment


Keeping in mind that the French had to win within 8 turns (two hours of simulated time), I decided to use Compere's brigade as the primary attack, just as it happened historically. Peyri and Digonnet's brigades would advance and engage the British in skirmishing and long range firepower. To put pressure on the British right flank, I advanced one battalion of the 1st Legere  across the stream in open order through the disruptive terrain while Compere's other two units engaged the Combined Light battalion on the British right.


Compere's brigade advances to engage the British right


The other French brigades advance to pin the British, while the British maneuver to solidify the line
Compere's brigade quickly came under artillery fire, causing a steady stream of casualties. The 1st Swiss advanced in the center and, with the aid of the lone French horse battery, raked the British 81st Foot regiment with heavy casualties.


The Swiss infantry and French horse guns attempt to disorder the British center. The British guns, in turn, are having none of it, opening up as well

After exchanging musketry with the Swiss, the 81st Foot soon retreated in disorder. Meanwhile, the Chasseurs on the French right looked for an opportunity to create havoc. Through the first several turns, the main carnage involved the 1st Swiss and the 81st Foot (and then the 78th Highlanders, who admirably plugged the hole vacated by the 81st) as well as the vicious musketry duel between the Combined Light battalion and the 1/42nd Ligne. All batteries on both sides were blazing away during the havoc.


Firefight between the Swiss and the 81st Foot from another angle. The batteries on both sides are causing great "carnage"


Meanwhile, the British Combined Light Battalion and 1/42nd Ligne exchange close-range vollies. The 81st Foot can be seen retreating in the background

Another angle of the action in the center and British right

The French 1/42nd Ligne has had enough and retreats, while the 78th Highlanders advance to bolster the center. The 1/1st Legere is continuing to creep onto the British right flank through the disruptive terrain

French Chasseurs charge onto the tired British guns

On turn 4, the Chasseurs charged the center British horse battery, which it judged to be greatly fatigued. Nope!  The British guns bloodied the French light horse and sent them packing. In the same turn, the 1/42nd Ligne retreated in disorder as well. These were the first signs of problems for the French. The plan was to pin the Combined Light battalion from the front while the 1/1st Legere maneuvered onto its flank from the stream. With the 1/42nd Ligne's retreat, the coordination for the attack was out of sync (the Legere battalion attacking across the stream was not yet in position). Also, the 1st Swiss were routed by the resolute Highlanders in the center and the French cavalry were retreating as well. Here is where the supporting units advanced to the attack. The 2 battalions of the 23rd Legere kept up the pressure on Cole's British brigade while the French cavalry regrouped. The lowly Polish conscripts formed line formation to block the victorious Highlanders, but the French got a break here. Acland's brigade, due to the fatigued horse battery and the shattered 81st Foot received a "no advance" status. The Highlanders could not advance and the Poles dared not advance, so the entire center of the battle ended up in a staring match.


A stalemate in the center. Both opposing brigades had command/control problems at this point and could not advance. Neither side had skirmishers either. The Polish conscripts were lucky today !

With the game winding down, General de Division Reynier placed himself at the head of the 2nd battalion of the 1st Legere as the other Legere battalion was finally in position to strike across the stream. Under this pressure and constant casualties from French skirmishers, the Combined Light battalion finally retreated in disorder, covered by a 272 man unit of Corsicans and Sicilian conscripts. On the other flank, between the French 23rd Legere and the Chasseurs, the British were caught in a pincer. This was the situation entering turn 8, the final turn. The French furiously launched multiple charges on both flanks, hoping to win at the buzzer. If the untested (but totally fresh) Corsicans and Sicilians fled in the face of an overwhelming charge, the French would roll directly into the retreated Combined Lights. The entirety of Kempt's brigade would be shattered. But it was not to be. Kempt himself attached to the Corsicans and Sicilians, who promptly delivered a punishing volley to the charging 2/1st Legere. The French lights halted at 50 paces and the charge was stopped ! The Chasseurs on the other flank refused to charge, but the 23rd Legere did force back the Inniskilling Regiment of Foot. It was not enough and the game ended.

With the retreat of the Combined Light battalion, the lowly Sicilian and Corsican unit was the only thing blocking the French charge. If these troops fled in front of the charge, the entire British flank would evaporate


The Corsicans and Sicilians held and punished the French charge, which had already been weakened throughout the game due to the fire of the British guns. Kempt attached himself to the unit and the French charge was halted at 50 paces

On the other flank, the French Chasseurs failed to charge in and the British units fell back but were considered to still be in good order

What a nail-biter. I had tried to be aggressive and yet my timing of the French attack was thrown out of whack by the inability of the 1/42nd Ligne to hold up to the musketry of the British Combined Light battalion. As the game ended, we realized that one unit can make a difference. The Sicilian/Corsican battalion literally saved the game for the British.

As we turned to the end of game calculation we decided that since the British were not forced off the field, they should be given a territorial advantage. The system then calculated casualties with the end result being ..... a draw ! Taken one step further though, walking wounded returned to both forces and the system finally concluded that the battle was a narrow British victory. Both sides fought extremely hard. The British stood steady and firm throughout while the French were extremely aggressive, launching intimidating attacks. Final British casualties were 512 troops while the French suffered 549 (all after walking wounded were added back in).  This was almost as close as it gets !

If the game had not ended at 8 turns, and we used the Army Morale system within the software, I do think that it would have ended as a French victory, but an extremely hard-fought one.


Friday, January 22, 2016

Maida 1806 using Carnage and Glory 2 (Part 1)

Maida     July 4th, 1806     Part One: The Scenario


The battle of Maida in Southern Italy, July 4th, 1806


Continuing with the Carnage and Glory 2 system, we ran a small division-sized scenario in the attic.  The system can handle any size battle. With a smaller scenario such as this, playing time should take approximately 1 1/2 - 2 hours. This scenario can easily be adapted for any rules system.


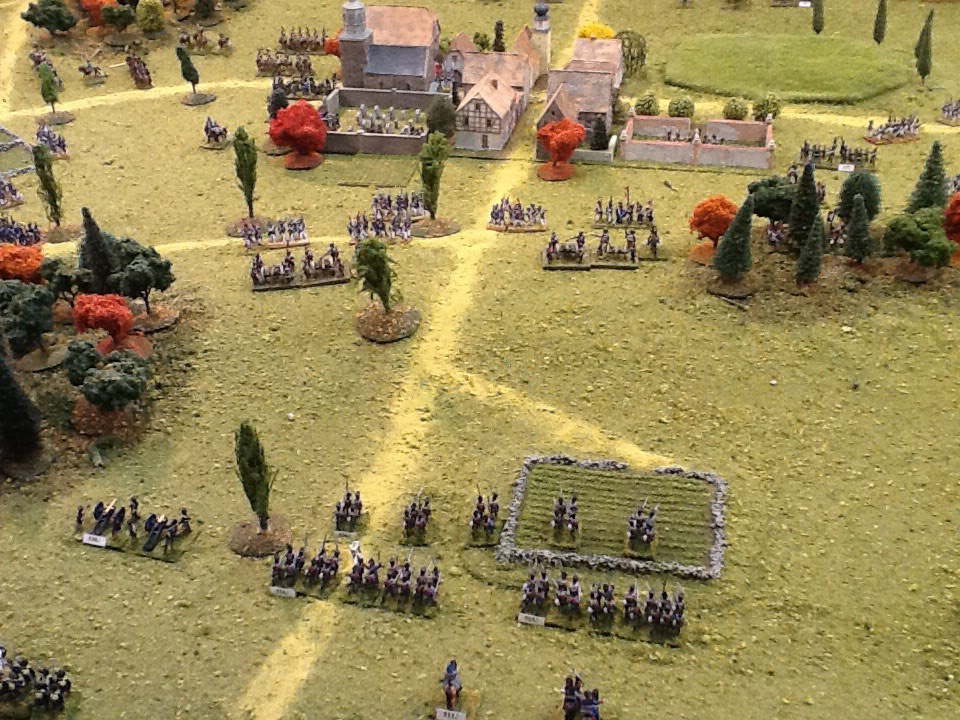
The 1/42nd Ligne advances against the 78th Highlanders


The battle of Maida in southern Italy is a great pick-up game. There is a division of infantry on each side, with a few guns and a light cavalry unit thrown in for fun. The terrain is very simple as well, allowing for a quick set-up and break-down after the game. Maida is a perfect choice for a scenario to start learning the Carnage and Glory 2 system.

Before the actual AAR of the game with Carnage and Glory 2, here's the scenario information:

Historical background of the battle: To support the defense of Sicily, British Major General Sir John Stuart organized an expedition to invade southern Italy. After landing at the Bay of St. Euphemia in Calabria, a short engagement resulted and the defending French General Reynier (actually Swiss) was alerted to the presence of the British force. Both sides were mistaken in the assessment of the other's forces; the British totally underestimated the French numbers, while Reynier was thoroughly confident that he could push the British back into the sea. Reynier concentrated his forces near the town of Maida, as the British marched onto the Maida plain. The engagement was on.


 General de Division Reynier

The battle: The French marched towards the British force in line formations, contradicting the popular notion that they threw themselves at the British in columns. The smoke from the artillery, as well as the dust produced by the cavalry, actually shielded the movement of the French as the lines closed. An attack on the British right into the scrub brush was repulsed by British flankers and the
Corsican Rangers, while the action in the center consisted of a firefight between the French and the redcoats, with the British gaining the upper hand and advancing. At this point, French General Compere saw the British infantry discarding their greatcoats and assumed by the movement (and confused by the smoke and chaos) that the British were retreating. The French charged with great élan, only to be met by steady lines at 30 paces. The resultant point-blank fire was devastating, and the French began to rout, taking the entire center with them.

 The 1st Legere routing after a British volley


General Compere was wounded twice before falling right in front of the British infantry. The redcoats pursued Compere's force all the way to the village of Maida, inflicting 900 casualties with the loss of only 50. As this was happening, the French right flank was holding its own, but became isolated and forced to withdraw. After some successful volley fire by the 23rd Legere, and with the help of Reynier's chasseurs, his shattered force withdrew from the field. Due to the lack of British cavalry, there was no further pursuit. The battle was a resounding British victory, even though the British force (after advancing inland with great success) embarked for Sicily after a few weeks due to Marshal Massena's advance upon southern Italy after the siege of Gaeta ended. Many historians view Maida as the first clear example of the superiority of British lines versus French columns, but in actuality, most of the French and allied infantry deployed into line formation as well. Possibly the real reason for the French defeat is the fact that Reynier totally underestimated the grit and toughness of the British infantry; his troops didn't wear down their opponents with skirmishers and artillery, preferring to gut it out in a losing succession of firefights and charges. The charge of Compere's infantry into the fire of the British, and the ultimate rout from the results of those volleys, began a "domino effect" that fractured Reynier's force, allowing Stuart to counterattack with vigor. The final casualty figures were approximately 1,200 French to 340 British. Maida was hailed, in spite of its small number of combatants, as a "great" victory by the allies. In truth, the French seemed unbeatable up until this point, so any good news was considered "great" news. As a side note, the Emperor Napoleon shrugged off the defeat, stating that Reynier "merely had a bad plan."


                                     The historical deployment

The scenario details:  This scenario is a challenging battle for the French to win. The British infantry lines are especially tough to break. Thus, the recommended strategy for the French is to be patient and to use their greater advantage in offensive skirmishing, greater overall numbers, and a unit of cavalry. The British should employ historical tactics, that is to punish the attacking French with musket volleys/artillery and to counterattack aggressively when given the opportunity.

 Colonel John Kempt

Terrain: The battlefield of Maida has relatively simple terrain. Treat the low scrub bushes on the left flank of the British as 3/4 speed for movement purposes (disruptive terrain movement is not necessary).  The Lamato river is shallow and dry in parts, so the stream may be forded at will (treat as disruptive movement and 1/2 movement speed). The area to the British right across the stream is rather rough and rocky, filled with shrubbery; I treat this area as disruptive terrain as well.

Weather: The weather is sunny/clear and the ground is firm.

Deployment:  This action can be played out on a 6' x 5' table. The attached map demonstrates the historical deployment of forces (Compere's and Kempt's brigades deploy at 750 paces between them--echelon other brigades as on the battle map). Another option is to deploy as the players wish at 750 pace distance, as long as it is agreed upon between players. The British must deploy first in this instance.

Open Order: The British Combined Light battalion, Corsican-Sicilian battalion, Swiss infantry on both sides, French Legere and Ligne troops may form open order. The French Chasseurs may also form open order.

Skirmishing: British Foot, Grenadiers, and Highlanders have provided their light companies to form the Combined Light battalion, so skirmishers will be set as none for these units. The Polish conscripts also do not have effective skirmishers, either defensively or offensively. All other units may utilize offensive skirmishers.

Reinforcements: The 20th Foot regiment arrives on the bottom table edge in support of the rest of Cole's brigade. This unit can be programmed within the system as expected on Turn 2. In our game, they didn't show up until the game was almost over.

Artillery: All British and French horse guns are light 6 pounders, with no howitzers.

 Victory:  The game will last 8 turns. This time limit is to simulate Reynier's zeal to throw the British back "into the sea." The pressure to attack is definitely on the side of the French. As an option, players may fight until one side or the other fails morale, however long it takes.

The Order of Battle:

The French:

Division Reynier - Attack
  [ 101] General de Division Reynier - Active C+     (Mediocre)

    Brigade Compere - Attack
    [ 102] General de Brigade Compere - Active B     (Good)
 [ 101] 1/1st Legere                      0/ 905      C+ [sk]    (Veteran)
 [ 102] 2/1st Legere                      0/ 905      C  [sk]     (Regular)
 [ 103] 1/42nd Ligne                     0/1046     C  [sk]     (Regular)

    Brigade Peyri - Attack
    [ 103] General de Brigade Peyri - Active B-      (Above Average)
 [ 104] 1/1st Polish-Italian Legion       0/ 472       D+     (Conscript)
 [ 105] 2/1st Polish-Italian Legion       0/ 465       D+     (Conscript)
 [ 106] 1/1st Swiss Regt                      0/ 630      C  [sk]    (Regular)

    Brigade Digonnet - Attack
    [ 104] General de Brigade Digonnet - Active B-     (Above Average)
 [ 107] 1/23rd Legere                          0/ 630      C  [sk]      (Regular)
 [ 108] 2/23rd Legere                          0/ 636      C  [sk]      (Regular)
 [ 109] 1/4th Artillerie a Cheval           0/ 150 [ 6]  B-           (Elite)
 [ 110] 32nd Chasseurs a Cheval       0/ 328      C  [sk]      (Regular)

 Strengths:
  losses/active
       0/  5689 Bayonets
       0/   328 Sabres
       0/   150 Artillerists
       0/     6 Cannon
       0/  6167 Total of all arms
              5 Standards present

The British:

 Division Sir John Stuart - Attack
  [ 501] Major General Sir John Stuart - Active B-     (Above Average)

    Brigade John Kempt - Attack
    [ 502] Colonel John Kempt - Active B-                  (Above Average)
 [ 501] Combined Light Bn.                0/ 694           B- [sk]   (Elite)
 [ 502] Corsican Rangers/Sicilian Vols    0/ 272     C- [sk]  (Second Line)
 [ 503] 1/RHA Battery                     0/ 100 [ 4]         B-        (Elite)

    Brigade Lowry Cole - Attack
    [ 503] Colonel Lowry Cole - Active B-             (Above Average)
 [ 504] Combined Grenadier Bn             0/ 485      C+      (Veteran)
 [ 505] 1/27th Inniskilling Regt              0/ 781        C       (Regular)  

    Brigade Acland - Attack
    [ 504] Colonel Acland - Active B-                    (Above Average)
 [ 506] 1/78th Highland Regt.             0/ 738       C+        (Veteran) 
 [ 507] 1/81st Foot Regt.                     0/ 603      C           (Regular)
 [ 508] 2/RHA Battery                        0/ 150 [ 6]  B-         (Elite)

    Brigade Oswald - Attack
    [ 505] Colonel Oswald - Active B-                   (Above Average)
 [ 509] 1/58th Foot Regt.                    0/ 576      C            (Regular)
 [ 510] De Watteville's Swiss             0/ 287       C           (Regular)
    Regiment Ross - Attack
    [ 506] Colonel Ross - Active B-                        (Above Average)
 [ 511] 1/20th Foot Regt.                   0/ 624       C            (Regular)

 Strengths:
  losses/active
       0/  5060 Bayonets
       0/   250 Artillerists
       0/    10 Cannon
       0/  5310 Total of all arms
              8 Standards present

Coming Up:  Part 2 (the game)
         

Tuesday, January 19, 2016

A Review and Summary of Carnage and Glory 2

Carnage and Glory 2 is a computer-moderated system that accurately tracks the details of an ongoing battle so that the player can focus on tactical decision-making. Although it can be played solo, the system is best in a multi-player game with either a dedicated GM or multiple players adept at data input. In my humble opinion, Carnage and Glory 2 is the top choice (with a veteran GM) for multi-player games.

The systems available include software and support for the Napoleonic Wars, Seven Years War (and American Revolution), the American Civil War, Franco Prussian War, the Age of Marlborough, and English Civil War (and Thirty Years War). Nigel Marsh is the brilliant creator of the system and everything can be purchased at the CG2 website:  http://www.carnageandgloryii.com/ .

Normal movement occurs independently of the software. Only charges, formation changes,
or movement through disruptive terrain needs to be input.


At its core, CG2 is a morale and fatigue tracking system, but it is capable of so much more. Players can conduct engineering functions, charges, movement/formation changes, fire, combat, and rally checks easily. Normal tabletop movement is independent of the computer system as the player only needs to input special movement, like formation changes or movement through disruptive terrain. Each turn represents 15 minutes of time and the turn sequence is laid out easily for each turn.  Our group uses a 30:1 figure scale (although any ratio scale may be used) and a ground scale of 1"= 50 paces (37 yards). These scales are flexible for any size figure (15mm, 25mm, 40mm, etc). For example, 1" typically equals 25 paces while using 25/28 mm figures. Basing is also flexible; there are recommendations, but as long as opposing forces are based similiarly, it should not affect the game. Initiative is also calculated by the software automatically. Army break points, reinforcements, heat exhaustion, weather, and more, may be entered initially as well. After turn 1, the computer does the rest. In my opinion, the system truly shines in the accuracy of casualty calculation and the monitoring of fatigue. Fatigue, both physical and psychological, are critical factors in combat, and most systems either ignore it or just get it wrong. The awareness of fatigue is an area in which CG2 reigns supreme. Fatigue management is also the factor manipulated the most by veterans of the system and most ignored by neophytes.


Carnage and Glory 2 can handle any size battle, small or large.

As far as command and control goes, the system does not have command distances for movement, it is rather more subtle than that. Each leader has a maximum distance to travel in order to rally a unit, and units are dependent on brigade support modifiers entered into the software to ensure that charges ram home or a unit stands steady in the face of a charge. Units from different brigades also may not charge the same target. Therefore, units of brigades are encouraged to deploy within supporting distance of each other, mirroring period tactics. There is an orders system as well, again tracked by the computer. Units on Defense orders receive a positive modifier when standing versus a charge, while units on Attack orders receive a similar modifier when conducting a charge.

Morale is another area in which CG2 makes it easy for the player. Unit and brigade morale checks are conducted automatically. Units that require rallying are listed, and if a player is able to attach a leader within the chain of command, the attempt is made and the results are computed immediately.


This picture is a great example of the unit identification tags that can be printed off using the software. Each unit is then tracked throughout the game by the software.


As for possible challenges, the flow of a game is dependent on a knowledgable GM, who is responsible for data input. With an inexperienced GM, the game can slow significantly.  In contrast, our gaming group is very experienced in this aspect; our games are brisk and very smooth. We also have multiple players capable of competent data input. A good rule of thumb is to start small when learning the system and build to larger actions later. Also, there is a moderate amount of work before the battle, as each unit and leader must be rated and added to a unique order of battle. In addition, there  is also the time that it takes to label each unit (the system keeps track of each unit's specific number) prior to a game. Trust me though, this amount of work is worth the effort to produce a superior gaming experience. In summary, CG2 is simply a  superb system in order to fight a Napoleonic battle.


Monday, January 11, 2016

The Road to Leipzig using Carnage and Glory 2


Recently, our Roanoke gaming group hosted a Napoleonic scenario based on an ahistorical preceding action just prior to the mammoth battle of Leipzig. In attendance were Doug, who ran the French, Italians, and Germans, while Andy controlled Osten-Sacken's and Langerons' Russian Corps. I ran Yorck's Prussian Corps. The terrain was produced by Doug Kline's Battlefield Terrain Concepts. The figures were supplied by Doug and myself.

The preferred rules were Carnage and Glory 2, which we were all familiar with. The scenario pitted Bertrand's and Lauriston's Corps of the Grande Armee against Blucher's Army of Silesia. Murat was tasked by Napoleon to act as wing commander for Bertrand and Lauriston. Basically, this was a rear guard action to cover the rest of the Grand Armee's concentration around Leipzig. Murat's force occupied a formidable position but were outnumbered in all arms. The game was to last 18 turns (although we called it after turn 15) and each important terrain objective was assigned victory points.


The table before the fight. Klinefeldt is in the foreground


The table again with Beedledorff in the foreground


The French position was anchored on both flanks by minor towns (Beedledorff on the right and Klinefeldt on the left). The large town of Gross Klinefeldt in the center dominated the surrounding area. Ridges in front of Gross Klinefeldt and to the right of Klinefeldt had to be taken as well. A large  wooded area to the left of Beedledorff was also a major obstacle.
Bertrand deployed his Corps to defend the center and Beedledorff, while Lauriston occupied the rest of the field. Murat deployed substantial reserves to the rear of Gross Klinefeldt. In addition to the towns and ridges, the French had to be wary of their lines of communication as well, especially in the face of superior numbers of Blucher's cavalry.


Total numbers were approximately 42,000 Prussians and Russians to 29,000 French, Italians, and assorted Germans.

Blucher's plan was to pin the French center with an impending attack and focus initially on the two flanks. The Russians would attack Klinefeldt, while the Prussians would attack Beedledorff.

Action at Beedledorff
The game started well for Blucher's forces, with the Prussians advancing steadily into Beedledorff and the woods which flanked the town. Initially, the Italians defending Beedledorff melted like butter in the face of the Prussian onslaught, but would prove their mettle as the battle raged on. Prussian grenadiers and Jagers took control of the large wooded area next to Beedledorff but were exhausted due to French skirmisher fire and the disruptive terrain. But they held the woods. Prussian cavalry attempted to advance around the French right flank but French cavalry stiffened and threw the Prussians back. Even though they outnumbered the French cavalry on this flank, the Prussians would eventually be put on the defensive and end the battle in a very vulnerable position. As for Beedledorff itself, Prussian grenadiers and Landwehr would take 75% of the town but the Italians rallied over and over again to maintain a foothold. A timely charge by Wurttemburger cavalry crushed an advance on one side of Beedledorff and  Yorck's Prussians would advance no further. This flank saw the Prussians control the large wooded area to the side of Beedledorff and most of Beedledorff itself, but the French right flank was still intact.


The Prussians line up against the French right flank at Beedledorff


Another view of the French right flank anchored on Beedledorff


The Prussians advance against Beedledorff


More action versus the Italians in Beedledorff


The Italians doggedly hang on in Beedledorff


French and Prussian cavalry tangle on the flank
Action at Klinefeldt
Osten-Sacken's cavalry swept onto the French left flank around Klinefeldt, while the main attack proved to be an advance onto windmill ridge just to the right of Klinefeldt. The French artillery on the ridge punished the Russian infantry and artillery attempting to advance. Although the Russians took heavy losses, eventually numbers began to tell and the huge Russian batteries began to blow holes in the French formations. Still the French held. Steadily advancing up the ridge (and aided by a heavy mist), the Russians waged a back and forth struggle with the French over this ridge. At the end of the battle, the ridge was contested by both sides, but the French had held long enough. On the extreme left flank, the French cavalry had been forced back due to weight of numbers but with the arrival of French Dragoons, had successfully refused the flank behind Klinefeldt and protected the Army's rear. The Russians had exposed the flank of Klinefeldt and were punishing the French garrison with a 12 gun battery of Russian horse guns. At this stage of the battle, several Russian regiments swept onto the refused flank behind Klinefeldt,
hoping to buy time for the advance on windmill ridge. This resulted in one of the bloodiest episodes of the battle, as the French batteries supported by cavalry tore through the ranks of the Russian horse. The sacrifice achieved its aim, but the price was terrible. The battle ended with the Russian infantry controlling about 60% of Klinefeldt, the windmill ridge in contention and one of the minor French lines of communication cut. The French cavalry had successfully protected the rear of the army and the primary route of retreat. The huge Cossack division never made it onto the table; there was never an area to break through on this side of the table. This area of the battle saw horrible losses on both sides.


The French left flank was anchored on the town of Klinefeldt


The Russians advance on Klinefeldt


Good view of the entire table during the Russian advance 


The fight over windmill ridge was brutal
Action in the center
On turn 9, as the attacks on both flanks were well underway, the Prussians committed the reserves into an all-out assault on the French center. Brave French infantry attacked downhill to disrupt the Prussian advance but could not stand up to the larger Prussian battalions. Another bloody chapter was written as the French artillery stationed at the top of the ridge pummeled the Prussian infantrymen. With cavalry in support of the batteries, the Prussians literally crawled up the ridge. With heavy casualties, the Prussian infantry continued to advance. By the end of the battle, the exhausted French batteries retired from the ridge, but the Prussians were so bloodied, that the ridge remained in contention at the end. And with the French holding the ridge until the end, the town of Gross Klinefeldt and the primary route of French retreat were never threatened.


          The center looks sparse now, but not for long. The fighting was vicious by the end


The Prussians and French square off in front of Gross Klinefedt


 The field at the end of the battle


A great game; it lasted a full weekend. there were over 2,000 figures on the table.


Summary
With all French reserves committed, the Prussian and Russian attacks were blunted. As dusk was falling, the French began an orderly retreat, having held their position long enough. Due to the French still controlling more terrain objectives, Murat was awarded a Minor Victory, but it was a costly one. Total French losses were 2,300 while the Russians and Prussians suffered 4,300. It was a hell of a battle. Kudos to Doug for his tenacious defense;it was a hard won victory. A great gaming experience was had by all and Carnage and Glory, as always, proved to be an incredibly realistic simulation.