Monday, April 11, 2016

Albuera 1811: Pt. 2 AAR

After reading Guy Dempsey's outstanding book Albuera 1811: The Bloodiest Battle of the Peninsular War, I was determined to recreate this battle in miniature. The actual battle was a very close affair, and featured some of the most vicious fighting of the Napoleonic Wars. There were also some interesting situations that affected the outcome immensely.......Blake's uncooperation with Beresford, Colbourne's flanking maneuver that allowed the Vistula Legion to emerge out of a rainstorm and wreak havoc, and Cole's decision to attack with his reserve division to finally win the battle were some of the more memorable incidents.

I also regularly use Carnage and Glory 2 as well as General de Brigade for gaming the Napoleonic Wars, but I have been interested in the March Attack rules for some time now. March Attack are grand-tactical in scope, but utilize the infantry battalion as the primary unit for maneuver (which I love--I never became accustomed to the brigade as the smallest unit on the table). The scale of March Attack was also perfect for the southern flank of Albuera (at 60 yards per inch, it allowed me to recreate this sector of the field on a 6' x 5' table). My thoughts (and some house rules I added) on how well March Attack worked are summarized at the end.

So....after researching the maps in Dempsey's book (as well as maps in other sources) I created the terrain which featured the northern and southern knolls as well as the other rolling hills of the field. Turn one was to start at 10 am, after the French under Girard had crossed the Albuera stream and the Spanish under Zayas and Lardizabal had redeployed to meet this threat. Marshal Beresford had already given the order to Stewart's British brigade to redeploy behind the Spanish line on the reverse slope. Stewart's brigade was to enter the north end of the table in column on turn one. Historically, the British under Colbourne began their flanking maneuver at 11 am, shortly after Girard's columns hit the Spanish. Therefore, I had to time it right to mirror the historical result; after more consultation of period maps and measurements, I think I got it right.

I also wanted to recreate the battle with a strategic mindset of the different commanders and not the "fight to the last unit" philosophy of most games.


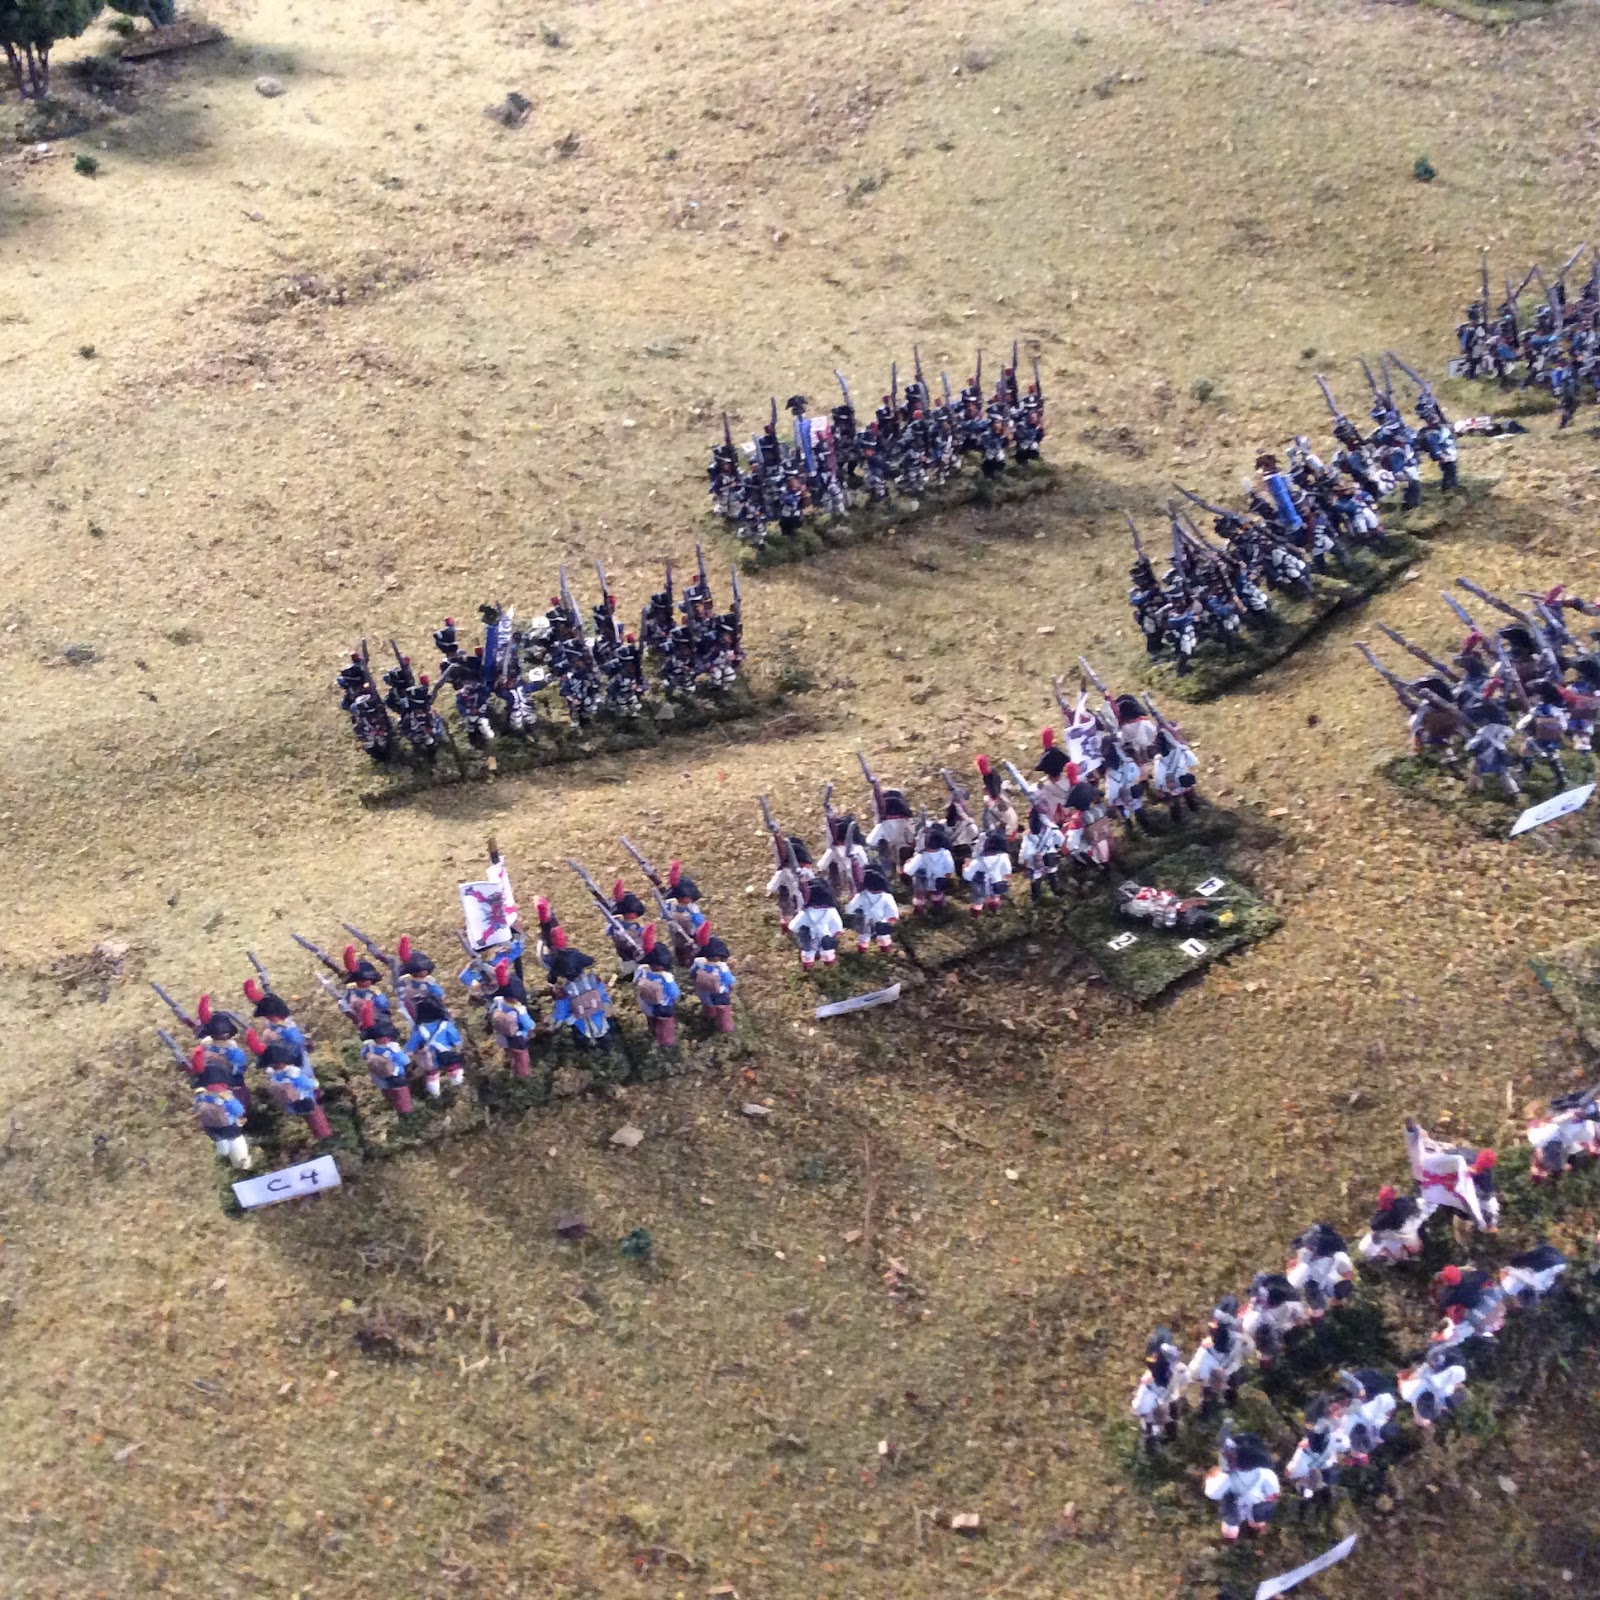
The initial deployment of the French V Corps and Werle's reserve brigade


The initial orders and OOB's are detailed in my earlier post concerning the scenario description. The game commenced with the French V Corps advancing to attack the Spanish deployed on the ridge line. Latour-Maubourg's cavalry advanced to support Girard's left flank. As the French deployed a battery on the southern knoll, it came under artillery fire from the Spanish, but to no effect. Meanwhile, on the allied side, Colbourne's leading battalions entered the table's northern edge behind the Spanish-held ridge.

Turns two and three saw Girard redeploying his first brigade into Ordre Mixte, instead of charging straight ahead in attack columns (as was done historically). This maneuver seemed to make more sense tactically, but it did give the British under Colbourne time to solidify their redeployment in support of the Spanish. It gave me some appreciation for Girard's historic attack in column; the French had surprise on their side and the goal was to rout the Spanish as fast as possible before reinforcements showed up. French artillery on the southern knoll opened up and light casualties were suffered on both sides.


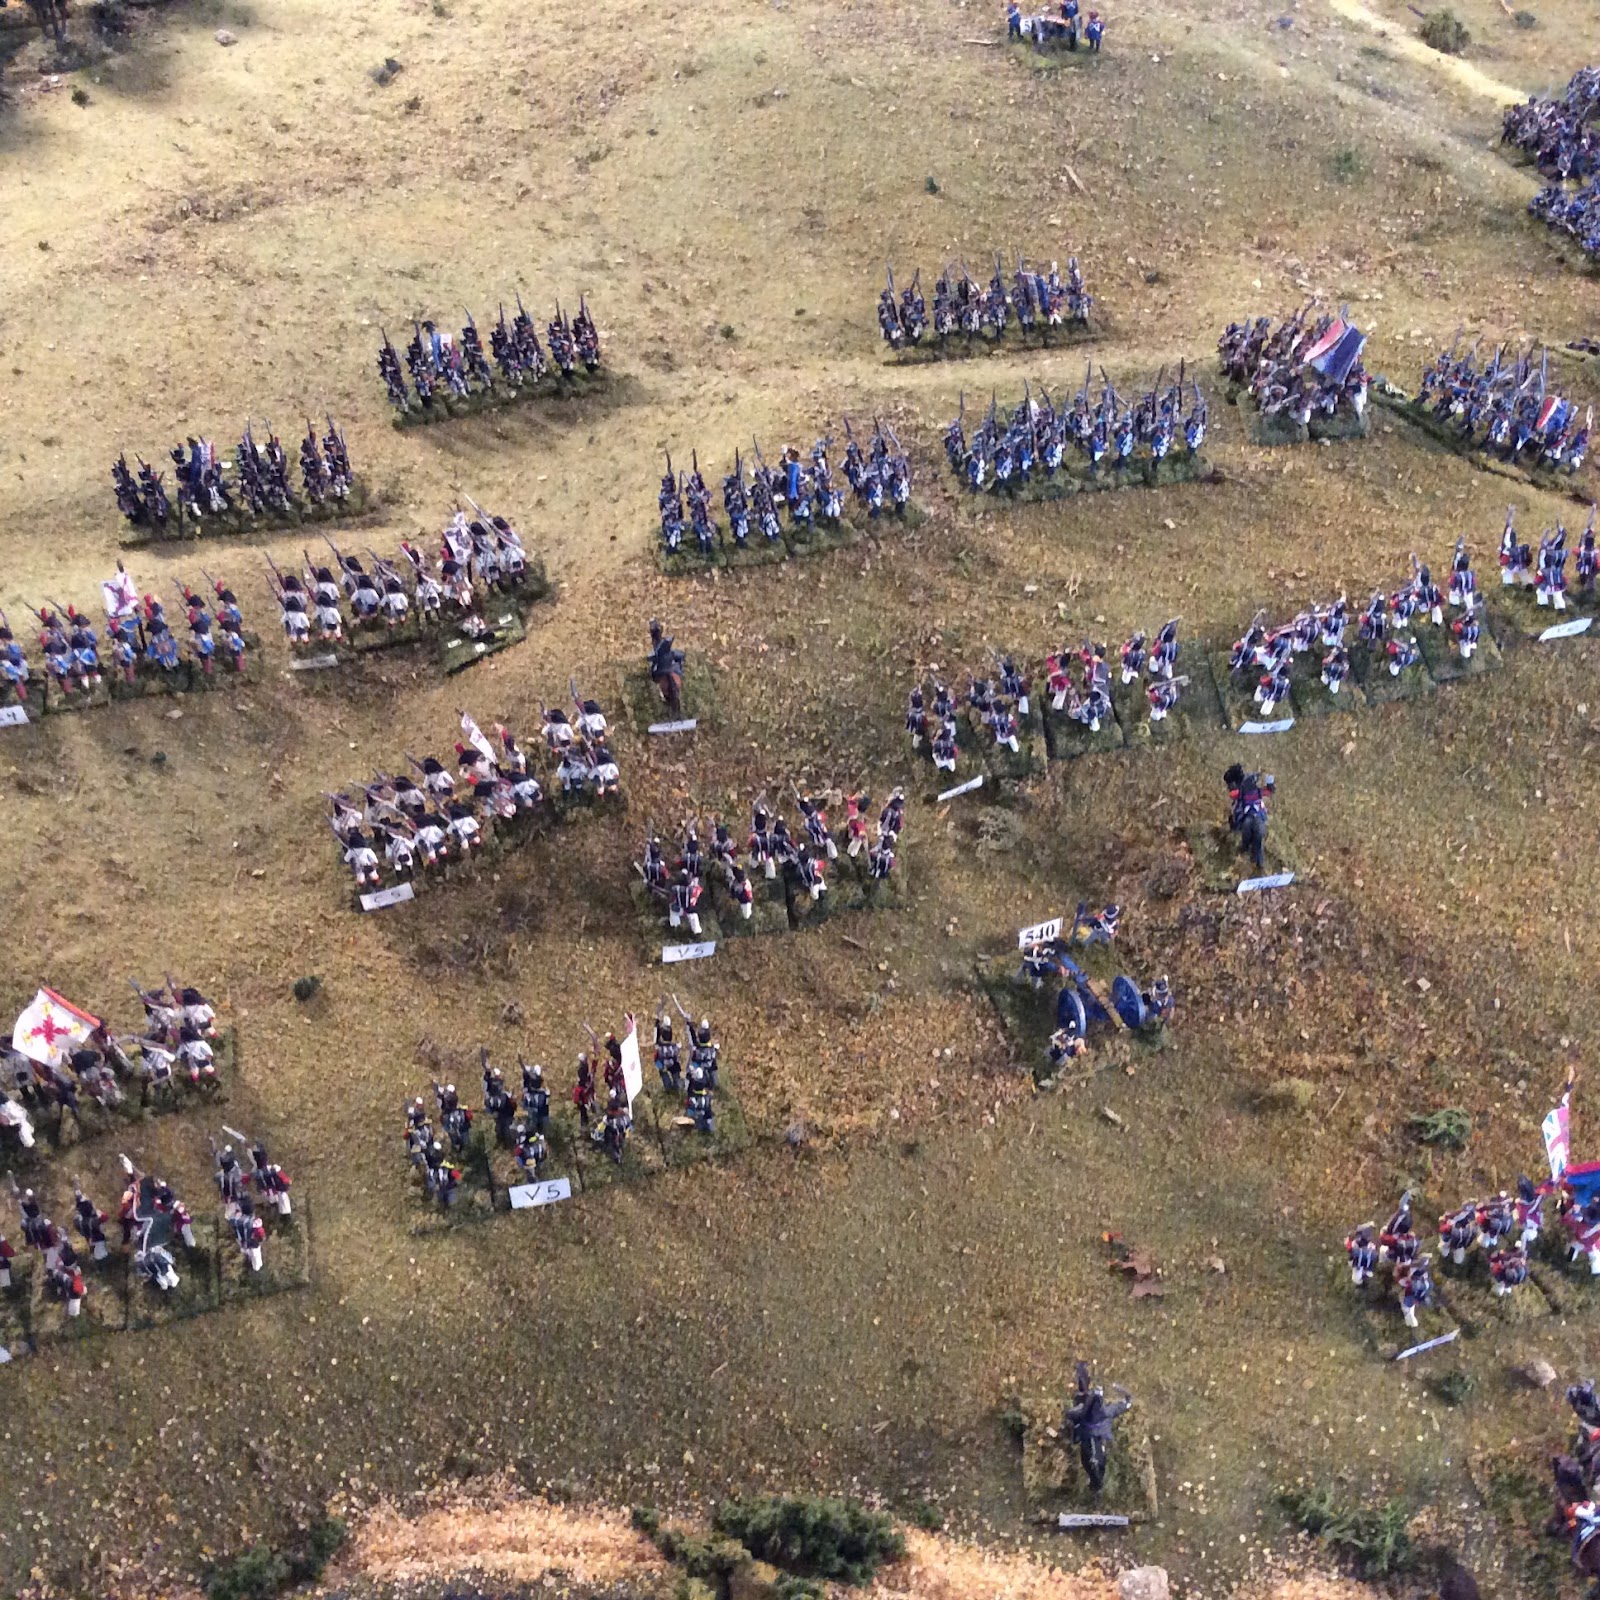
Girard's lead battalions advance toward Zayas' Spanish


Girard's battalions close to attack the Spanish and a nasty firefight erupts between the Spanish and French. Casualties mounted immediately and Zayas needed to attach to the Spanish Guards to keep them in the line. Meanwhile, Stewart's division forms a solid line behind the Spanish and waits. Historically, this was the point that the British moved around the Spanish line and attacked the French flank. We decided to benefit from our knowledge of history and stick to Beresford's original orders and use the British as a solid support.

The cavalry of both sides are both on support and watch each other's units in anticipation.


The French attack the ridge line as Stewart's British infantry calmly look on


At this point, the heavens opened up on turn four as heavy rain falls on the field.

The rain limited musketry and artillery casualties, but the action was so heavy that casualties continued to mount. Zayas narrowly avoided a leader casualty roll as he attempted to keep his Spanish in the fight. British skirmishers added to the Spanish and the French, now at a skirmish disadvantage, suffered more casualties.  The 1/34th Ligne attempted to charge the lowly Voluntarios de la Patria unit on the extreme right flank but failed its closing check and ended up disordered in front of the Spanish unit in line.

Subsequent turns saw more casualties between the French and Spanish units, with the combined grenadiers, in particular, being roughly handled by Lardizabal's Spanish. Pepin's 2nd division of V Corps redeployed and attempted to shoot the gap between the allied cavalry and infantry, threatening to outflank the Spanish. At the end of turn 5, one of the French battalions (the 2/40th Ligne) succeeded in charging the Spanish artillery on the ridge and routed it completely.


The French combined grenadier battalions retire in the face of withering Spanish musketry


Lardizabal's Spanish infantry celebrate the repulse of the French grenadiers


Pepin's 2nd division attempts to maneuver around the flank as Girard's division continues to engage the Spanish on the ridge


Turn 6 saw the British begin to counterattack the French where the Spanish line ruptured. The 31st Foot advanced and threw out a hail of musketry that rocked the 2/40th Ligne (which had just broken through the Spanish artillery). The Voluntarios de la Patria battalion routed, but the 3rd Foot was there to plug the gap. Colbourne's artillery also redeployed on the extreme right and commenced a withering fire into Pepin's lead columns.


The British, under Colbourne, block Pepin's advance around the flank


At this point, Pepin's division was beginning to stack up. Marshal Soult ordered Latour-Mauborg's cavalry to immediately attack the allied cavalry to allow the French infantry room to envelop the allied infantry. Also, as Pepin's division was now within engagement range, the French once again assumed skirmisher superiority and focused their skirmish attacks on the British infantry anchoring the extreme flank.

The Spanish infantry was beginning to break, but the British under Colbourne admirably plugged all of the gaps. The 31st Foot, after its opening volley, charged the hapless 2/40th Ligne, sending it reeling. The French cavalry confidently charged the allied cavalry and engaged the Spanish horsemen in front. Unfortunately, for the French, the Spanish cavalry overachieved and won 3 of 4 engagements, driving Latour-Mauborg's dragoons back. This was surprising.


French cavalry engage the allied cavalry


The rain had lifted by this point, making British musketry even more powerful as the Spanish suffer a morale test and Zayas' infantry finally retired behind Colbourne and Abercrombie's brigades. On turn 7, although the French cavalry finally sends the Spanish cavalry to the rear, the British 13th Light Dragoons catch an enemy dragoon regiment in the flank on an opportunity charge and shatter it. With only the Vistula Legion and the 2nd French Hussars untouched, Soult reluctantly orders Latour-Mauborg's cavalry to retire. In a final charge to cover the French retirement, Latour-Marborg is severely wounded leading the Vistula Legion, adding to the French woes. At about the same time, Girard is wounded leading a charge as well, and exits for 3 turns.


Stewart's infantry advance toward the worn French battalions after Zayas retires


On turn 8, the strategic situation looked grim for French victory. The British under Stewart were advancing in a solid line to the top of the ridge, continuing to be supported by Lardizabal's Spaniards. The allied cavalry was victorious, but would not activate an attack order from Beresford (twice!) to pursue the retiring French horse. Pepin's 2nd division was stacked up and could not maneuver due to the solid British infantry and the close threat from allied cavalry. Also, the British infantry advancing to the top of the ridge were relatively fresh and the French battalions were worn due to the combat with the Spanish. Thinking strategically, Marshal Soult saw little chance to break through and ordered a retreat from the field  in order to fight another day.

With Werle's reserve infantry and French cavalry still able to counter any pursuit, the decision to retreat with minimal loss made sense from a strategic standpoint.

A very tough fight ! Casualties were high on both sides. After walking wounded were returned (March Attack has a system for this) the allies suffered 4,700 casualties, primarily Spanish. The French suffered 4,200 total casualties.

The decision to form Stewart behind the Spanish holding the ridge allowed the allies to counterattack the French. Zayas' Spanish, although defeated, held the ridge long enough to allow the British to form an unmovable wall of veteran infantry to block the French. The allied cavalry also got lucky in repulsing the French cavalry......if the French were successful in the cavalry action, Pepin's 2nd division would have room to maneuver around the extreme right flank of the British. But it didn't happen. The fight was very bloody and had a very historical resolution. The game played like an account from a history book and seemed very realistic.

My thoughts on March Attack?  These rules are intended for large games, not smaller tactical actions. I did add a few house rules, but felt that the rules overall provided an excellent system in which to replicate a battle as large as Albuera.  The mechanisms that I really liked about March Attack were:

- An easy, yet realistic, method of changing corps and divisional orders
- Skirmishing was abstracted on the divisional level, but added to the overall strategic feel
- Melee was abstracted and decisive, but made sense in each instance
- Grand-tactical movement for unengaged formations was realistic. Movement distances dropped as each division approached engagement range (9")
- The rules were streamlined and split into strategic as well as tactical phases
- For a grand-tactical system, the infantry battalion is still used versus a brigade unit
- March Attack can be easily used for a campaign

There were a couple of things that I thought were missing from the rules. These could easily be taken care of with house rules.

- Wounding or death of leaders had little impact on morale.
- Even with the rallying of units mechanism after the battle, casualties seemed a bit high. The rules are advertised as "bloody".....they lived up to it.

I added some minor house rules in order to tweak the rules as I saw fit:
   1. I cut an attack column's fire rating down to 1/2 CV, and a company column down to zero.
   2. I added a +1 modifier to British infantry firing in a 2 rank line.
   3. I started melee modifiers out at a 3:2 mass advantage (+1) rather than at 2:1.

Will I play March Attack again for larger battles?  Absolutely !  It was fast moving, well though-out, and clicked most of my boxes for the grand-tactical scale. For smaller actions, I'll stick with Carnage and Glory 2 and General de Brigade, but I'm looking forward to my next "large" battle with March Attack.

Saturday, April 9, 2016

Albuera, May 16, 1811: Part 1, the scenario

Albuera              May 16, 1811


The Vistula Legion attacks Colbourne's British infantry 


For scenario information, I primarily consulted Guy Dempsey's outstanding work Albuera 1811: The Bloodiest Battle of the Peninsular War


Historical Background of the battle:   In May of 1811, Lieutenant-General William Beresford, commanding the British-Portuguese forces besieging Badajoz, received intelligence that Marshal Soult was rapidly advancing with his French army to relieve the besieged garrison. A Spanish army under General Blake was also marching to reinforce Beresford, and Soult resolved to strike the British before the allied armies could combine. The Spanish did join with Beresford as he abandoned the siege at Badajoz and maneuvered to Albuera to await the French. Soult arrived at Albuera on May 16 but didn't realize that the allies had combined and now outnumbered the French by a 3:2 margin. The allies were deployed in a defensive line running North-South, centered on the town of Albuera.  Soult resolved to attack the allies by feinting in front of Albuera, in order to draw the allies into reinforcing this center sector, but planning to focus his main advance onto Beresford's right flank to the south in a surprise envelopment. Soult entrusted this attack to General de Division Girard, commander of V Corps. As French cavalry and infantry demonstrated in front of the allied center, Girard marched his infantry across the Albuera stream and approached the allied right flank, largely undetected by heavy woods.


Zayas' Spaniards await the approach of Girard's columns


The allied right flank was held by Zayas' Spanish, supported by Lardizabal's division on his left and a combined force of British and Spanish cavalry on his right. Upon detecting  the gleam of French bayonets approaching the Spanish position, Beresford gave orders to redeploy the infantry and refuse the flank. Instead of redeploying the bulk of the Spanish infantry, General Blake only allocated 4 battalions of Zayas' command to face the French onslaught. Lardizabal did march to support Zayas' left flank. The Spanish faced the French in time, deploying on a ridge, anchored by a rise known as the northern knoll. Beresford recognized Girard's advance as the main French attack and hurriedly gave orders to reinforce this sector.

Girard advanced his infantry in columns, supported on his left by Latour-Marbourg's cavalry. General de Division Pepin's 2nd division of V Corps was behind Girard's 1st division and Werle's large brigade of infantry served as a reserve.  Soult now realized that the Spanish had joined the British-Portuguese, but he felt that he had taken the initiative and had the element of surprise on his side. The French continued to advance towards the Spanish, confident of victory. A southern knoll facing the Spanish was quickly occupied and a battery of French guns were placed on it, beginning a bombardment on the allied position. The scene was set for a dramatic clash.


A map showing the French attack on the southern flank of the allies


The Battle:  Girard pushed his division forward in attack columns towards the Spanish infantry lining the ridge. Memories of the recent Battle of the Gevora were in the minds of the French, an action which saw the melting away and subsequent rout of Spanish infantry deployed on a ridge similar to this one. But on this day, the Spanish under Zayas stiffened and let loose a murderous volley which tore into the French columns. Although largely veteran troops, the French infantry hesitated and, instead of pushing forward, attempted to deploy into line formations. Lardizabal's Spanish infantry also held their own against the  combined grenadiers that were supporting the 1st division's right flank. A vicious firefight erupted between the French and the Spanish infantry, with the Spanish gaining the upper hand.

Meanwhile, while Zayas' Spaniards were engaged with Girard's French, Major General Stewart was advancing his division, led by Colbourne's brigade, behind the Spanish line on a track that traversed the reverse slope of the ridge. Although Beresford had ordered Stewart to form his division behind the Spanish in support, Stewart saw a golden opportunity to maneuver onto Girard's exposed left flank. Colbourne's brigade executed this maneuver admirably and the French found themselves engaged to the front and to the flank. But Girard's supporting battalions did a fine job of maneuvering to refuse this flank and a hot firefight erupted between the British and the French. The weather at this time decided to play its hand, and a torrential downpour rained down on the troops.  Colbourne's British attempted to charge with bayonets but were unsuccessful. Even with the effect of the pouring rain, casualties were mounting on both sides.

As admirable as Colbourne's maneuver was, it was a massive mistake. Marshal Soult and General de Division Latour-Marboug had also witnessed the British infantry's flank up in the air. Orders were quickly dispatched to the Vistula Lancers as well as French Hussars and Dragoons to attack. As the rain slowed, the French and Polish cavalry emerged and swept onto the flank and rear of Colbourne's infantry before they had time to form square. This cavalry charge resulted in the most devastating charge of the Peninsular War. Almost all of Colbourne's entire brigade was effectively destroyed. The British commanders could do nothing but watch the horror. Even Beresford had to fight a lancer off with his bare hands. The French cavalry was eventually spent and instead of crashing onto British squares and several cavalry squadrons that now met them, pulled back.

The fight was far from over. The rest of Stewart's division performed passage of lines with Zayas' Spanish while the French were conducting the same maneuver. The firefight between the French and British erupted again, with casualties extremely heavy.

At this point, both sides were exhausted and totally spent. The British line, in particular, was becoming dangerously thin. Beresford galloped off to find fresh forces to plug into the line. At this point, the critical decision of the battle was made. General Cole, with his Anglo-Portuguese division was uncommitted, itching to get into the fray, but following his strict orders to stand in reserve. An aide to Beresford, Lt Colonel Hardinge, galloped over and convinced Cole to advance and attack the French. Cole did make the decision and advanced with his fusiliers in the lead. His Portuguese troops under General Harvey also advanced cooly and professionally. Seeing Cole's division marching on, Soult knew that he had to stop these troops or the battle would be lost. Werle's infantry and uncommitted squadrons of French cavalry were thrown against Cole.  The cavalry was repulsed by the Portuguese infantry formed in line, while the 7th Fusiliers and 23rd Royal Welsh Fusiliers charged and broke Werle's columns. The battle was seemingly won by the allies at this point.

Soult realized that the time for offensive action was over and ordered Latour-Marbourg's cavalry to cover the retreat of his remaining infantry, which the horsemen admirably accomplished.  Indeed, the Battle of Albuera was the bloodiest day of the Peninsular War. The French had lost 5,936 men, while the Allies had lost 5,915 men. Colbourne's brigade of Stewart's division had effectively ceased to exist. The French also captured 5 British colors. Wellington was furious and never again trusted Beresford with an independent command. Albuera was an allied victory, but an extremely costly one. The controversy over the tactical decisions of the battle would continue long after the battle was over.

The Scenario: Our scenario is concerned with the main French attack on the right flank of the allies. It is played on a 6' x 5' table. The rules I used were March Attack, which has just the right scale for the allotted space (1" equals 60 yards). March Attack also utilizes battalions as the basic unit, but is still grand tactical in philosophy. I have attempted to keep this scenario as generic as possible, for conversion to any rules system.

The game begins at 10:00 am and continues until nightfall, if needed.


The wargame table 6' x 5' viewing from south to north. The piano and dollhouse are, sadly, not part of the terrain.
The northern and southern knolls are located roughly in the center of the table.


Deployment:  The allied cavalry and the Spanish under Zayas and Lardizabal have detected the French and have completed their defensive deployments on the table. The French V Corps under Girard are deployed in attack columns with the French cavalry supporting the left flank. Werle's infantry is in reserve behind V Corps. Therefore, initial orders are:

French

Girard and Pepin's divisions are to attack the Spanish position on the ridge, with Girard leading the attack and Pepin following.

The French cavalry under Latour-Marbourg  are to support V Corps to the left of the infantry.

Werle's infantry are to support and remain uncommitted to the rear.

Allied

Zayas and Ladizabal's divisions are to defend the ridge

Cole is off the table and is to support and remain uncommitted. Cole's division is available to be committed on the 2:00 pm turn. If activation is successful, this force will enter anywhere on the western edge of the table.

Lumley's allied cavalry are to support the Spanish flank and, more importantly, block the French cavalry from crashing into the allied rear.

Zayas' second brigade was held back by Blake and is fixed in place. Only Blake can attach himself to this brigade and maneuver it. This brigade is on support orders and is to remain uncommitted.

Stewart's division, which enters the table on turn 1 (10:00 am) will maneuver in columns to the rear of the Spanish infantry and form a second defensive line while assuming defend orders.


The French deployment, with the cavalry on the left, Girard's V Corps in the center and Werle's reserve command on the right. The units of Lardizibal's Spanish can be seen in the upper left corner.


The Spanish deployment on top of the ridge, with Lardizibal on the left. The rearmost Spanish lines are the rest of Zayas' command, which is fixed in place at the beginning of the game
 
 
The allied cavalry, deployed to the right of the Spanish infantry


Terrain: The French have already crossed the river in advancing to the ridge. Most terrain is open. Hills do not effect movement distance, but do block line of sight. Any woods or streams are considered normal disruptive terrain in whatever rules you choose to play.

Weather: Weather played a tremendous role in the battle. Effectively, each turn there was a 25% chance for heavy rain to effect musketry, artillery, and visibility. This "weather roll" is to be conducted as the first step of each game turn.

Allied command difficulties: Although Beresford was the senior commander, he had great difficulty with the Spanish chain of command. Although agreeing with Beresford at the beginning of the battle about refusing the southern flank, Spanish General Blake curiously only turned 4 battalions of Zayas' division with Lardizibal in support and then disappeared. Beresford had no other meeting or correspondence with Blake during the rest of the battle. Therefore, any commands from Beresford to Blake (obviously for Spanish units only) should incur a negative modifier to demonstrate this situation.


Orders of Battle:

French

Marshal Soult      Good Command Capability / Normal Inspiration

V Corps      Girard       Average Command Capability / Normal Inspiration

1st Division   Girard 

1st Brigade Brayer 
34th Ligne     Veteran     2 bns      953 men 
40th Ligne     Veteran     2 bns      813 men 

2nd Brigade Veilande  
64th Ligne     Veteran     3 bns     1,589 men 
88th Ligne     Veteran     2 bns        899 men 
 
Combined Grenadier command Vare
Grenadiers     Elite          2 bns        1,033 men
 
8 x 6 lb Battery    Veteran

2nd Division     Pepin     Average Command Capability / Normal  Inspiration

1st Brigade Pepin
21st Legere    Veteran      2 bns          788 men
100th Ligne    Regular     2 bns           738 men 

2nd Brigade Maransin  
28th Legere    Veteran     3 bns          1,368 men
103rd Ligne    Regular     3 bns          1,290 men

3 x 6 lb Battery    Veteran

Independent Brigade Werle     Average Command Capabilty / Normal  Inspiration

12th Legere   Regular        3 bns       2,164 men
58th Ligne     Regular        3 bns       1,641 men
55th Ligne     Regular        3 bns       1,815 men
 
6 x 6 lb Battery    Veteran


Cavalry Division Latour-Maubourg     Good Command Capability / Normal Inspiration 

1st Brigade Bron
4th Dragoons    Regular        406 men
20th Dragoons   Regular       266 men
26th Dragoons   Regular       421 men

2nd Brigade des Eclats
14th Dragoons   Regular        316 men
17th Dragoons   Regular        314 men
27th Dragoons   Regular        249 men

Independent commands
2nd Hussars       Regular        305 men
1st Vistula Legion    Elite         591 men


Allied

Marshal Beresford         Average Command Capability / Normal Inspiration 

Spanish Army      Blake     Poor Command Capability / Normal Inspiration

Division Zayas      Average Command Capability / Charismatic  Inspiration

1st Brigade Mourgeon
2nd Reales Guards     Veteran         630 men
4th Reales Guardias   Veteran         647 men
Irlanda Regt      Conscript               749 men
Voluntarios de la Patria    Militia     594 men

6 x 4 lb Battery   Regular

2nd brigade Polo, fixed in place moved only by attached Blake
Toledo Regt    Militia         577 men
Legion Extrangera    Militia       547 men
Ciudad Rodrigo Regt    Conscript      445 men
Walonas Regt      Conscript        633 men

Division Lardizabal      Average Command Capability / Normal  Inspiration 

Brigade Lardizabal
Murcia Regt     Conscript        706 men
Canarias Regt    Conscript       433 men
2nd de Leon Regt    Conscript     586 men
Campo Mayor Regt    Conscript      673 men

Allied Cavalry Division  Lumley    Average Command Capability / Normal Inspiration

Brigade Loy
Escaudron de Granaderos     Conscript      284 men
Escaudron de Instruccion         Militia            132 men
Provisional de Santiago         Militia          338 men
Husares de Castilla                Militia          411 men

Brigade Penne-Villeur
Carabineros Reales                Militia           47 men
Reina Regt                                Militia           138 men
Borbon Regt                             Militia            135 men
Lusitania Regt                       Militia            86 men
Algarve Regt                            Militia            101 men
Husares de Extremadura       Militia           214 men

Brigade Long
3rd Dragoon Guards             Guard             374 men
4th Dragoons                        Veteran           387 men
13th Light Dragoons            Veteran           403 men


Division Stewart     Average Command Capability / Normal  Inspiration  

Brigade Colbourne
3rd Foot                     Veteran           755 men
31st Foot                    Veteran           418 men
2/48th Foot                Veteran           452 men
66th Foot                   Veteran           441 men

Brigade Abercrombie
2/28th Foot                Veteran            519 men
2/34th Foot                Veteran            596 men
2/39th Foot                Veteran            482 men

Brigade Houghton
29th Foot                   Veteran            507 men
1/48th Foot                Veteran            497 men
1/57th Foot                Veteran            647 men

6 x 6 lb Battery          Veteran
6 x 9 lb Battery          Veteran


Division Cole            Good Command Capability / Normal  Inspiration

Brigade Myers
1/7th Fusiliers             Elite               714 men
2/7th Fusiliers             Elite               568 men
1/23 Royal Welsh Fusiliers        Elite          733 men        

Brigade Harvey
11th Portuguese Line     Regular        2 bns       1,154 men
23rd Portuguese Line     Regular        2 bns       1,201 men 
Lusitania Legion            Veteran        572 men

6 x 6 lb Battery               Veteran